I made a giant pedalboard
After failing to convince the client otherwise
On the side, I do a bit of pedalboard “making”. And yesterday I just finished the largest board I’ve ever made. But even though I failed to talk him out of the giant board1, I still enjoyed making something this ludicrous!
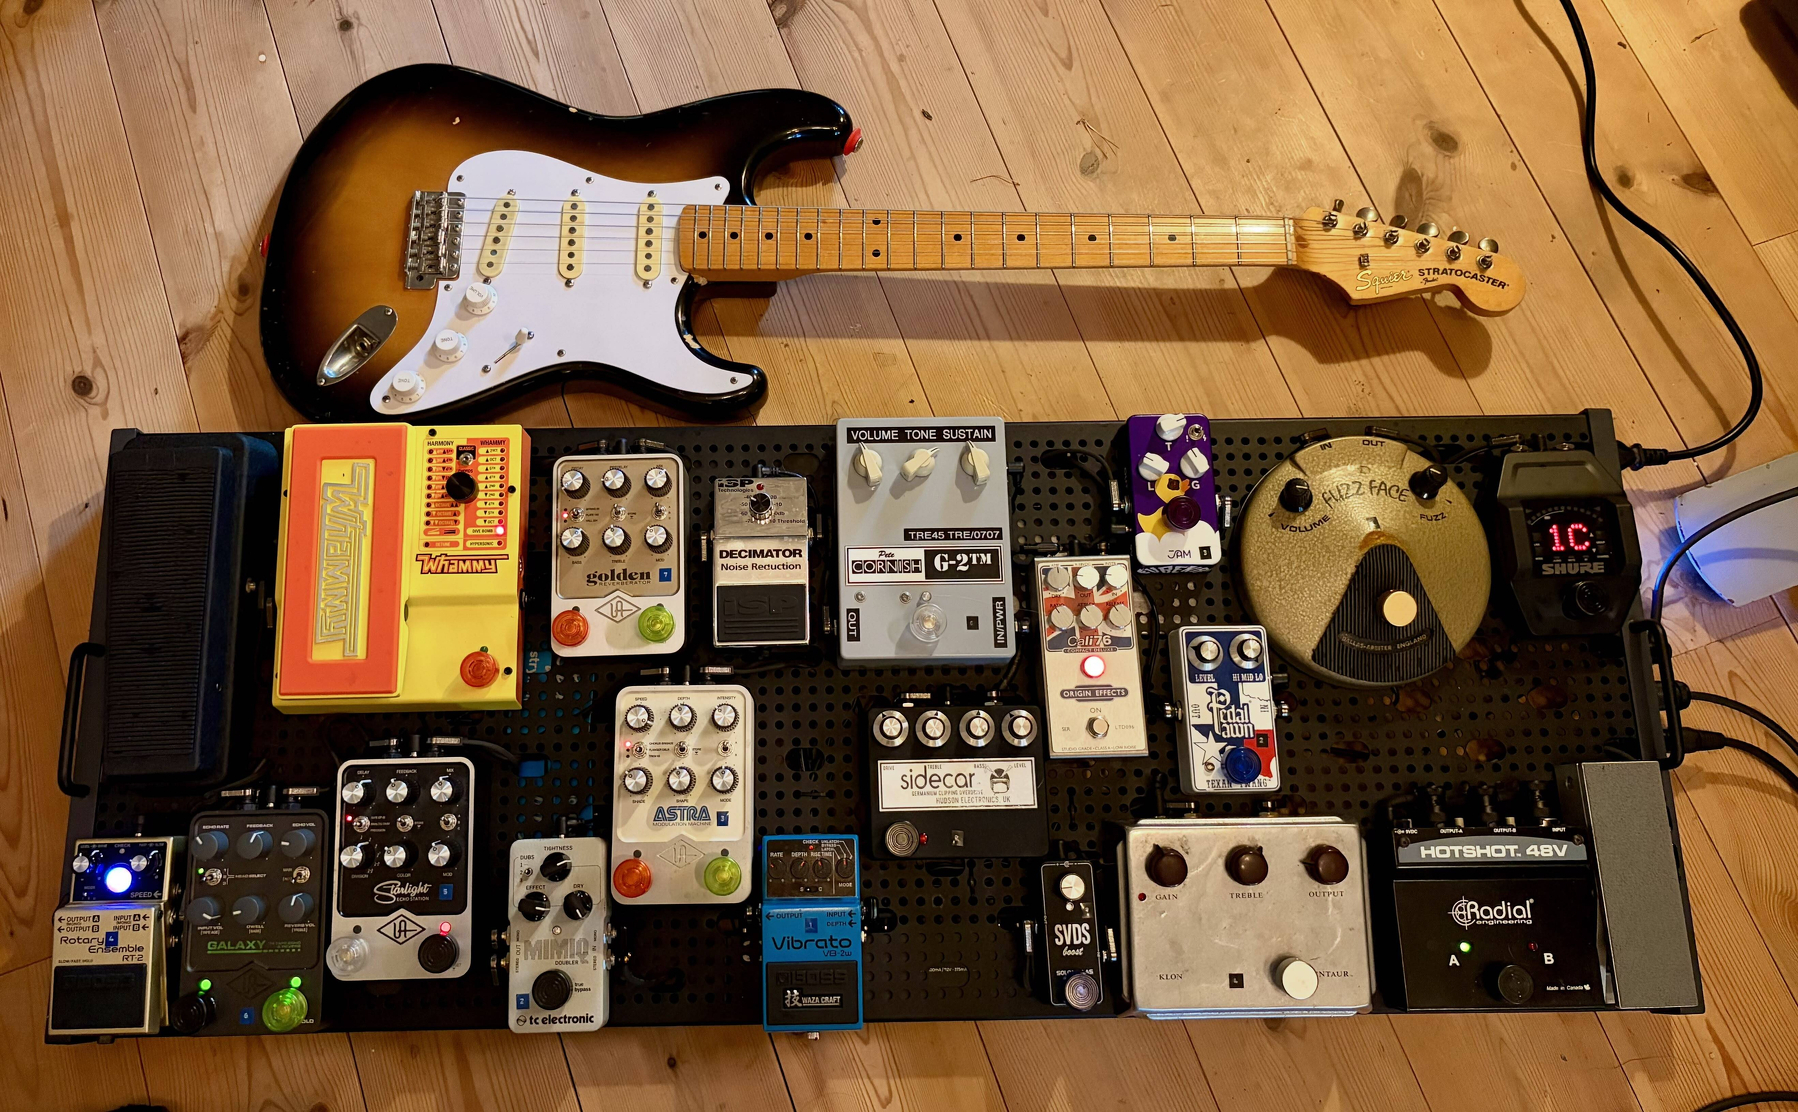
I had a previous version where I prioritised squeezing in even more pedals. But that made pedals even harder to access, and would’ve made maintenance even more fiddly.
The board
I like to build with things from Temple Audio — and this is a Trio-43 board. Their largest.
I like that they have modular side panels, where you can add useful mods. (I’ll show some later.) And I like that the holes make it easy to hang stuff beneath. I don’t love the way pedals connect to the board, though.
The Quick Release system is mostly a hassle, as I find that they simply come off the pedals way too easily2, and are challenging to re-use.
The signal chain
- The input is the Shure GLXD6+. It can either be wireless or wired. (With the latter, It’s unbuffered.)
- Next is a really fancy Fuzz Face remake I don’t know the maker of
- Pedal Pawn Texan Twang (a Texas Ranger/Rangemaster pedal)
- Jam Eureka distortion
- Then a buffer — a Skrydstrup BF2 hidden underneath. (Could only find a link to the version with a foot switch, which isn’t used here.)
- A version of Origin’s Cali76 compressor
- Moyo volume pedal, the best small volume pedal I’ve found
- MonoNeon’s signature Whammy pedal
- A boutique wah pedal I don’t remember who made
- Boss VB-2W vibrato pedal
- An original(!) Klon Centaur
- Hudson Sidecar (a Tube Screamer variant)
- Pete Cornish G-2 distortion
- ISP Decimator Noise Reduction (the link is to the second version), after the drive pedals, before clean boost
- SVDS Boost, the aforementioned boost pedal
OK, and then it gets a bit crazy…
Because this was the “dry” part of the signal. (Drives, compressor, and wah/whammy/vibe.) And the mono part. You see, the client often uses a fancy amp that can first take a dry signal, which it then sends back to the board, and then (after more pedals) it can accept a stereo wet signal, for a total of 3 inputs.
This is handled by a switcher, the 4X Mod Pro from Temple Audio. (The link is to v2. I don’t know the difference.)
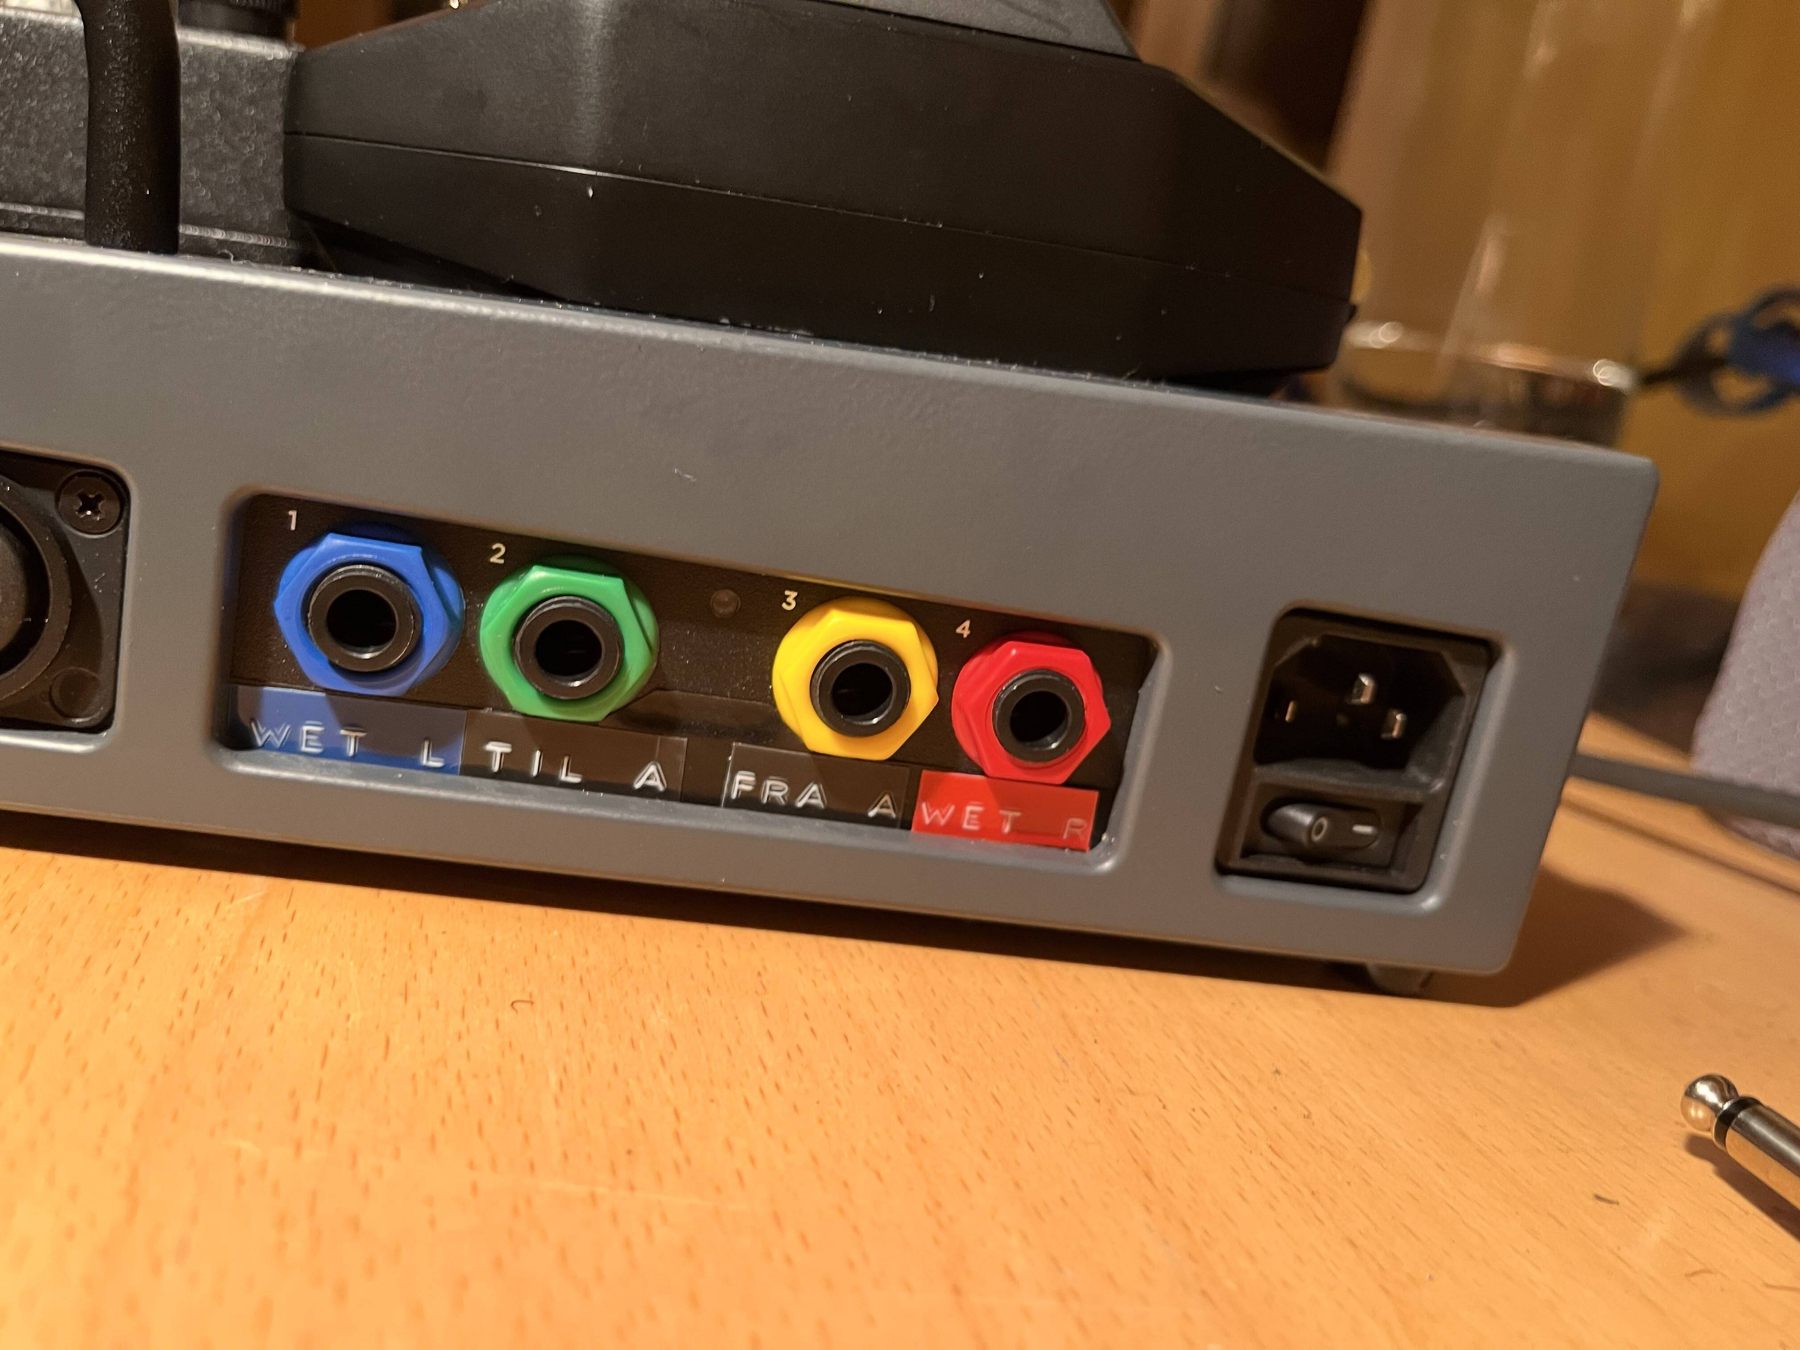
- So, the “dry” signal goes from the green output to the amp,
- then it goes from the amp and into the yellow input,
- before going through multiple stereo pedals (an FX loop),
- and ending up in the blue and red outputs.
What’s really cool is that if you don’t use an amp with an FX loop, you can just leave the green and yellow connections empty, and the switcher automatically bridges them! Also, all the inputs and outputs are buffered.3
The stereo section
- The first stereo pedal is the Mimiq Doubler (which simulates double tracking)
- Universal Audio Astra chorus (and more)
- Boss RT-2 rotary
- Universal Audio Starlight delay
- Universal Audio Galaxy Tape Echo
- Universal Audio Golden reverb
- Then it all ends up in a StageBug SB-6 stereo isolator, to help with noise, and provide access to phase inversion and ground lift.
The side panels
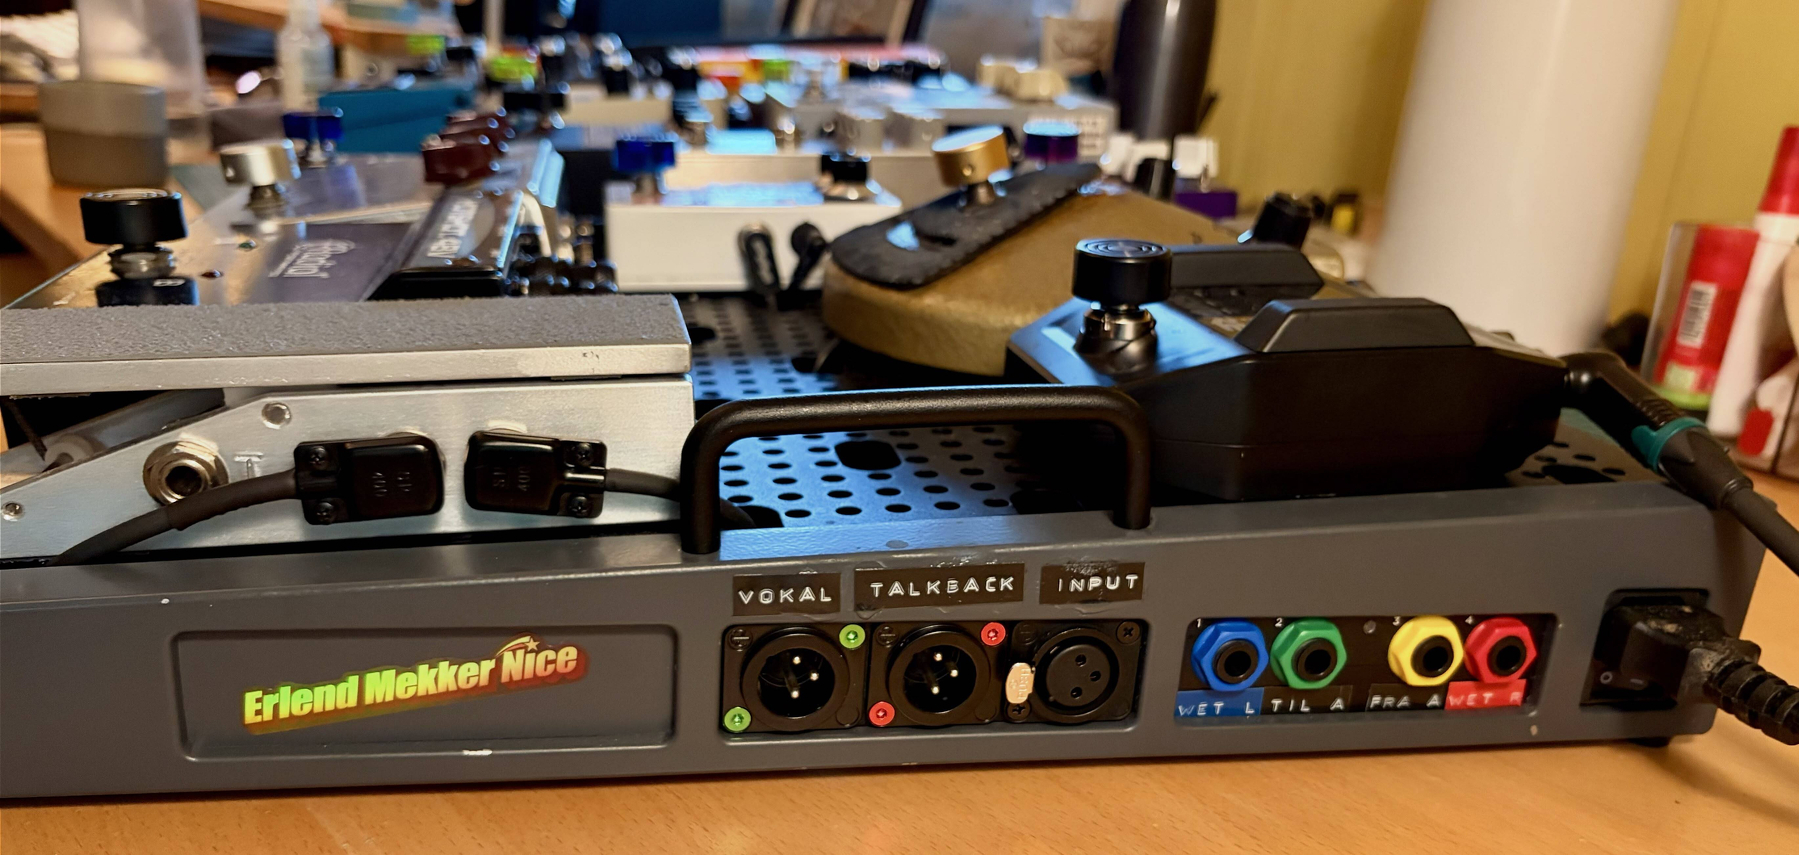
This is the right side of the board. First, you can see my beautiful WordArt logo. Then there are connectors for the HotShot 48V on the board, which I haven’t mentioned: Here you connect one microphone and two outputs. The default output is for singing. And when you hold the foot switch on the pedal, the sound instead gets sent as talkback (to communicate with the band and sound engineers).
Then there’s the needed jack inputs and outputs, and lastly one ISO power input for the whole board.
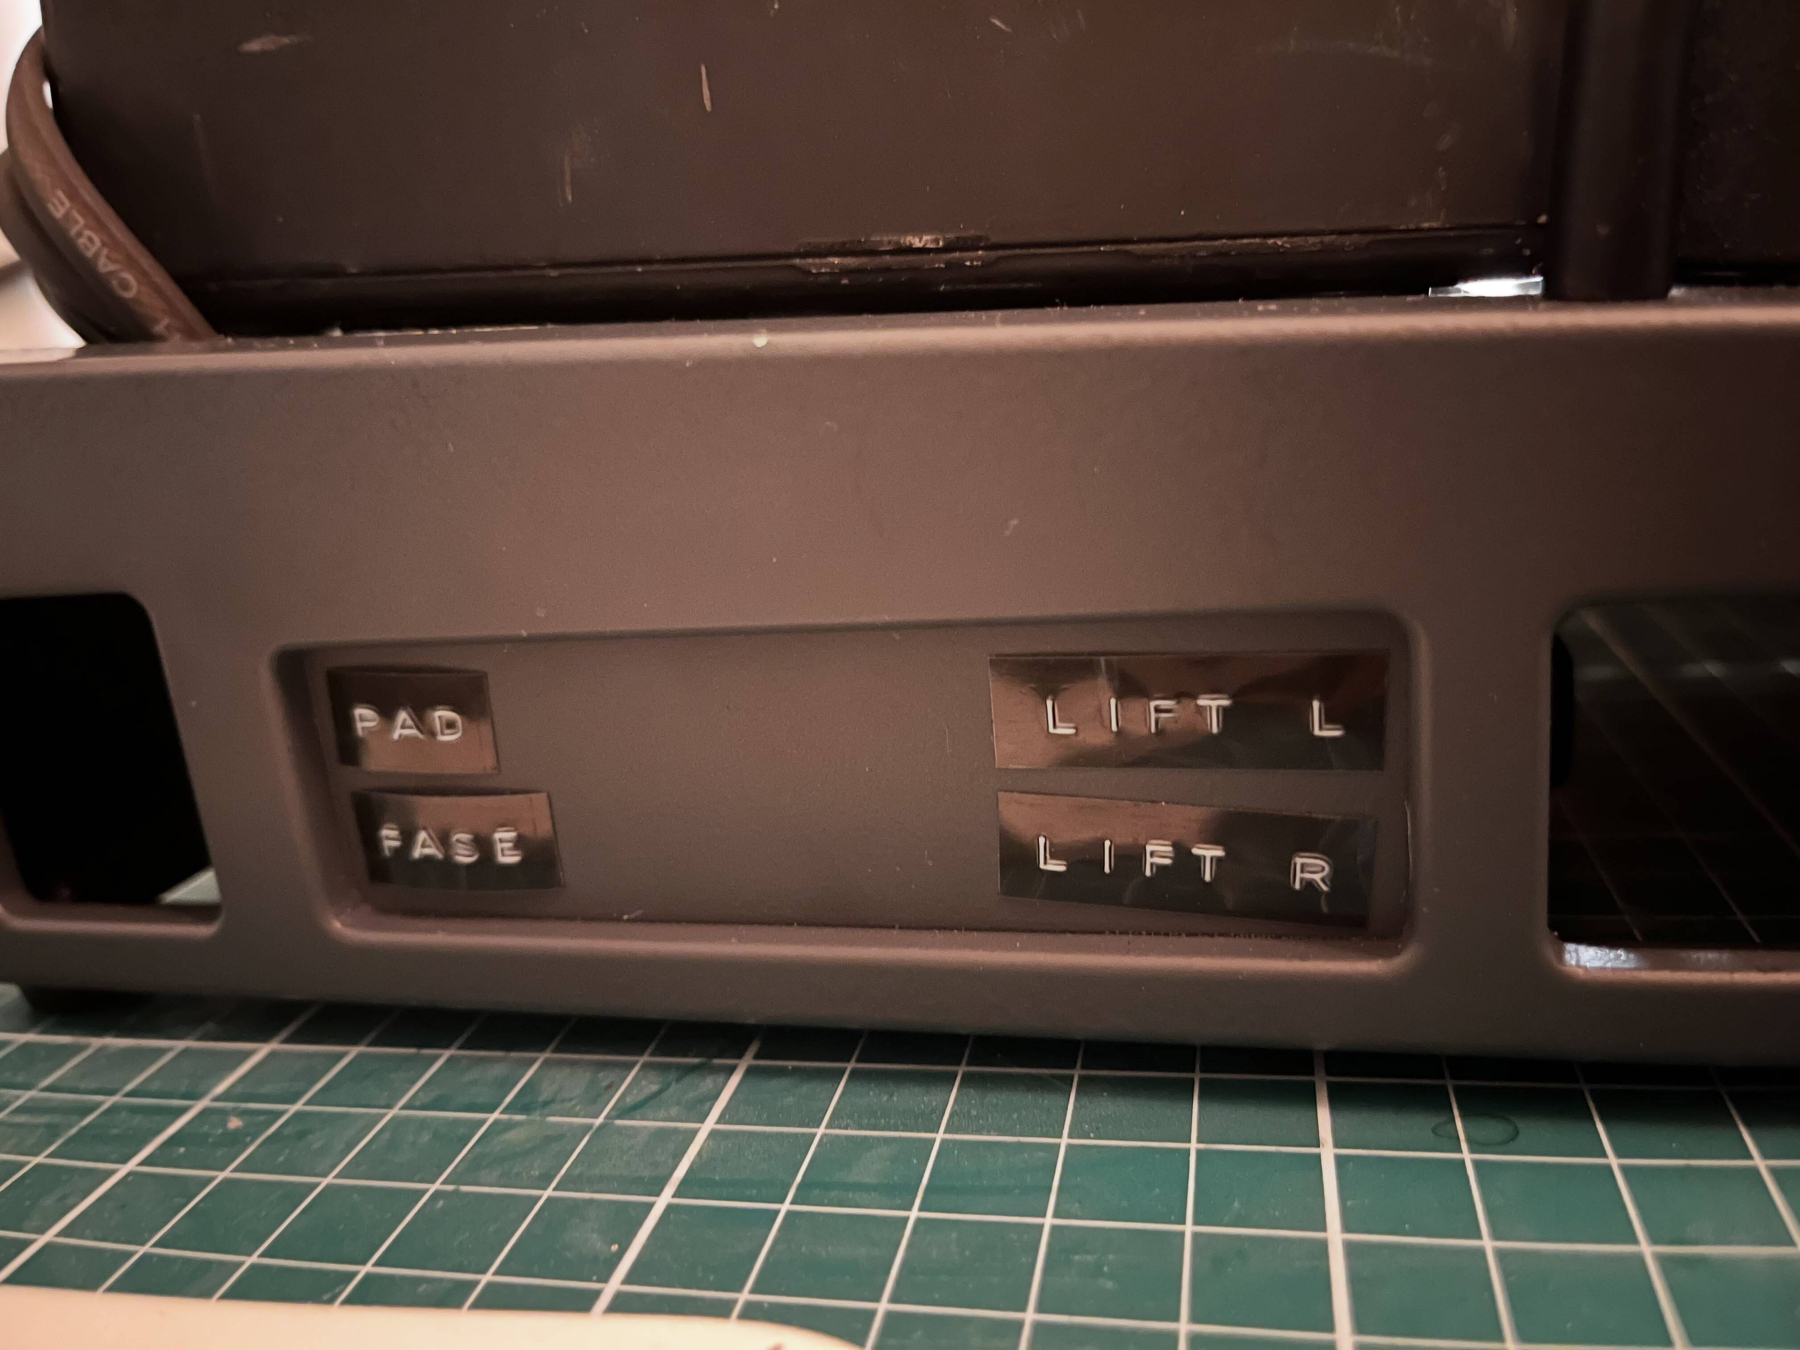
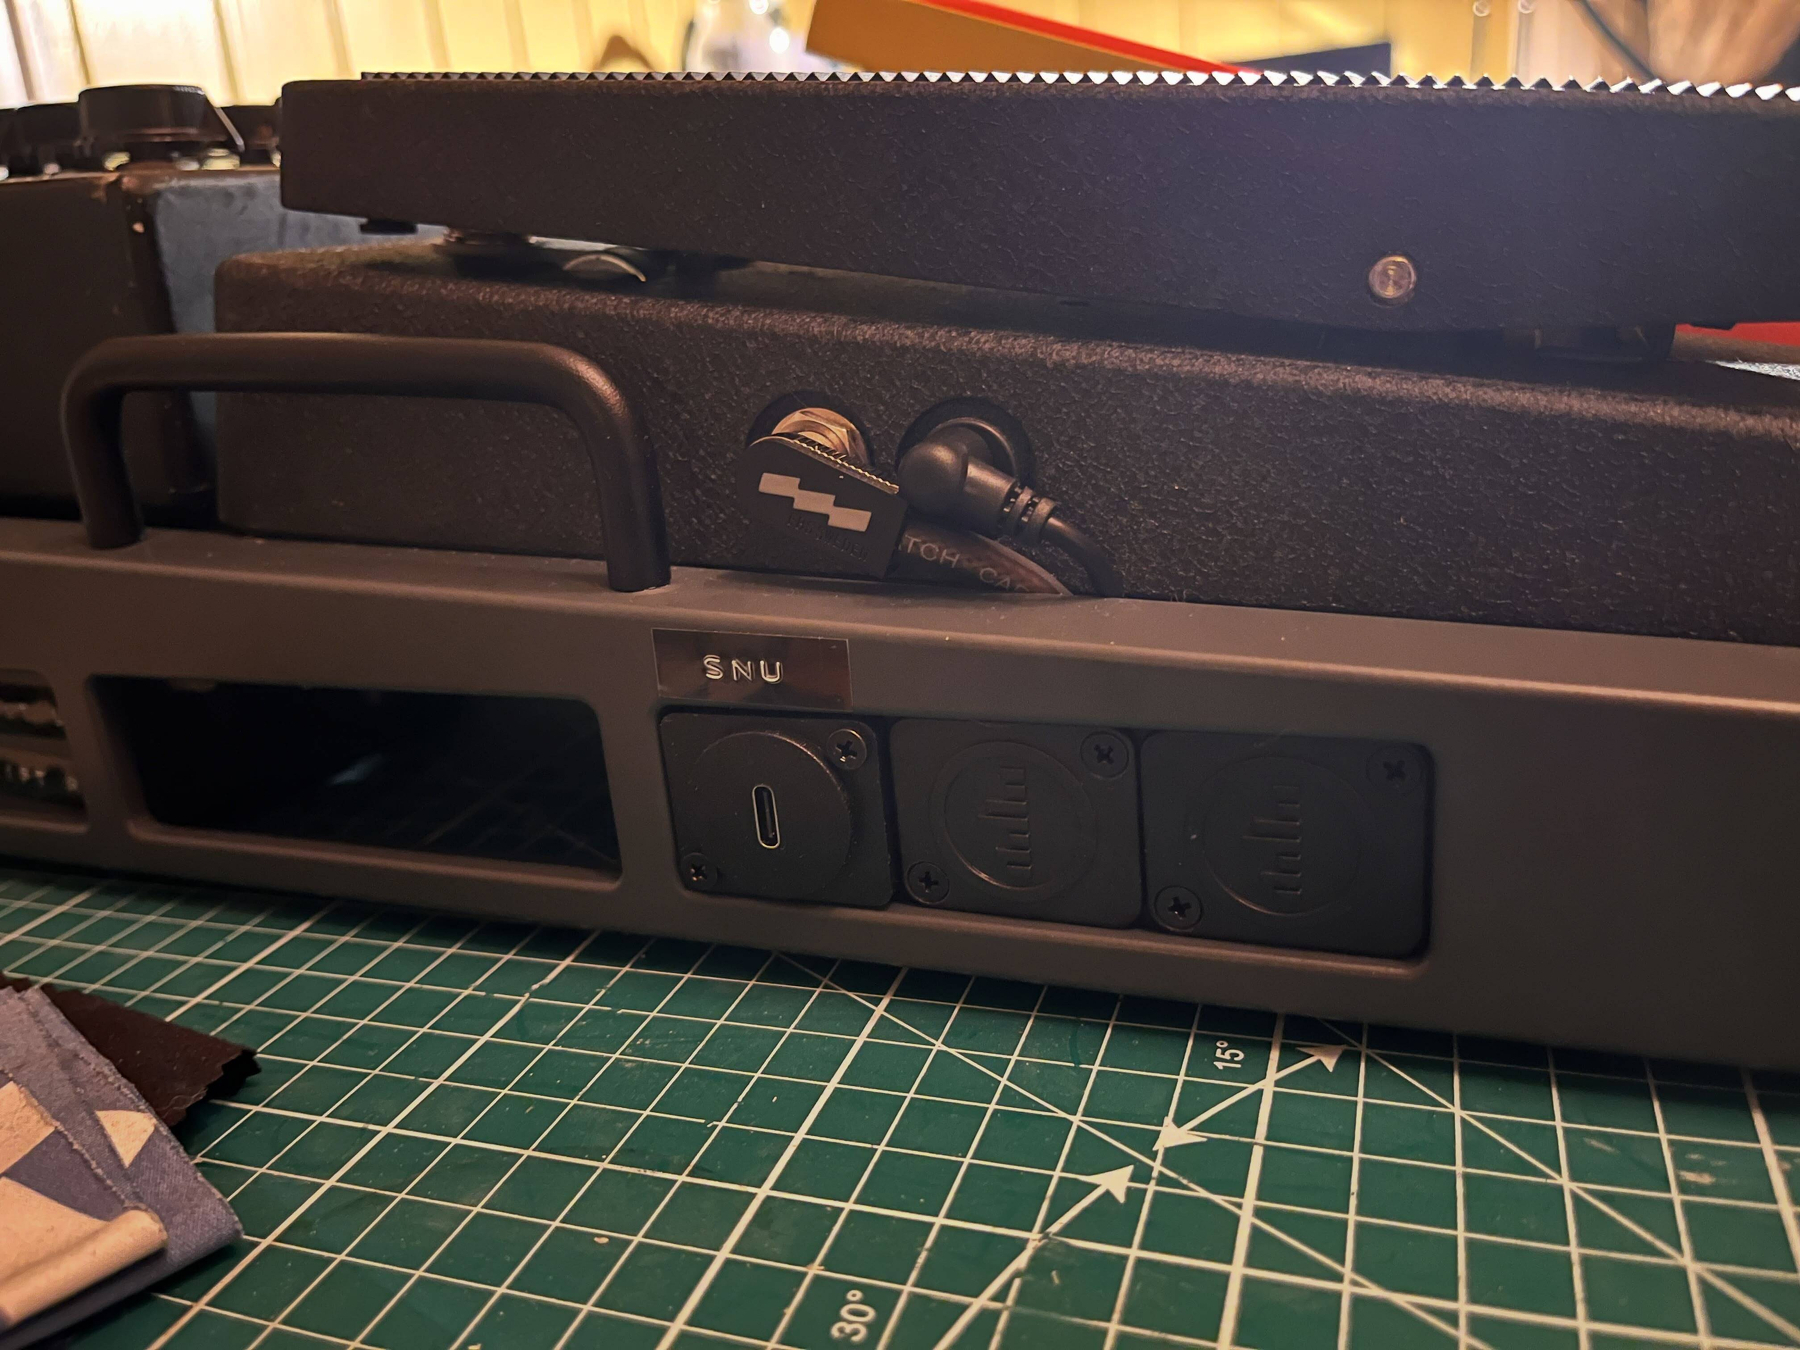
The first image just shows some labels. That’s because the SB-6 is behind there, with some panels removed to give access to it. On the left side it says “pad” and “phase” (inversion), and on the right it says (ground) “Lift L” and “Lift R”.
The power supply I’m using provides a USB-C charging port, which I wanted to be accessible from the outside.4 However, for some reason, the port on the outside only works if the USB-C connector is the right way(!). So the label says “turn” to remind him that he might have to turn it to make it work.
Under the board
I don’t believe in Instagram-style ultra-beautiful undersides of boards. Not only does it take a lot of time (expensive), it makes it impossible to maintain and make small changes to the board. But I do try to clean it up a bit, as that makes it easier to work with!
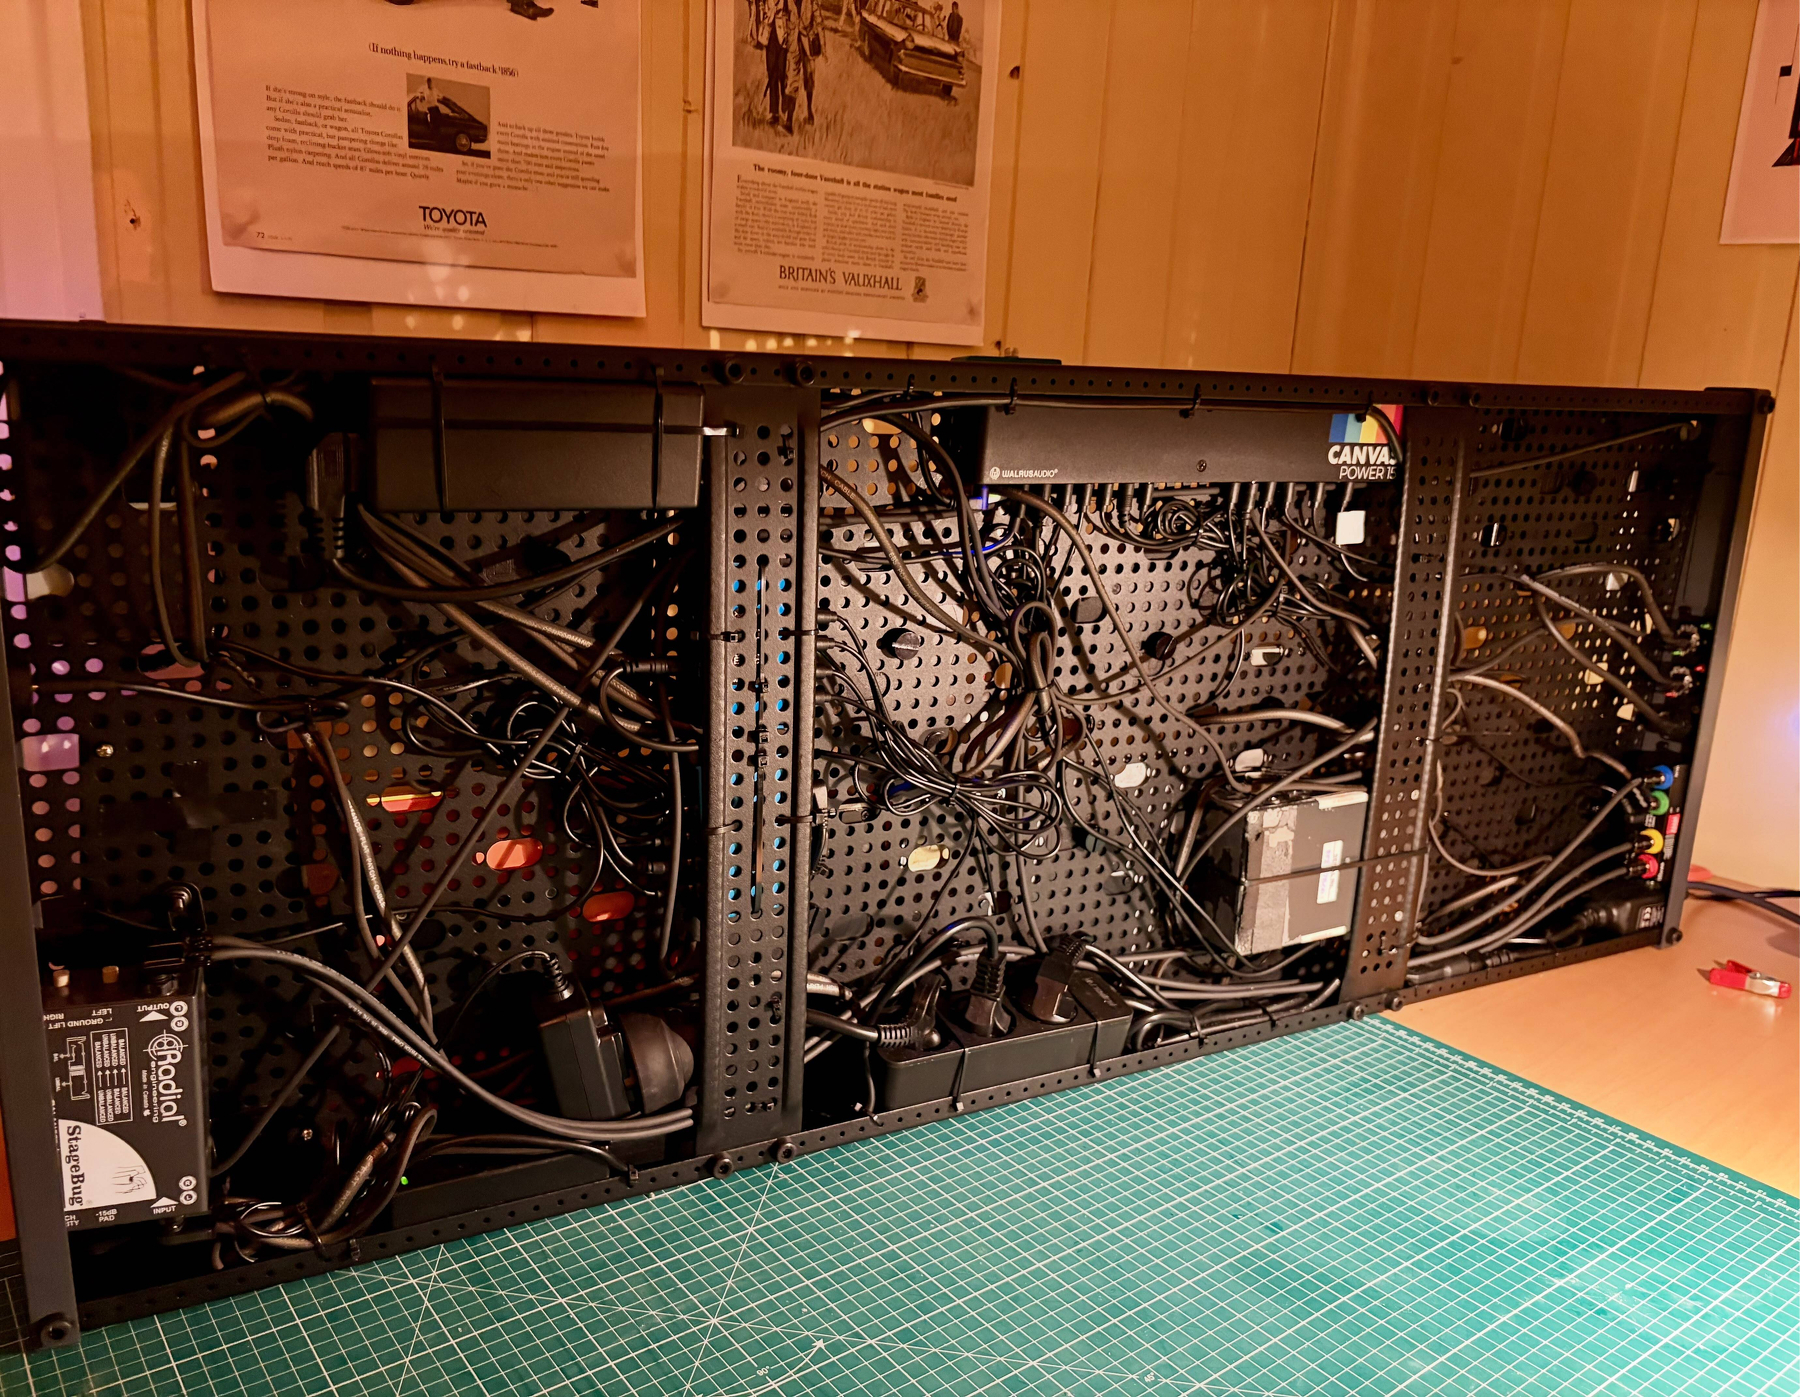
On the left, you can see the SB-6. Then it’s possible to see how the power works:
- The ISO on the side goes to the 3-way branch in the middle.
- One branch is the whammy’s power supply,
- one goes to a Walrus Audio Canvas Power 15,
- and the last one goes to a pair of Strymon Ojais the client had on hand. (You can see the blue colour on the left bracket.)
The black box top left is the other part of the Canvas Power, and the box on the right bracket is the BF2 buffer. All the way to the right, you can see the side panel stuff, including custom cables for the HotShot.
Some niceties
To make the board easier to use, I’ve added some things to the pedals.
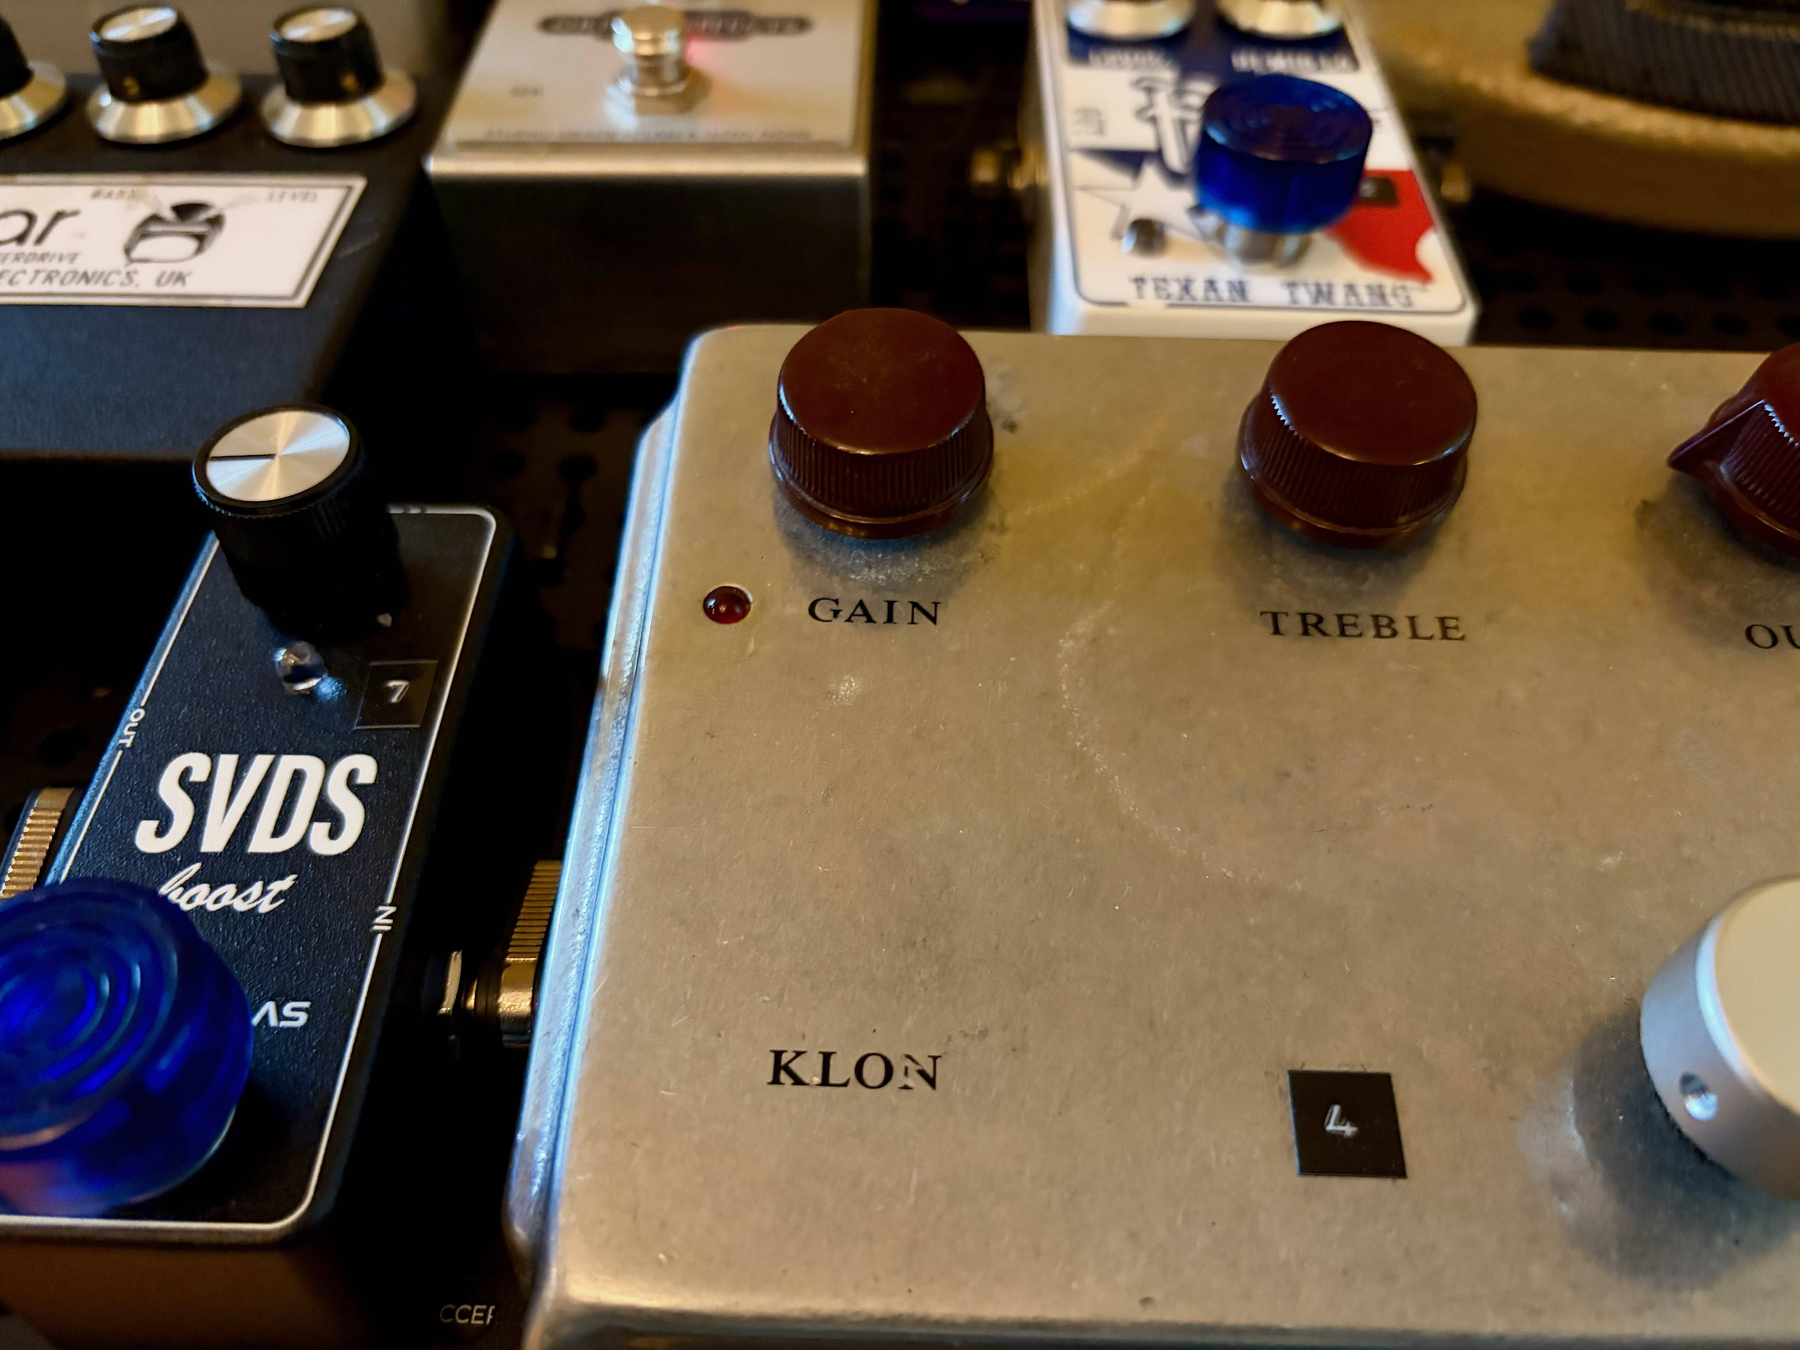
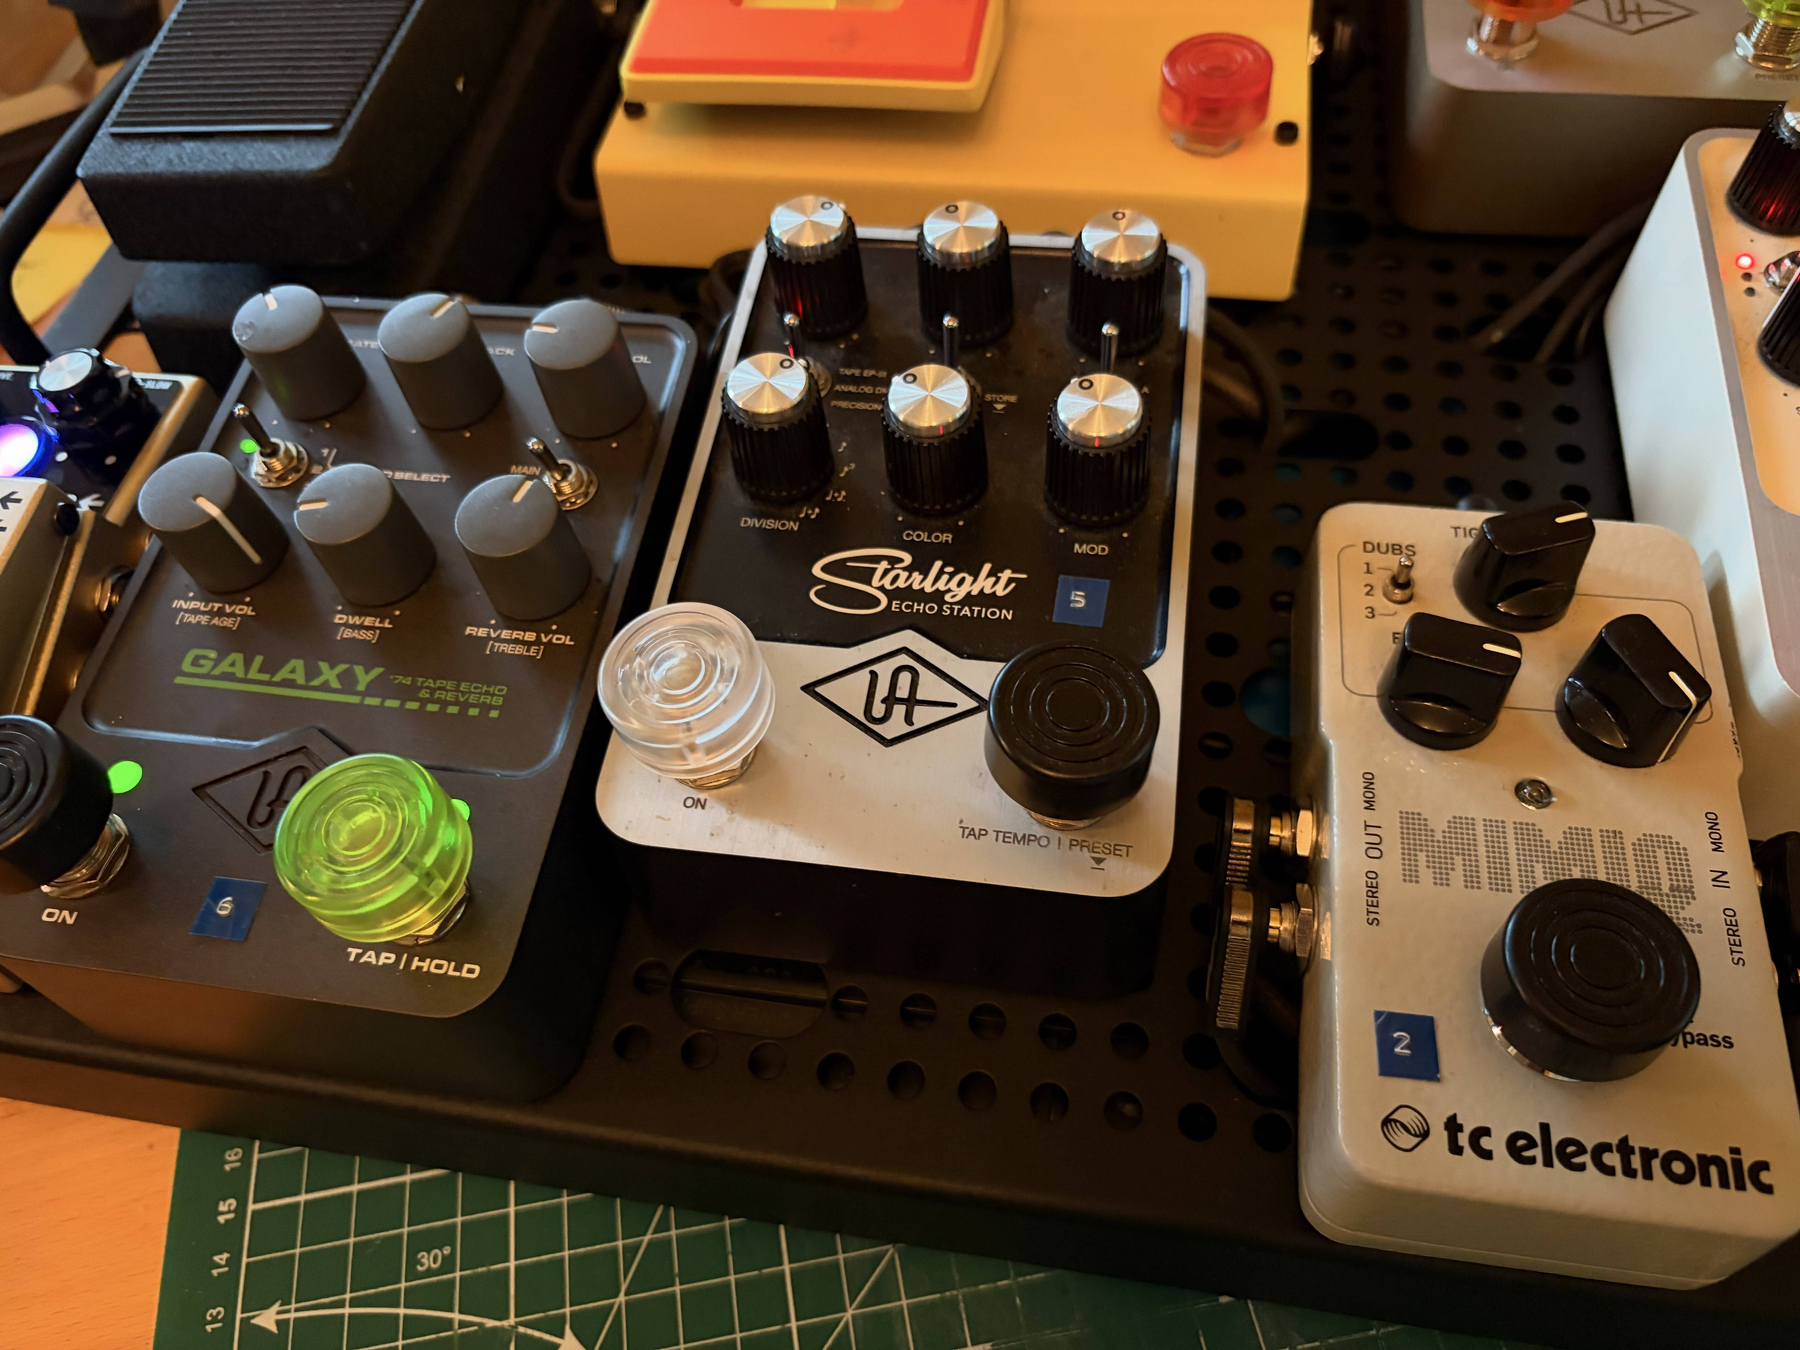
I’ve added foot switch toppers, to make them easier to step on. This can also help with distinction. (I use these in plastic 🖇️ and these in metal 🖇️.) Of course, I also try to place pedals so that they are easier to access, and use the space well. However, this can mean that the order of the pedals and their order in the signal chain don’t always add up. So I’ve also numbered the pedals.
The drives have black numbers, from 1-7, and the other pedals (most of them) have blue numbers.
Hopefully, he can find a way to lug this beast around. And hopefully, he’ll be happy! As mentioned, I would’ve made something smaller… I’ve also helped him with a compact Axe FX board, though — so there’s that option as well.
But this board now has a huge number of options and also some truly legendary pedals. All in something that’s relatively easy to use, and with some extra features thrown in.
-
It’s heavy, large, and long cable runs and different pedals can simply lead to unforeseen complications. ↩︎
-
I think it happens more often if you don’t clean the surface enough before applying, and if the pedal ends up wobbling when you press it. The latter will pull it off little by little each time. ↩︎
-
With a little help from the extra buffer in the BF2. This was needed as the Temple Audio switcher isn’t meant to be used quite like how I’m using it. ↩︎
-
Not only can it charge his phone and stuff, but also the wireless transmitter for the Shure-GLXD6. ↩︎