A Shortcut for Automatic Mac Dock Changes
For When You Switch Between Screen Sizes
I switch a lot between using my MacBook as a laptop, and in clamshell mode in my office. And in general, I keep every setting the same between the setups. However, I have different dock preferences:
- While in laptop mode, I want it at the bottom, with automatic hiding.
- But while on my 27" external display, I want it to be on the left, smaller, and always showing.
The great Rafael Conde has made a solution, with his app HiDock. But sadly, in my experience, it’s simply not stable enough (probably due to some esoteric macOS restrictions) – so I’ve made a crude shortcut to replace it. But before the guide to try it out for yourself, a little thing I recommend you paste into your terminal:
defaults write com.apple.dock autohide-delay -float 0;
defaults write com.apple.dock autohide-time-modifier -int 1 ;
killall Dock
First, create shortcuts for setting the different preferencesmore
In general, I like creating modular shortcuts: Instead of making one monster shortcut, you break it down into modules. So the first shortcuts I created are one called “Dock — Laptop” and one called “Dock — Display”.1
They only consist of one action: Run Shell Script.
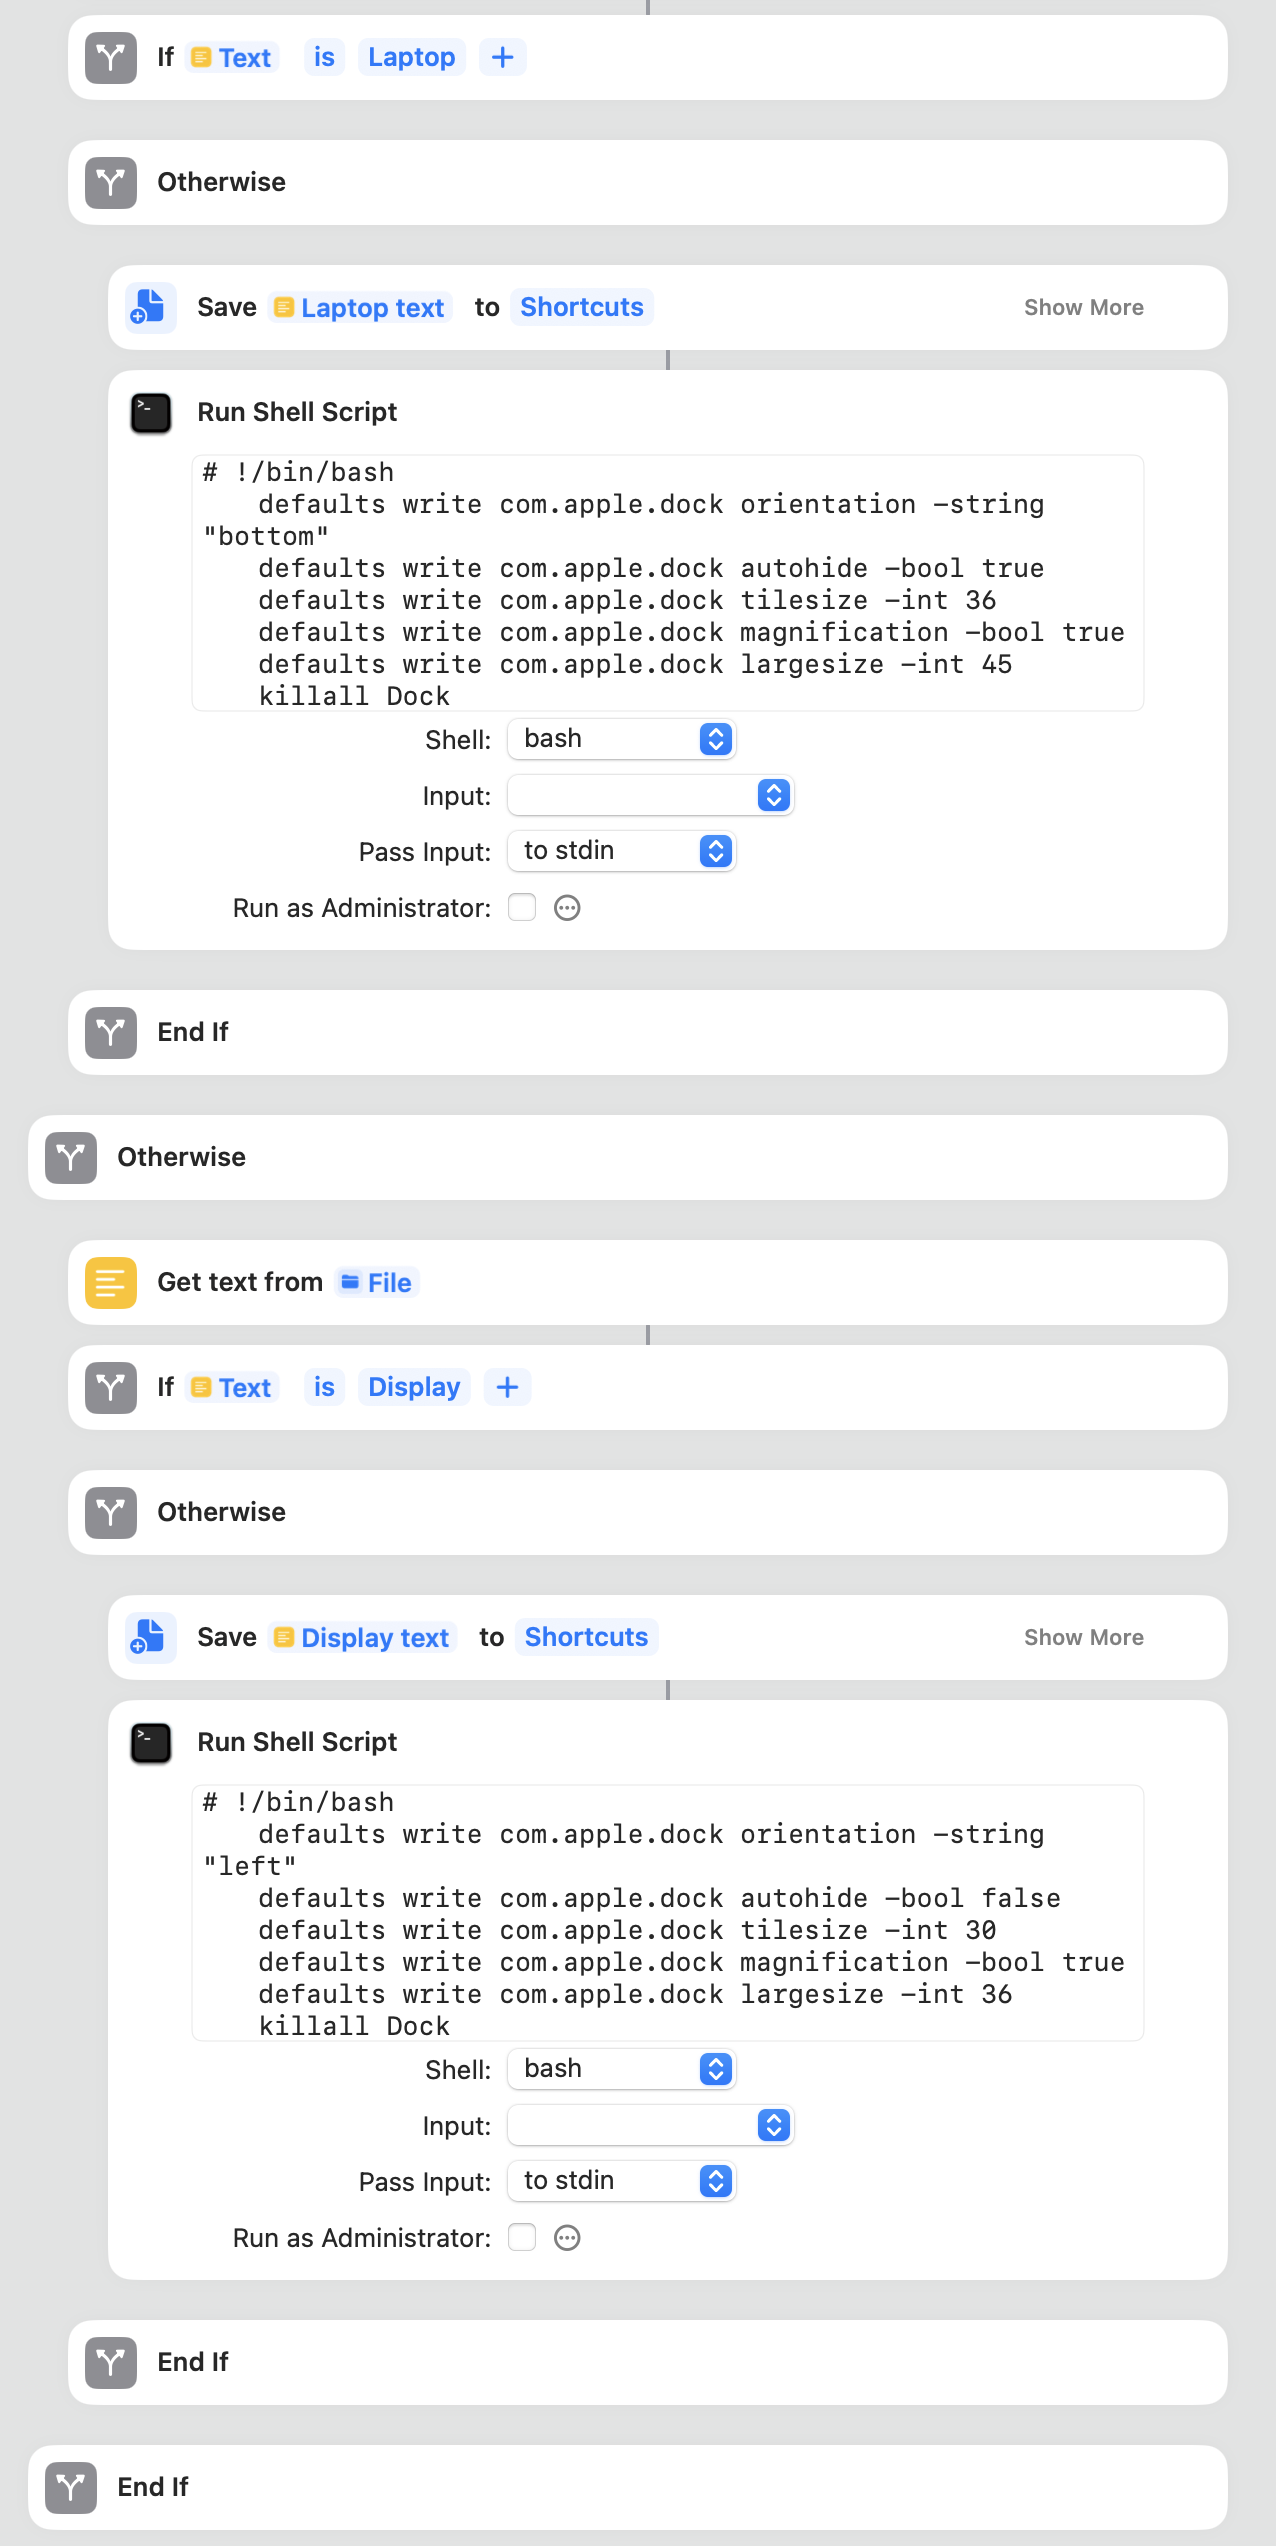
And my laptop variant runs this script:
#!/bin/bash
defaults write com.apple.dock orientation -string "bottom"
defaults write com.apple.dock autohide -bool true
defaults write com.apple.dock tilesize -int 36
defaults write com.apple.dock magnification -bool true
defaults write com.apple.dock largesize -int 45
killall Dock
I’d say every line is pretty self-explanatory! Just change the variables to fit your needs, and run the shortcut to test. (My preferred way to quickly run shortcuts is with Raycast 🖇️.) The last line, killall Dock, restarts the dock. This will make it blink – and there is a tiny chance that it will remove the little separator in the dock. This comes back on a restart, but that’s a reason to not run this command more than necessary.
My Display variant is like this:
#!/bin/bash
defaults write com.apple.dock orientation -string "left"
defaults write com.apple.dock autohide -bool false
defaults write com.apple.dock tilesize -int 30
defaults write com.apple.dock magnification -bool true
defaults write com.apple.dock largesize -int 36
killall Dock
For a long time, I didn’t bother with automating this; I just ran the corresponding shortcut when I had changed setup. This works fine!
But here’s a shortcut to have it happen automatically
There are different ways to get shortcuts to run automatically – and one of them is the utility app Shortery. I’ve set this up to run my shortcut, HelloDock, when I unlock my computer.
First a bit on how it works, and then how you can use it if you’d like.
How it works:
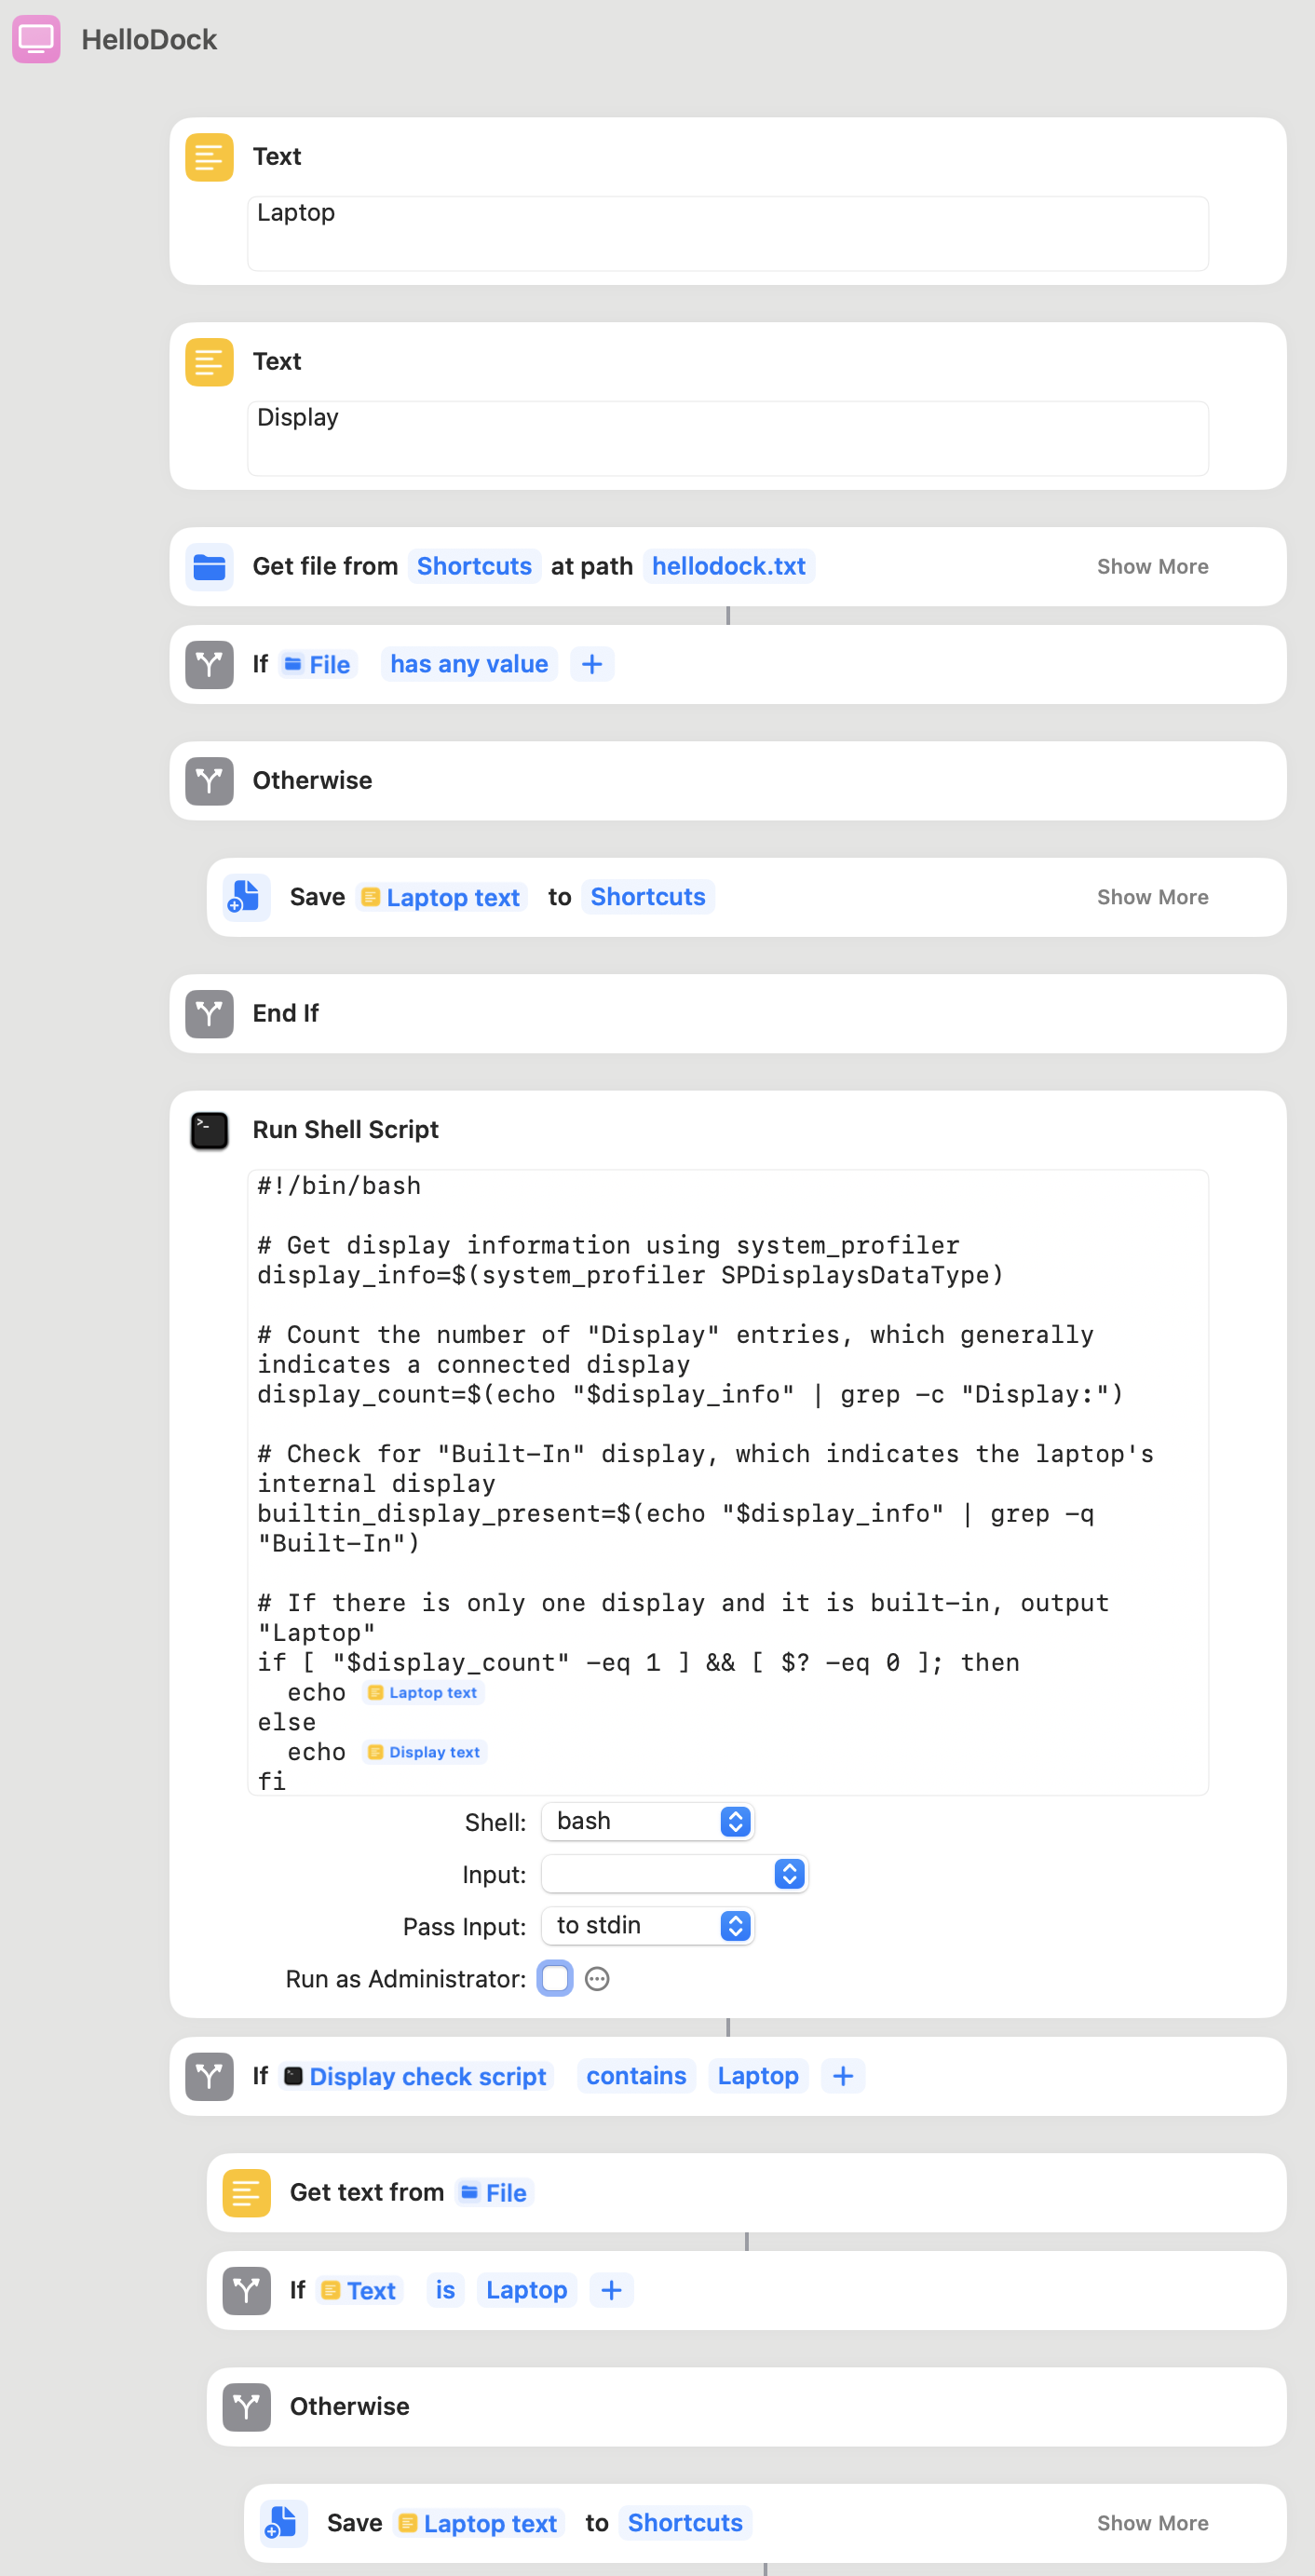
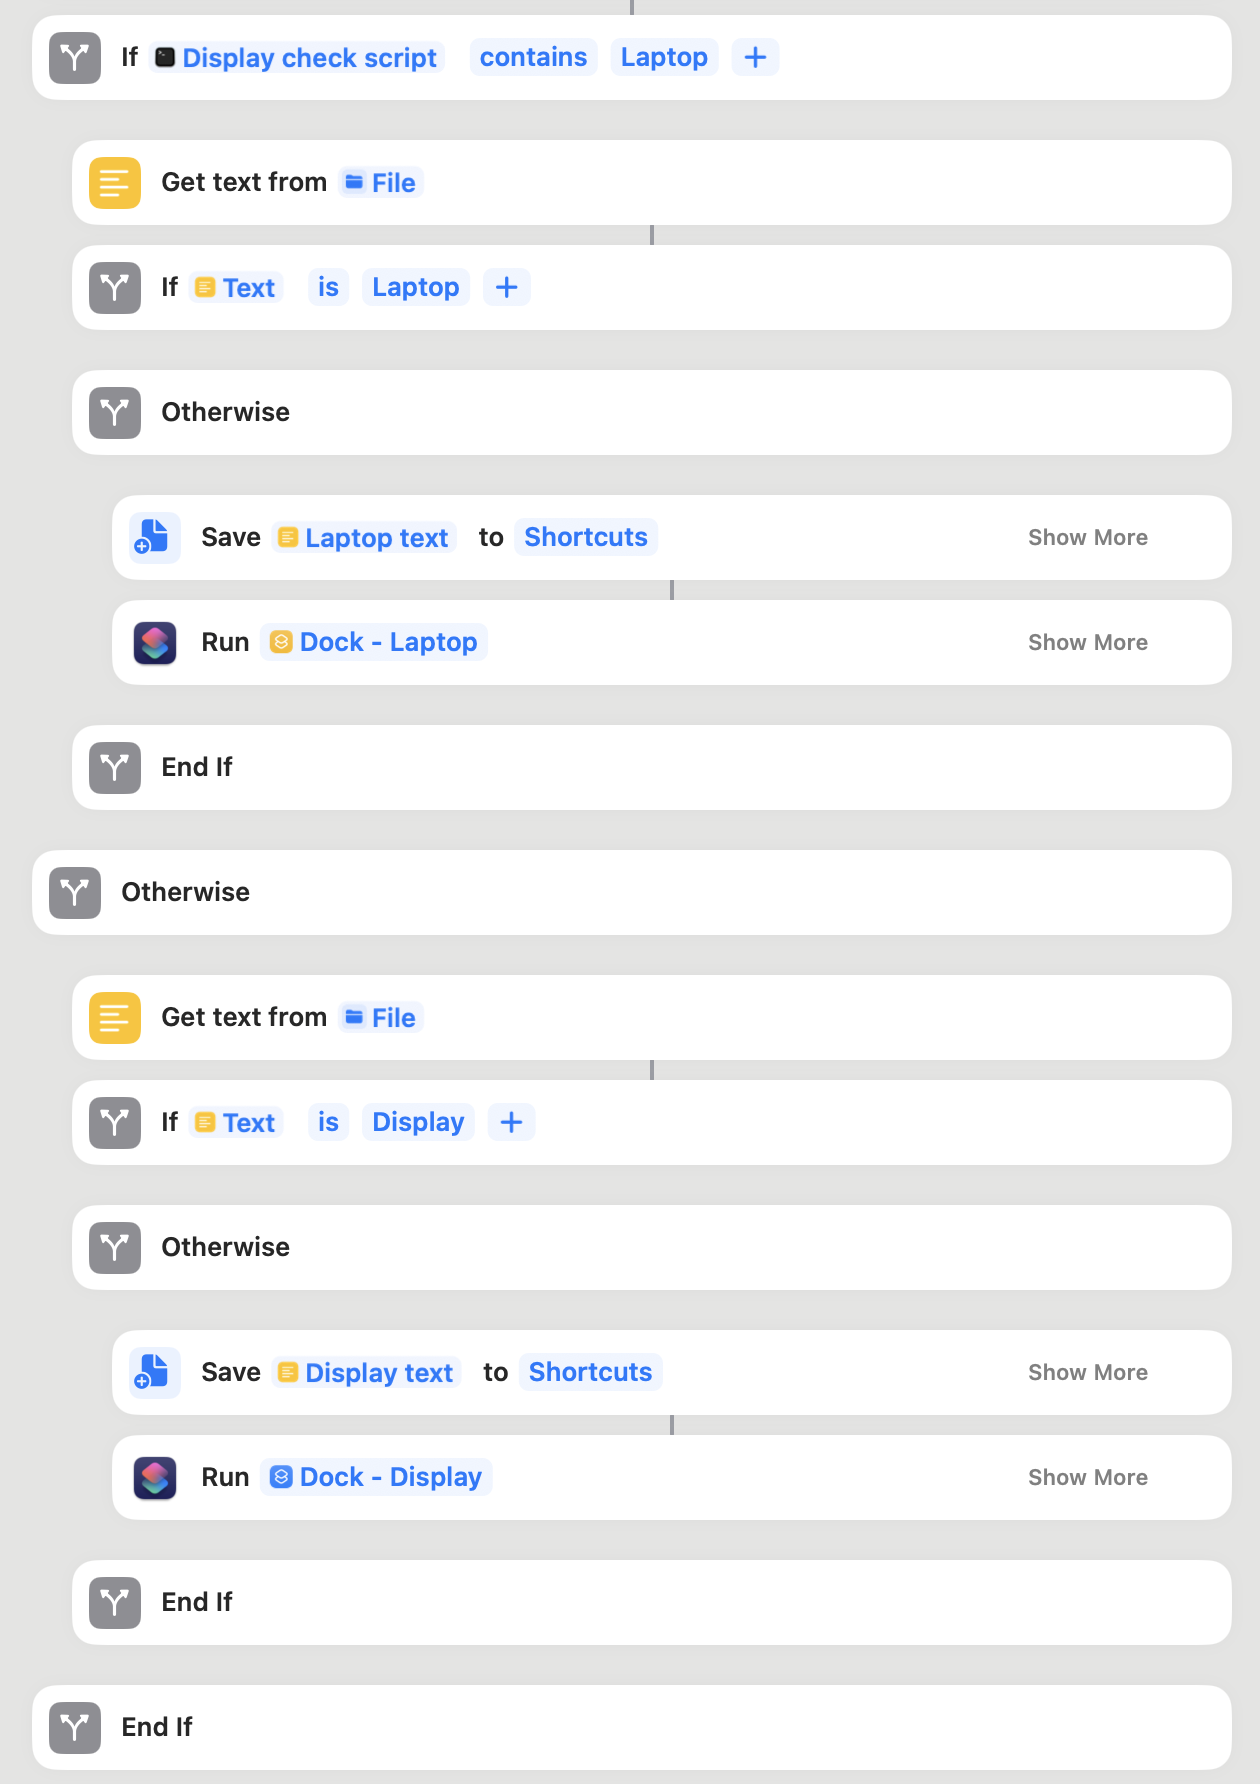
- First, it runs a script that checks whether an external display is connected.
- Then it checks which mode the Mac is currently in.
- Lastly, if things have changed (and only then), it will run the correct shortcut of Dock — Laptop or Dock — Display.
Step one is done by this script (made with the help of an LLM):
#!/bin/bash
# Get display information using system_profiler
display_info=$(system_profiler SPDisplaysDataType)
# Count the number of "Display" entries, which generally indicates a connected display
display_count=$(echo "$display_info" | grep -c "Display:")
# Check for "Built-In" display, which indicates the laptop's internal display
builtin_display_present=$(echo "$display_info" | grep -q "Built-In")
# If there is only one display and it is built-in, output "Laptop"
if [ "$display_count" -eq 1 ] && [ $? -eq 0 ]; then
  echo Laptop
else
  echo Display
fi
I struggled a bit with how I could do step two – but I found a solution that, although not pretty, works well.2 The shortcut creates a little text file, called hellodock.txt, that currently only consists of the word “Laptop” because that’s the mode I’m currently in. When the shortcut sees that the script output and the current mode is the same, it will just do nothing. Only when there’s a mismatch will it run the correct shortcut action (Display or Laptop), and then change the text file. So the text file should always display the current mode.
How you can set it up for yourself
Here’s a link to the HelloDock shortcut that’s meant for running separate shortcuts for the dock modes. With this, you need to create the mode shortcuts, and point the “Run Shortcut” actions to them.
And here’s a link to one I’ve named HelloDock One, that has everything in one. It comes loaded with my scripts for Display and Laptop mode, and you can just edit them right there in the shortcut.
It should create and handle the text file in the Shortcuts iCloud folder by itself.
That’s it! Hopefully, it works fine. Feedback appreciated!


