Homebrew – For Noobs (Like Me)
I do not know what I’m doing when it comes to the terminal on my Mac. But one use-case, I really like, is Homebrew. So I wanted to explain what it is, and how to use it, to other newbies!
How to install it
I get that I haven’t told you why yet, but to install it, you just copy this into your terminal: $1
/bin/bash -c "$(curl -fsSL https://raw.githubusercontent.com/Homebrew/install/HEAD/install.sh)"
Then you just follow the quick guide. (I think you only have to copy and paste one set of commands.) For Mac, you can also go here to download the latest .pkg file.
It’s a “package manager”
And this just means that you use it to install, uninstall, and update other apps. These can both be command-line software (called formulae in Homebrew parlance) or what most would recognise as regular apps (called casks).
And here’s how you use it:
Installing something is as easy as typing brew install firefox. That’s it! No going to a website, no downloading of installers, no dragging and dropping, no nothin'! And you uninstall by typing brew uninstall google-chrome. Even though you’d be surprised by how many apps support installation through Homebrew, not every app does. Furthermore, every “app name” has to be only one word – so brew search chrome will help you find out if the app you want is there, and how you should address it.
You type brew update to update Homebrew itself. But this leads to something a bit confusing: To update apps installed by Homebrew, you have to type brew upgrade.
Taps are a thing as well.
The main source of casks and formulae are the Homebrew catalog – but sometimes you need to add a different source. This is often a custom source for a specific app, and those are called taps. For these apps, you first have to add the tap by pasting in a command – but the app will include this in its guide.
My favourite consequence of using Homebrew:
Recently, I did a fresh reinstallation of macOS. And one annoying thing, especially if you (like me) have numerous apps installed, is to hunt down every app and reinstall them. But with Homebrew, you can just keep a text-file (script) of the apps you want to install on a fresh OS'. Here’s mine. 👇🏻 I know it’s long, but the only thing you need to bother with is the lists of formulae and casks.
#!/bin/bash

# Array to keep track of failed installations
failed_casks=()
failed_formulae=()

# List of formulae to install
formulae=(
		bat
		eza
		fzf
		zoxide
)

# List of casks to install
casks=(
		affinity-designer
		affinity-photo
		affinity-publisher
		bbedit
		bike
		calibre
		daisydisk
		discord
		dropbox
		fmail2
		hazel
		karabiner-elements
		keyboard-maestro
		lasso
		linearmouse
		memory-clean-3
		menuwhere
		nova
		obsidian
		pearcleaner
		raycast
		setapp
		slack
		soundsource
		squash
		steam
		telegram
		tidal
		transmit
		vivaldi
		warp
)

# Install formulae
for formula in "${formulae[@]}"; do
		echo "Installing $formula..."
		if ! brew install "$formula"; then
				echo "Failed to install $formula."
				failed_formulae+=("$formula")
		fi
done

# Loop through each cask and attempt to install it
for cask in "${casks[@]}"; do
		echo "Installing $cask..."
		if ! brew install --cask "$cask"; then
				echo "Failed to install $cask."
				failed_casks+=("$cask")
		fi
done

# Check if there were any failures
if [ ${#failed_formulae[@]} -ne 0 ]; then
		echo "The following formulae failed to install:"
		for failed_formula in "${failed_formulae[@]}"; do
				echo "- $failed_formula"
		done
else
		echo "All formulae installed successfully."
fi

if [ ${#failed_casks[@]} -ne 0 ]; then
		echo "The following casks failed to install:"
		for failed_cask in "${failed_casks[@]}"; do
				echo "- $failed_cask"
		done
else
		echo "All casks installed successfully."
fi
Here’s what I then do:
- Drag the text file to an accessible location – for instance, in a folder called “scripts” in my home directory.
- Install Homebrew.
- Make the script executable, with the command
chmod +x ~/scripts/installs_erlend.sh- The
~symbol in the path means the home directory, which in my case is called “erlend”.
- The
- Run the script, with
~/scripts/installs_erlend.sh
It will then install everything in one go! Together with the ability to “install every favourited app” in Setapp 🖇️, getting up to speed is effortless.
An alternative interface
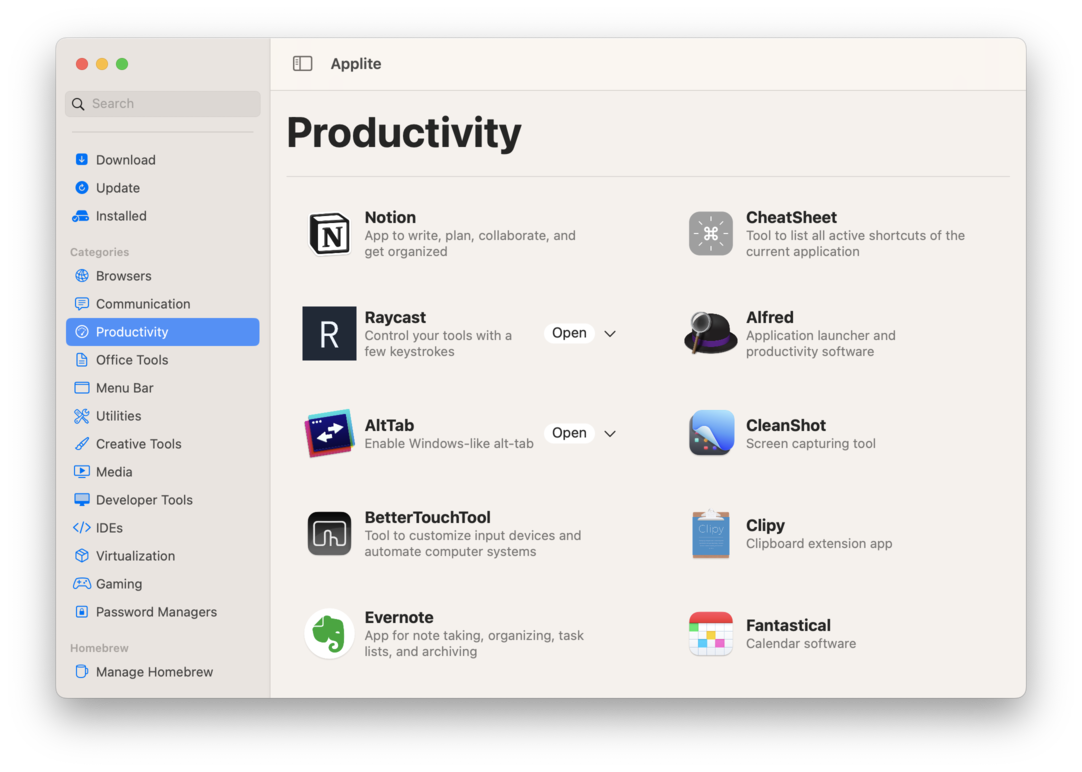
If you’re more comfortable with an interface that looks more like a regular app store, you can install an app called Applite.
This is just an interface over Homebrew, that can make installation and discoverability easier for some! And this, and Homebrew in the terminal, can be used in parallell.
As mentioned up top, I’d love comments on this! Either from people actually knowledgeable about the subject, or from beginners like me. Do you see the value of something like Homebrew?
Edit 1: Cork
Another GUI app I’ve used a bit for Homebrew, is Cork. This app can also search and install stuff – but also makes a bunch of surrounding admin easier to do. Personally I’ve found I don’t need to do the aforementioned admin, so I haven’t used it all that much, heh. But it’s still a good app! I recommend the AppAddict Lou Plummer’s review of the app for more info!
Edit 2: Brewfile
Brendan Thompson gave me a good recommendation: Brewfile. I haven’t looked into it that much, but it seems like a way better version of the noob script I wrote above, that makes bulk installation with Homebrew easier. I’ll definitely use that myself next time! It (and my script, tbf.) also support mas, which is a tool for installing things via the App Store. 👌🏻
Keep the tips coming!
-
The dollar sign is the symbol of a terminal shell called “Bash”. You can think of that as the dialect used by your terminal. On newer Macs the default is a different one, called Zsh (with the symbol %). However, it is backwards compatible with Bash, so commands that start with $ always works! However, what they often don’t tell you, is that you shouldn’t copy the dollar sign when giving the command to the terminal. ↩︎


