The Terminal – For Noobs (Like Me), Part Three
A More Noob-Friendly Terminal
This is the third, and final, part of my terminal guide.
- The first one was about basic concepts,
- the second about why you might want to use and become familiar with the terminal,
- and this is how you can make your terminal more noob-friendly (regardless of what you’ll end up using it for).
I’m not saying these things are stuff everyone should do – but they are things that have helped me like the terminal much more. And feel free to just pick-and-choose the things you want to try out.
Also, as I’m a Mac user, this might be a bit Mac-centric. But I think all of the programs I’m mentioning also exist for Linux – and many of them for Windows as well. (And installation is probably similar.)
Choice of app
One thing that has tripped me up quite a bit, is that terminals adhere to different text manipulation conventions than the rest of the OS. For instance, Shift+Command+Left will usually select text from the caret and all the way to the left – but it doesn’t in terminals. To be fair, the hotkeys in the terminal are probably better, if you know them. But to me, it’s just impractical that they’re different when I spend so much more time with “regular” bindings. (Here’s a video showing some of the default bindings in most terminals!)
The only terminal I’ve found that behaves like regular apps, when it comes to text, is Warp 🖇️. It also has several helpful AI tools integrated. However, this is a controversial recommendation. Among other things, it has gotten a lot of flack for the fact that you used to have to log in to use it, and that it’s quite bloated compared to other terminals. But I still think it’s a good choice for beginners!
If you want something leaner, either to start with or if you’ve graduated from Warp, I recommend Ghostty.1 I’m currently using Ghostty – and the screenshots in these posts are from it. I don’t miss the AI features, as I prefer to keep a chat going in Raycast 🖇️ anyway. And I’m getting by with the, in my opinion, poorer text manipulation.
Customising
In this world, programs typically don’t have a regular settings screen, where you can hit buttons to make your choices. Instead, they’ll usually have a text file, where you add the changes you want to make to the default settings. These settings files often start out empty, or perhaps not even made at all (so you have to create it manually).
Let’s use the code editor Zed as an example: The settings.json file starts existing, but empty. To show you the things you can change, how what you need to write, they show you the default settings in a “filled out” file.
You can see what that looks like at this link – and one way you can adjust settings, is by copying and pasting everything from the default into your settings.json, and then change what you want.
But you can also just write new values for what you want to change, which is what I have done. Below is my entire settings.json for Zed – and you can probably understand what every line does!
{
  "uifontsize": 16,
  "bufferfontsize": 13,
  "bufferfontfamily": "FiraCode Nerd Font Mono",
  "theme": {
    "mode": "system",
    "light": "macOS Classic Light",
    "dark": "Quill"
  },
  "indent_guides": {
    "coloring": "indent_aware"
  },
  "git": {
    "inline_blame": {
      "enabled": false
    }
  },
  "journal": {
    "hour_format": "hour24"
  },
  "scrollbeyondlastline": "verticalscroll_margin",
  "softwrap": "preferredline_length"
}
Some config files use json, like this. Others use toml, other languages, or something proprietary. In general, it’s a good idea to open these files in code editors, with syntax highlighting (like Zed).
.zshrc
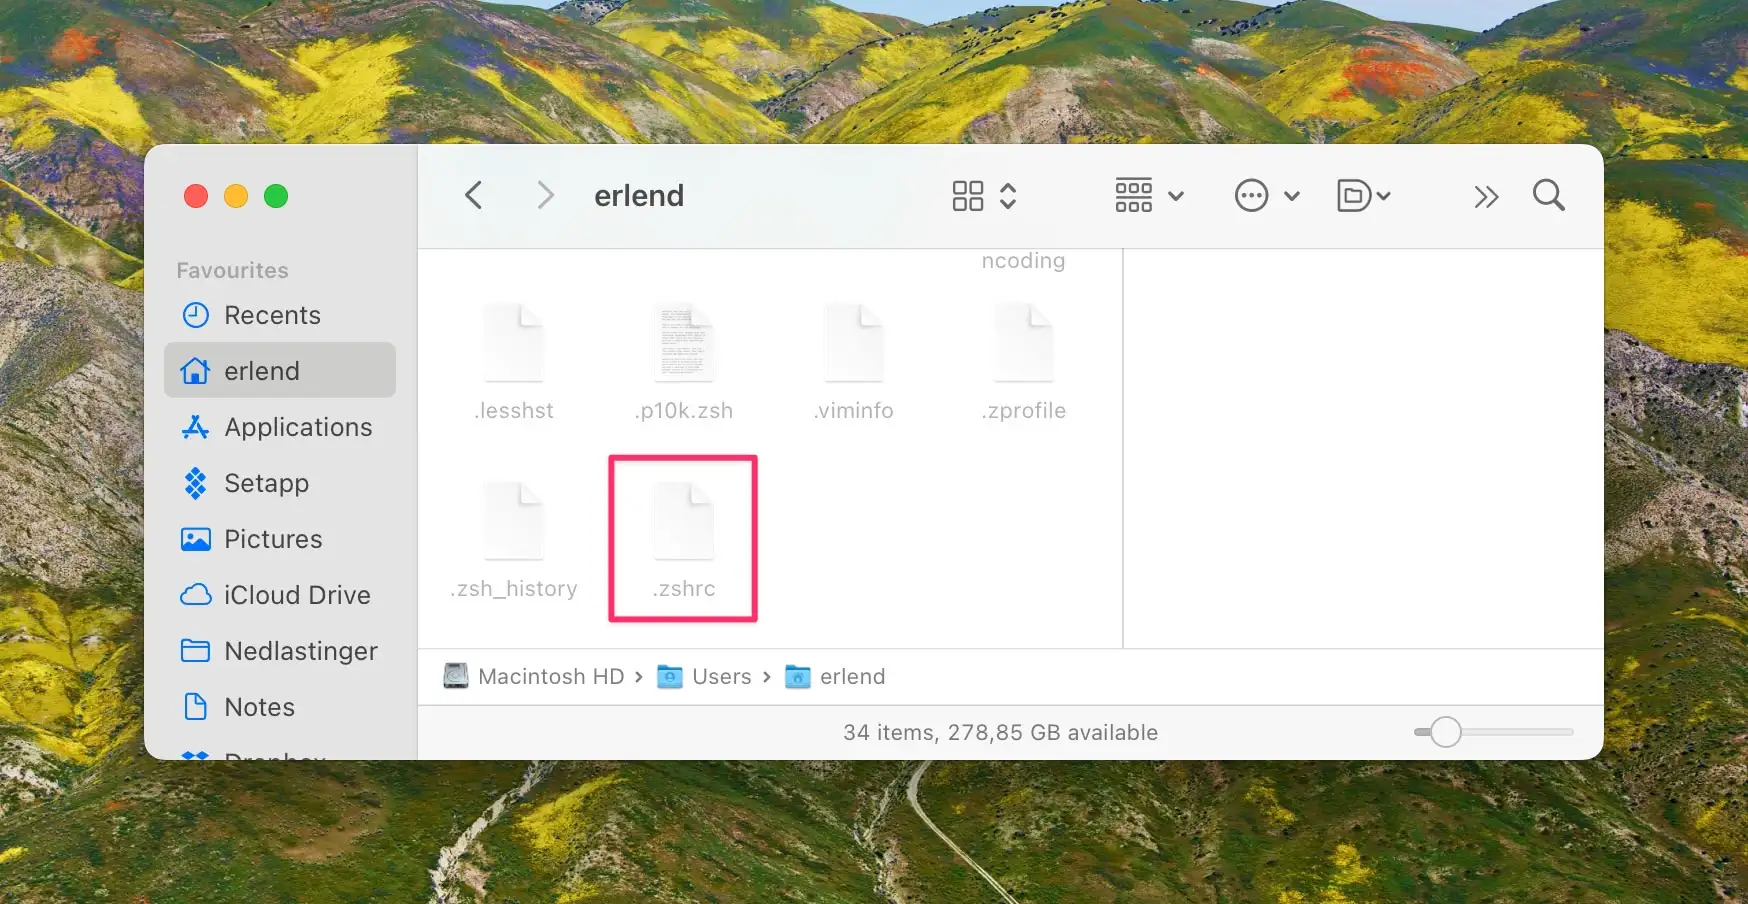
A file you need to create yourself, is the config file for the shell (zsh). In your home folder, create a file called .zshrc (with no extension or anything). This is where you customise the shell itself. And a nice thing about this, is that these settings follow you between different terminal emulators (like Warp and Ghostty).
. is usually hidden. So to see them, you have to enable showing these. The hotkey in Finder is Shift+Cmd+..Later in this guide you’ll be asked to add stuff to this file. Furthermore, the order of lines usually doesn’t matter in files like this – but hierarchy might.
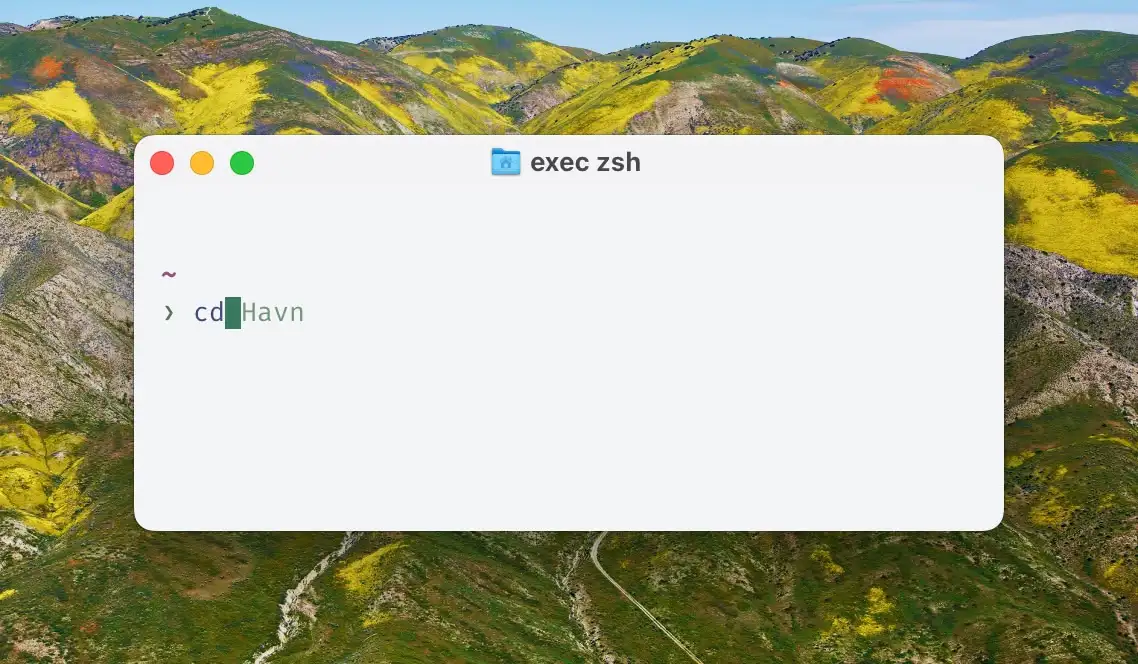
When you’ve changed the .zshrc file, it won’t be apparent in your terminal immediately. You can restart the shell with exec zsh, or by just quitting and re-opening the terminal window.
Starship
There are many ways of configuring your prompt – and one of them is Starship. For it to work optimally, you need to have a nerd font installed, and used as your font in the terminal. These are fonts that have a bunch of extra, specialised, glyphs. I like FiraCode! (Click here for a preview, and here to download. You can also do brew install font-fira-code-nerd-font)
- To install Starship, first just run
brew install starship, - then paste the following into .zshrc:
eval "$(starship init zsh)", - and lastly, create a config file, if you want to customise it.
Let’s look at the command, from the documentation, to create the config file:
mkdir -p ~/.config && touch ~/.config/starship.toml
The && separates two different commands, and states that they should be performed one after another. So first mkdir -p ~/.config, and then touch ~/.config/starship.toml.
mkdir creates a directory/folder – and the -p is there so that it won’t throw an error even though the folder exists. You might already have the .config folder!
touch is a command for creating files, and it will create the starship.toml file, where you’ll add your settings.
I’m explaining this to show that it isn’t magic! And you can also manually create the file and folders in Finder, if you’re more comfortable with that. You also need to locate the file, to be able to open and edit it.
Starship also comes with presets, which are snippets you can copy into your config as starting points. The only thing I’ve done is adding command_timeout = 1000 to the top (I got some errors related to this), and adding the Nerd Font Symbols preset.
Helpers
These two apps are little helpers that will make life in the terminal a little easier.
thefuck
You install this simply with brew install thefuck. (See how easy Homebrew is??)
Then I’d add the following to .zshrc: eval $(thefuck --alias)
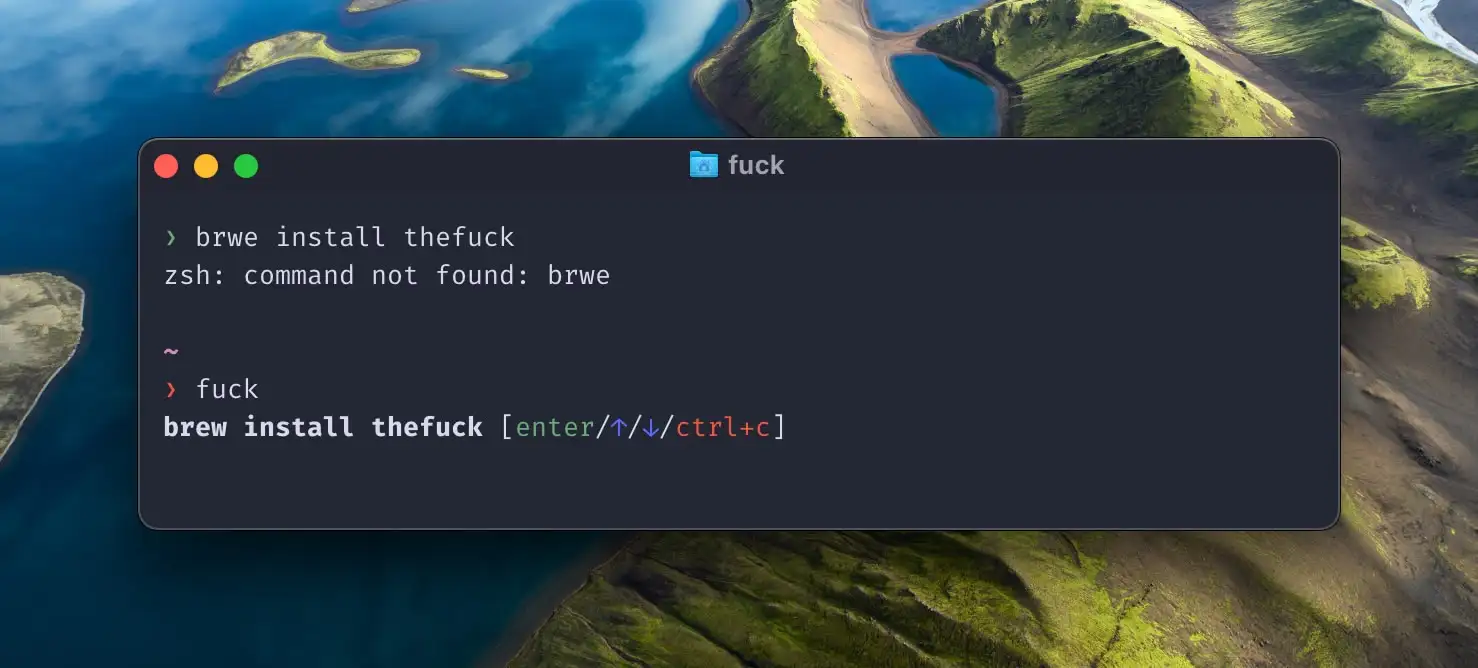
Now, if you get an error, after giving the wrong command, you can just type “fuck” – and it will suggest a fix.
Here you can see that I wrote “brwe” instead of “brew”, so I got an error. Just writing “fuck” gives a suggestion for fix, and hitting enter sends it. I can also go up and down to see other suggestions, and ctrl+c cancels.
esc, q, ctrl+q, or ctrl+c, or type :qa.tldr
This is installed with brew install tlrc2
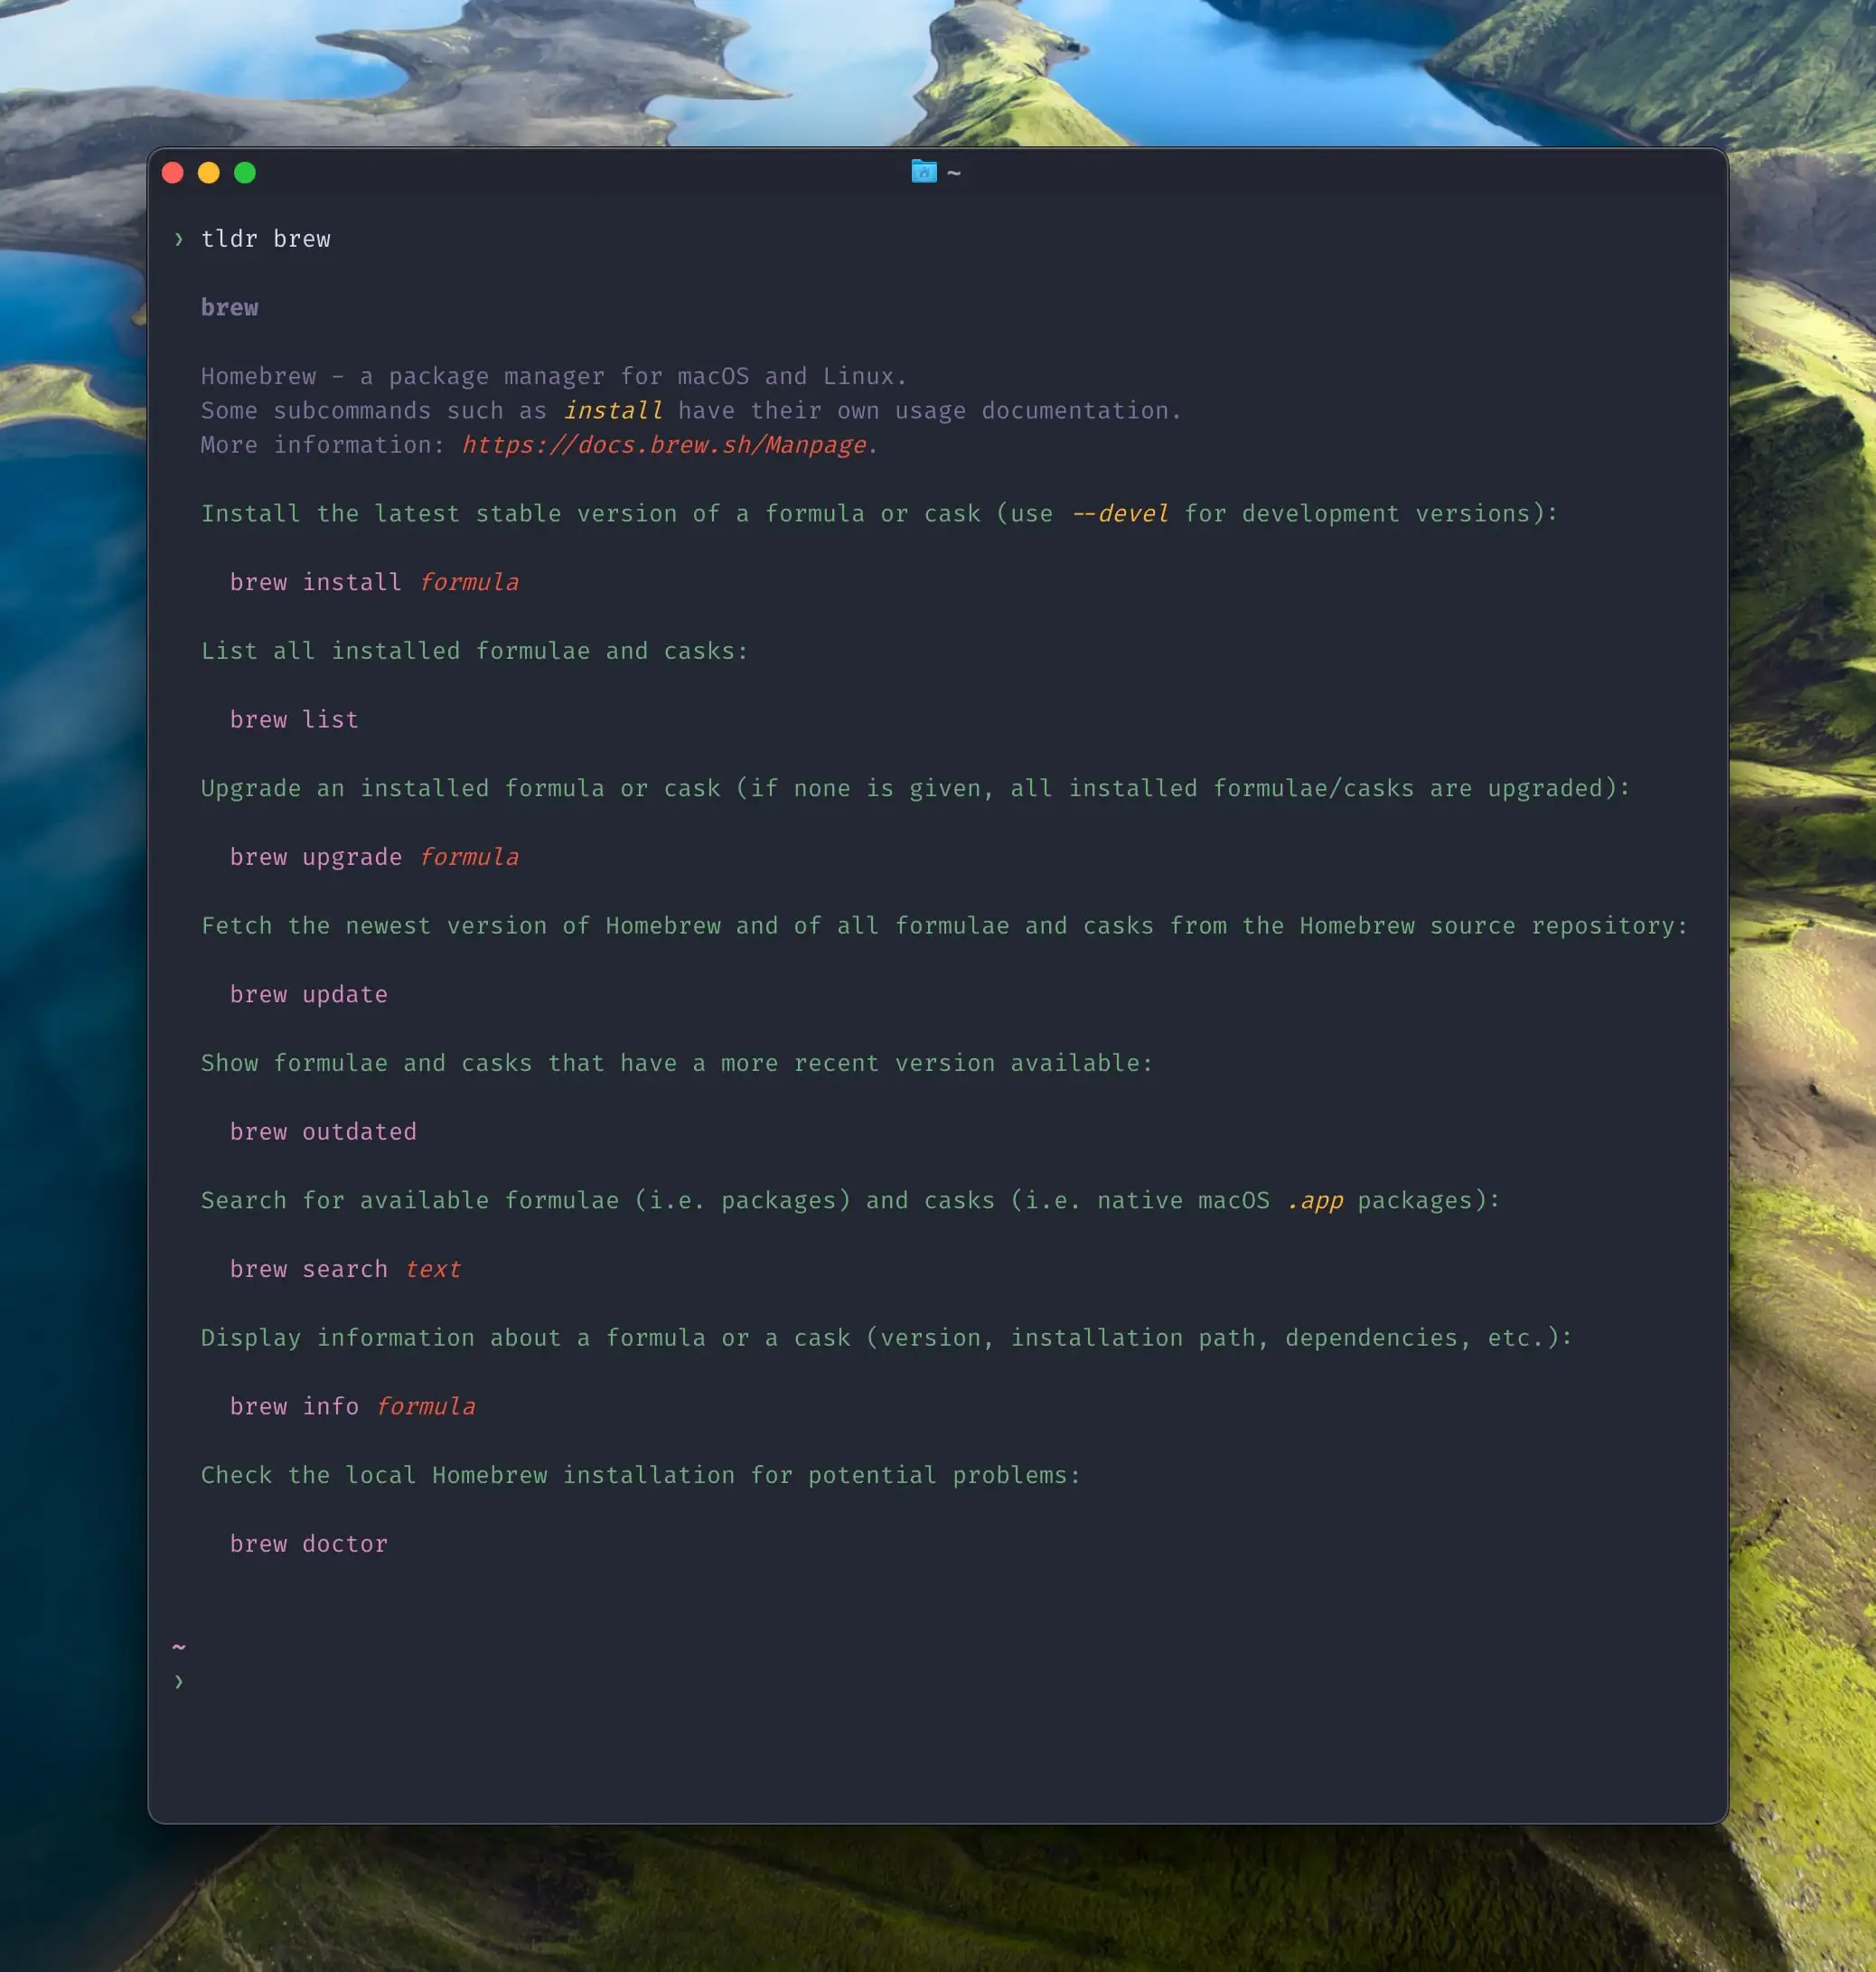
Typing man brew will give you a complete manual for Homebrew. But these are sometimes very long!
Typing tldr brew instead, gives me this neat little thing:
zsh-autosuggestions
As mentioned, Warp has built-in AI suggestions. However, you can add something similar to Zsh (so all terminals) as well! And one option is zsh-autosuggestions.
- First run
brew install zsh-autosuggestions, - and then paste
source $(brew --prefix)/share/zsh-autosuggestions/zsh-autosuggestions.zshinto your .zshrc. - I also added this, to change the colour of the auto suggestions:
ZSH_AUTOSUGGEST_HIGHLIGHT_STYLE='fg=10'- Many terminals operate with themes that have 16 colours, numbered from 0-15. So you can try adjusting the number (from 10) to find something that you like, and that fits your theme.
Alternatives to common tools
Some of the most common commands aren’t the most user-friendly. Luckily, you can swap them out for more modern alternatives!
What I’ve tried to focus on is not to make them more advanced (which you also can, of course) – but simply doing the same thing in a more user-friendly way.
bat
An example of this is the command cat, that will give a preview of a file. However, it doesn’t have things like syntax highlighting, so it’s harder to read. But someone has made something named bat! (“A cat clone with wings.")
As you perhaps could guess, you install it with brew install bat.
OK, so now you can preview things, in a nicer way, with bat instead of cat. But we can improve things further! Because, if you’d like to, you can paste this into your .zshrc:
alias cat="bat"
This means, that if you write the old command (cat), it will automatically use bat instead! Making aliases like this can be really useful – so please remember it! The syntax is simply alias command="What should be done instead".
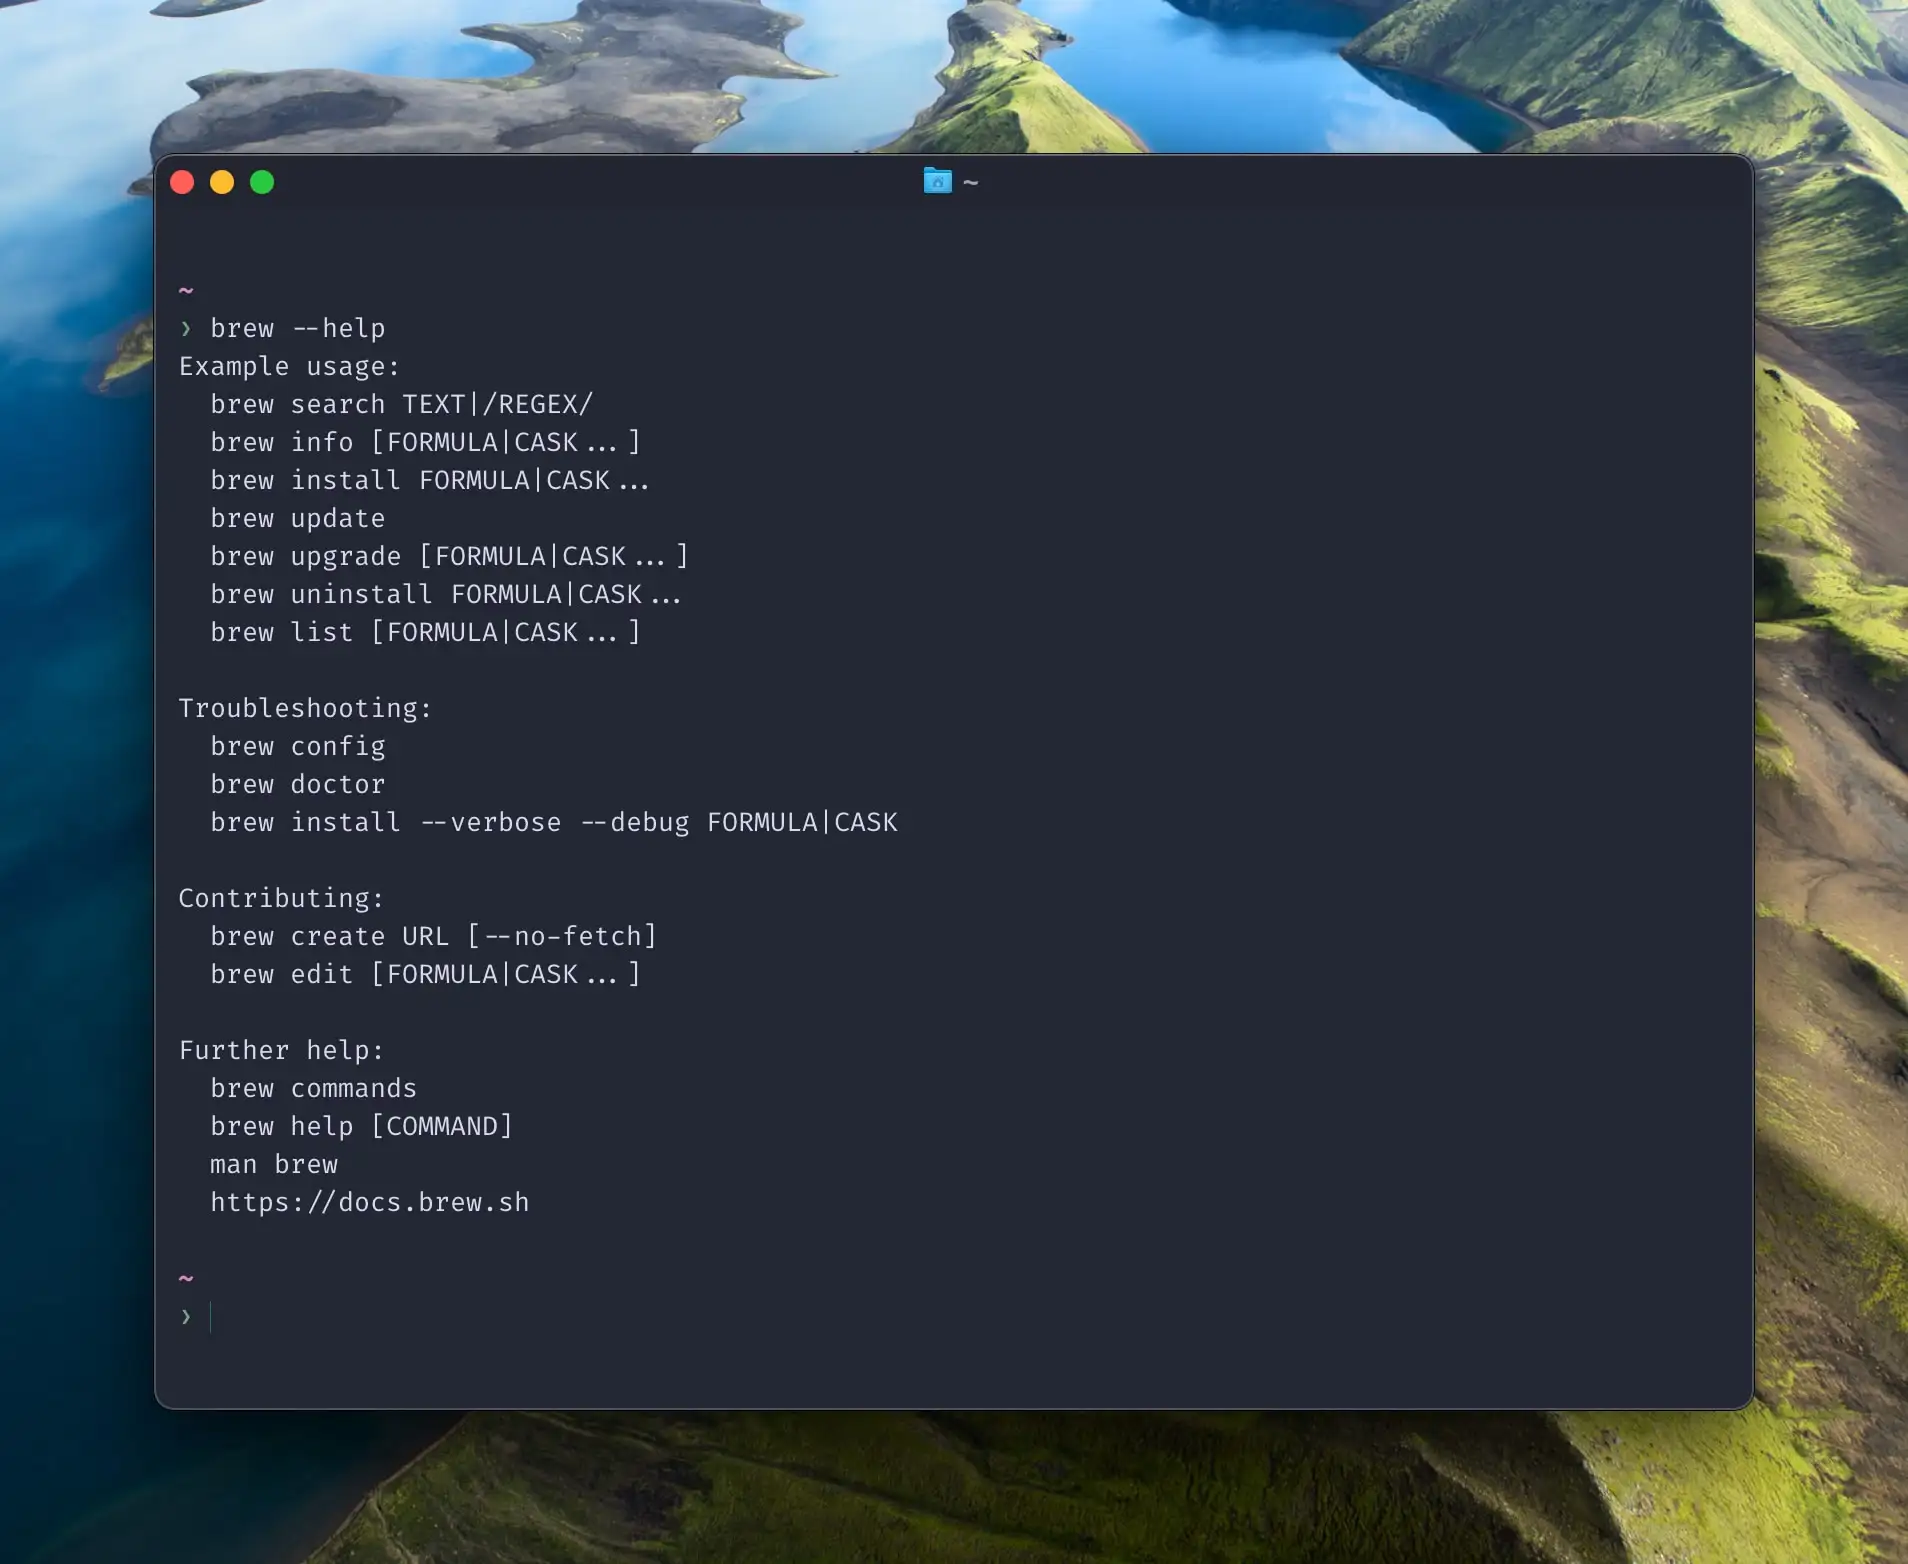
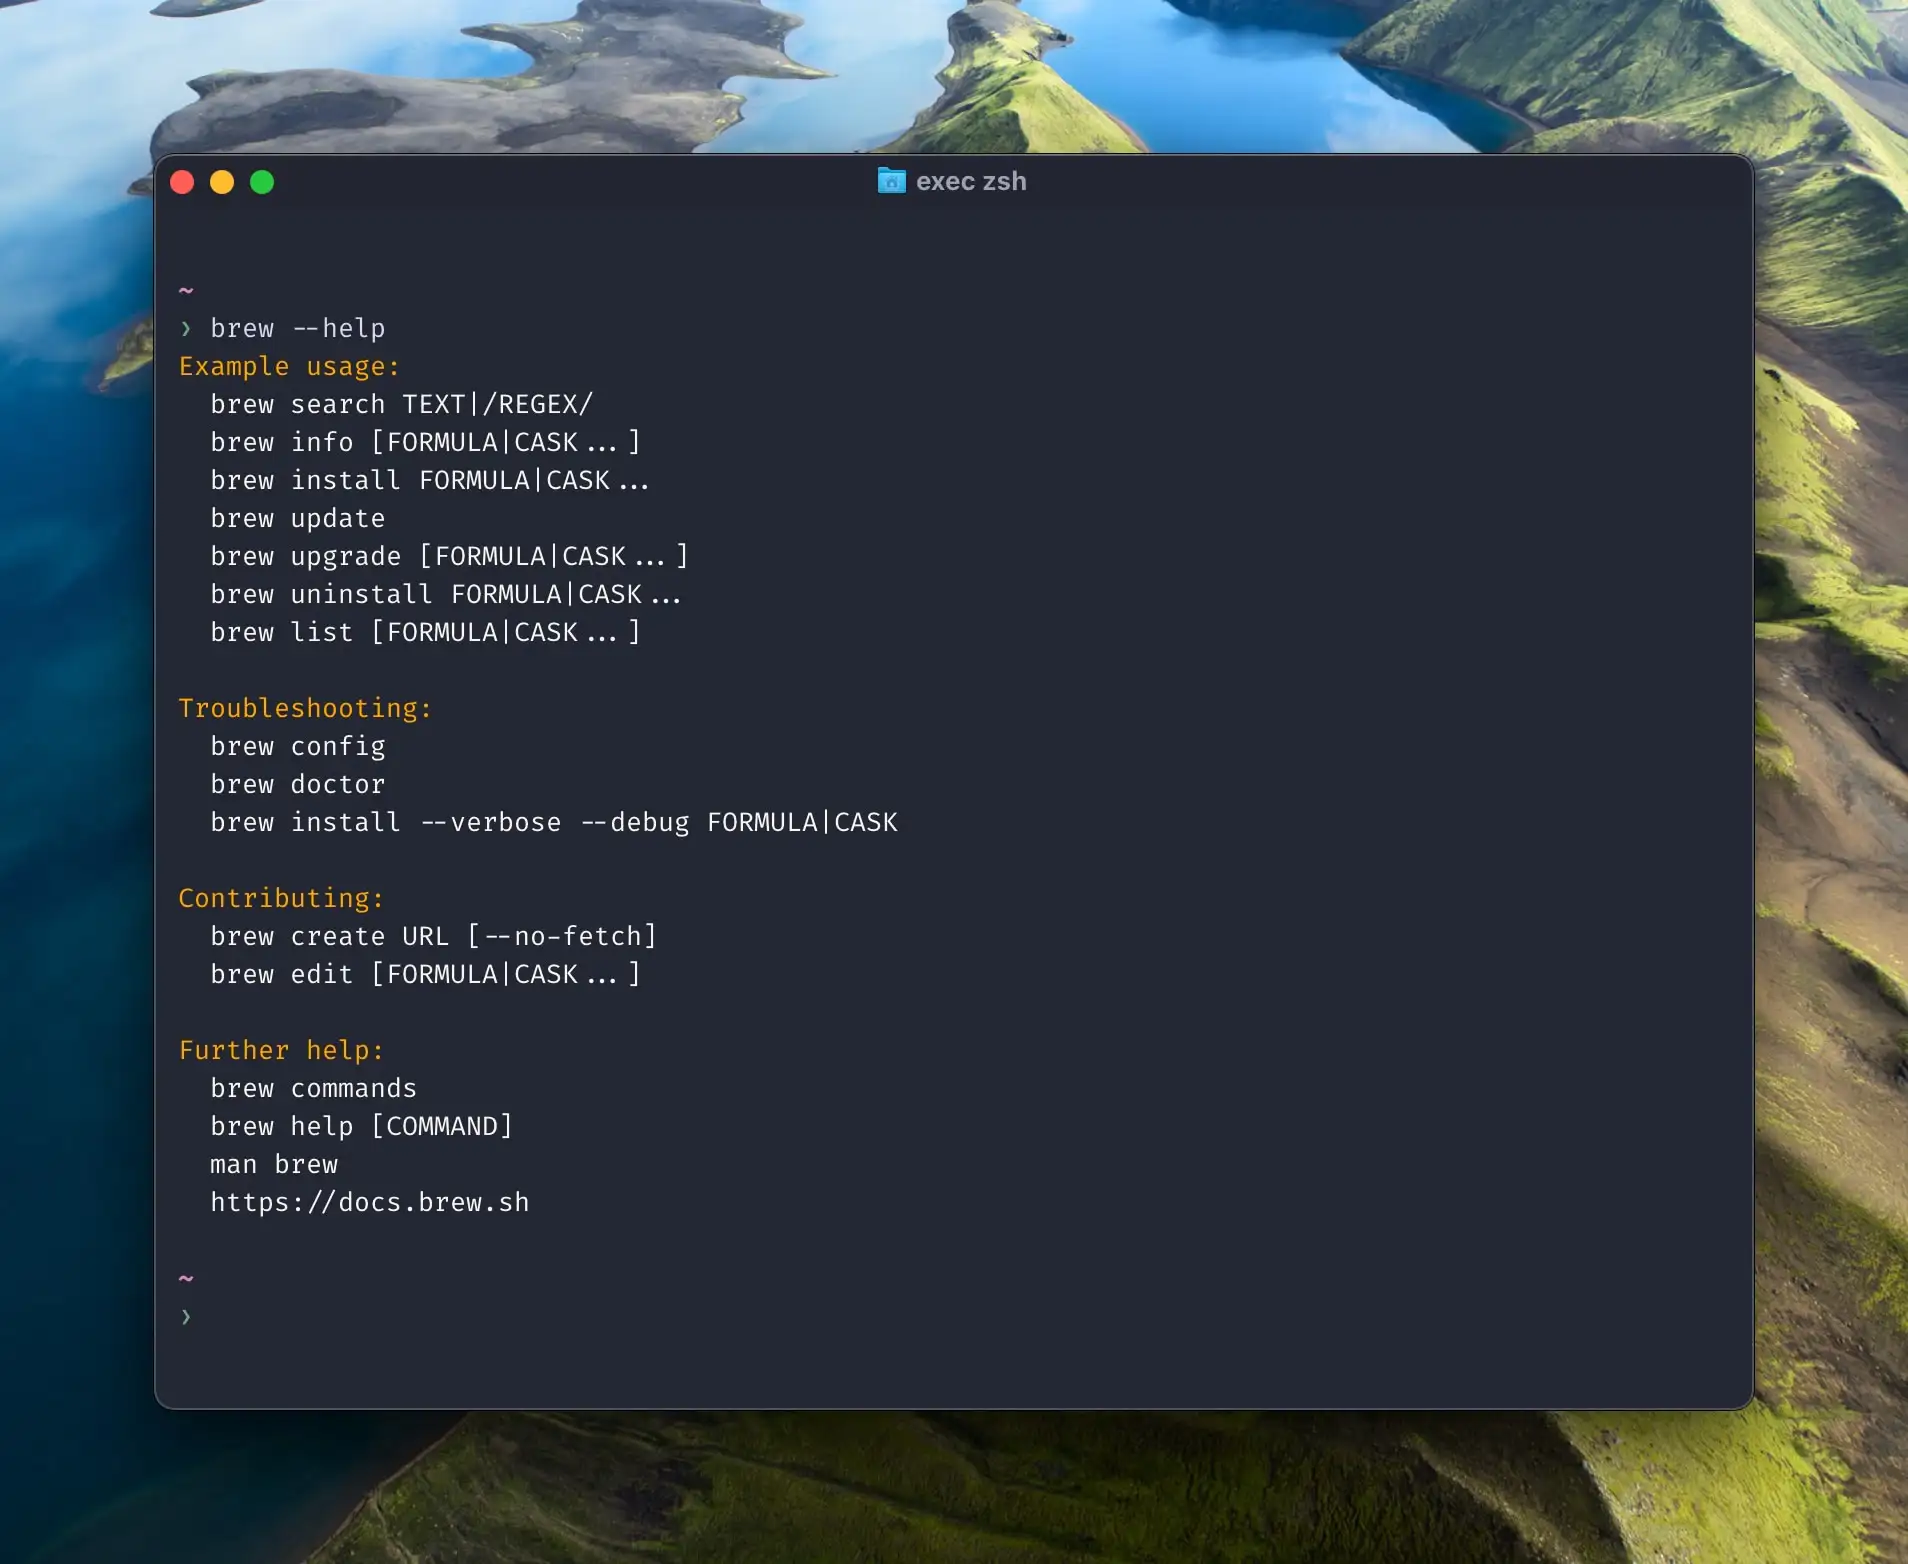
In addition to man and tldr, another way to get help with a command, is things like brew --help. And bat can make that help text nicer as well! Add this to your .zshrc:
alias -g -- -h='-h 2>&1 | bat --language=help --style=plain'
alias -g -- --help='--help 2>&1 | bat --language=help --style=plain'
Now, both --h and --help commands will be highlighted.
In general, these apps will often be able to improve other parts of the terminal! For instance, you can use bat to improve file previews of programs I’ll get to later.
micro
As mentioned, as I’m not used to it, I don’t like the way the terminal handles text differently than every other part of my OS. So while I get that things like NeoVim can be very effective when you learn it, I try my best to edit text outside of the terminal.
Another of the classic terminal text editors is nano. But a more user-friendly alternative is micro.
brew install micro gives you this, of course. Typing micro path_to_file opens a file in this editor. And if you’d like, you can create an alias in .zshrc: alias nano="micro"
You can also make micro your “default terminal editor” by adding this to .zshrc:
export EDITOR='micro'
However, you can also do this:
export EDITOR='open'
That makes the default editor to open the file in the default app set in macOS.
eza
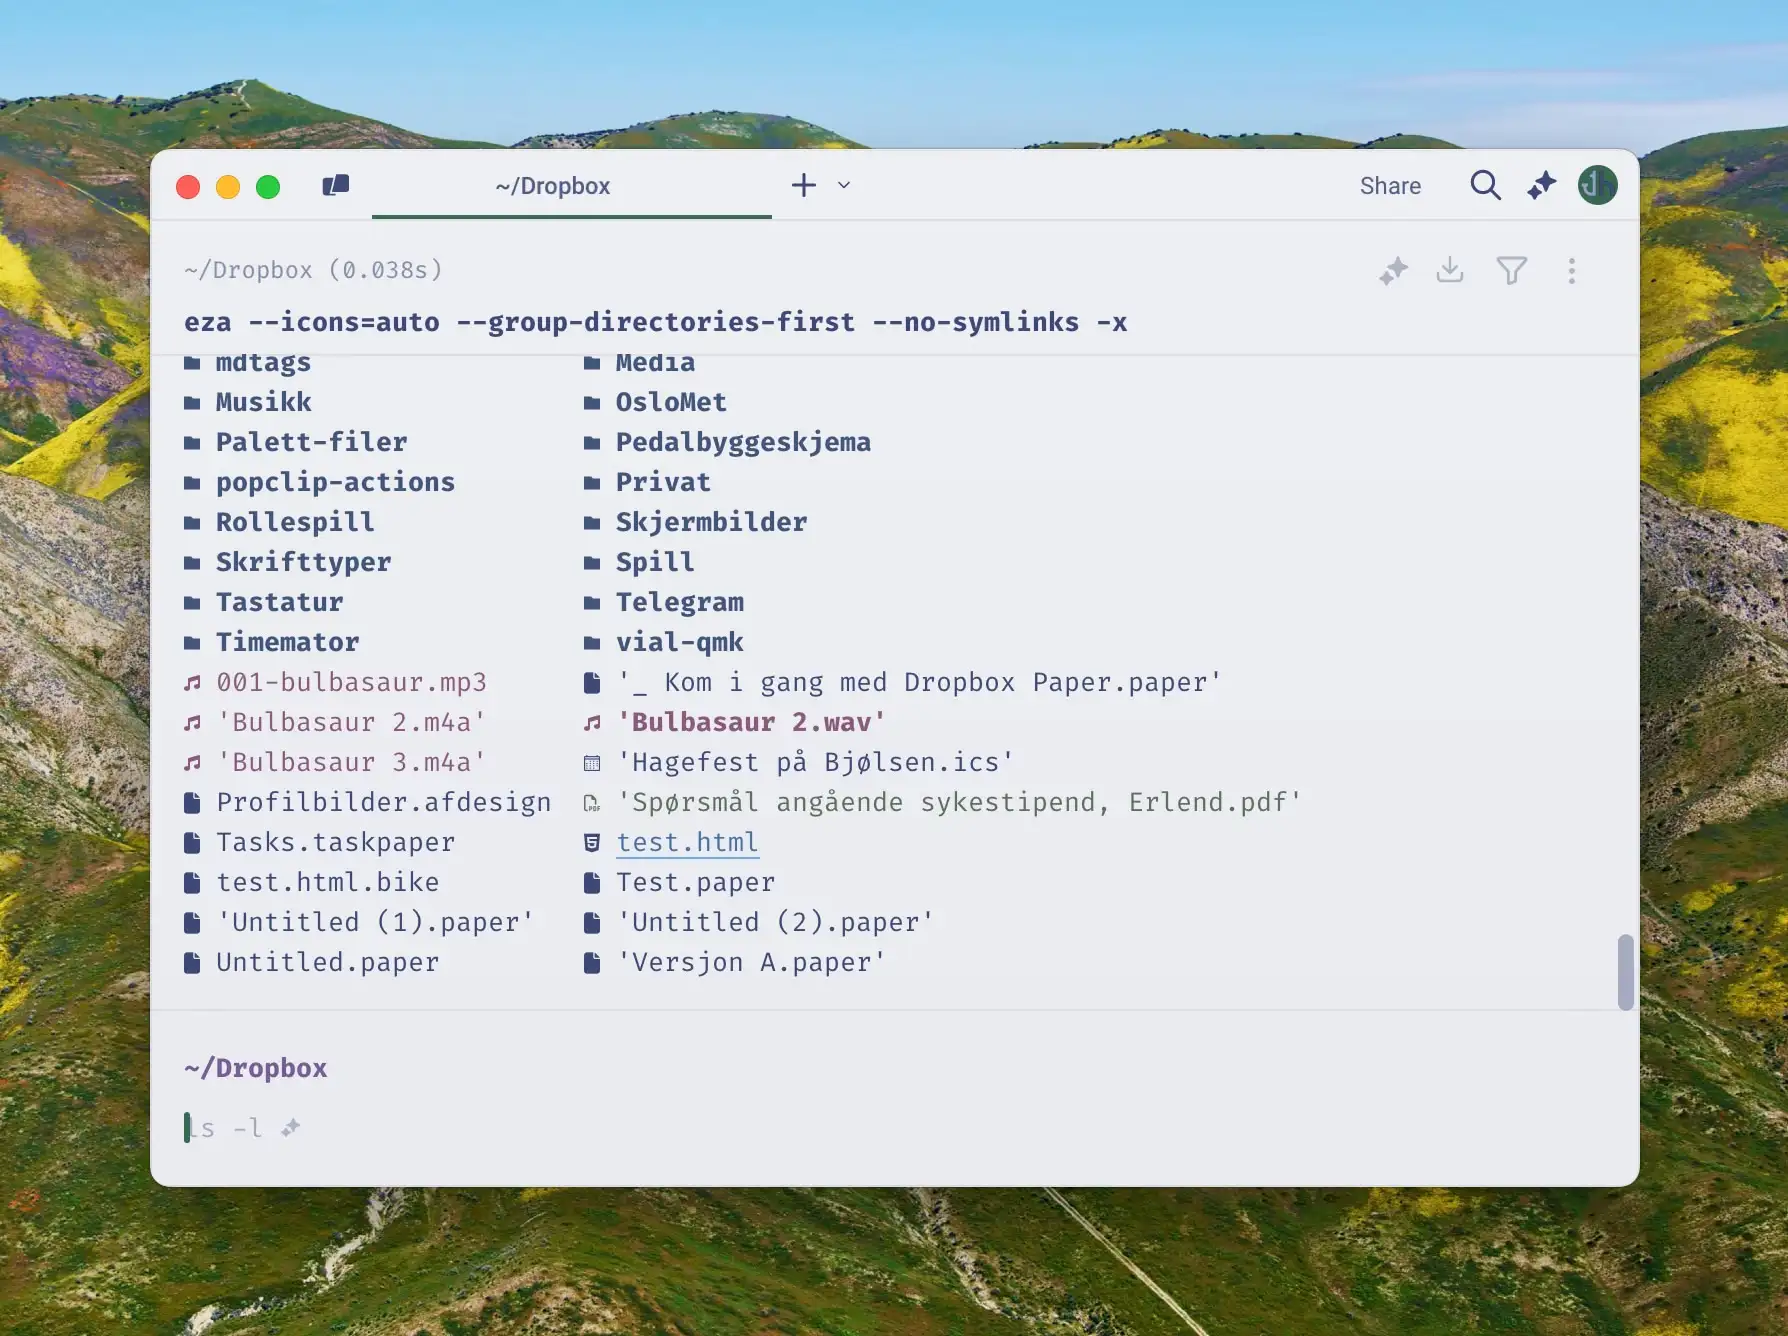
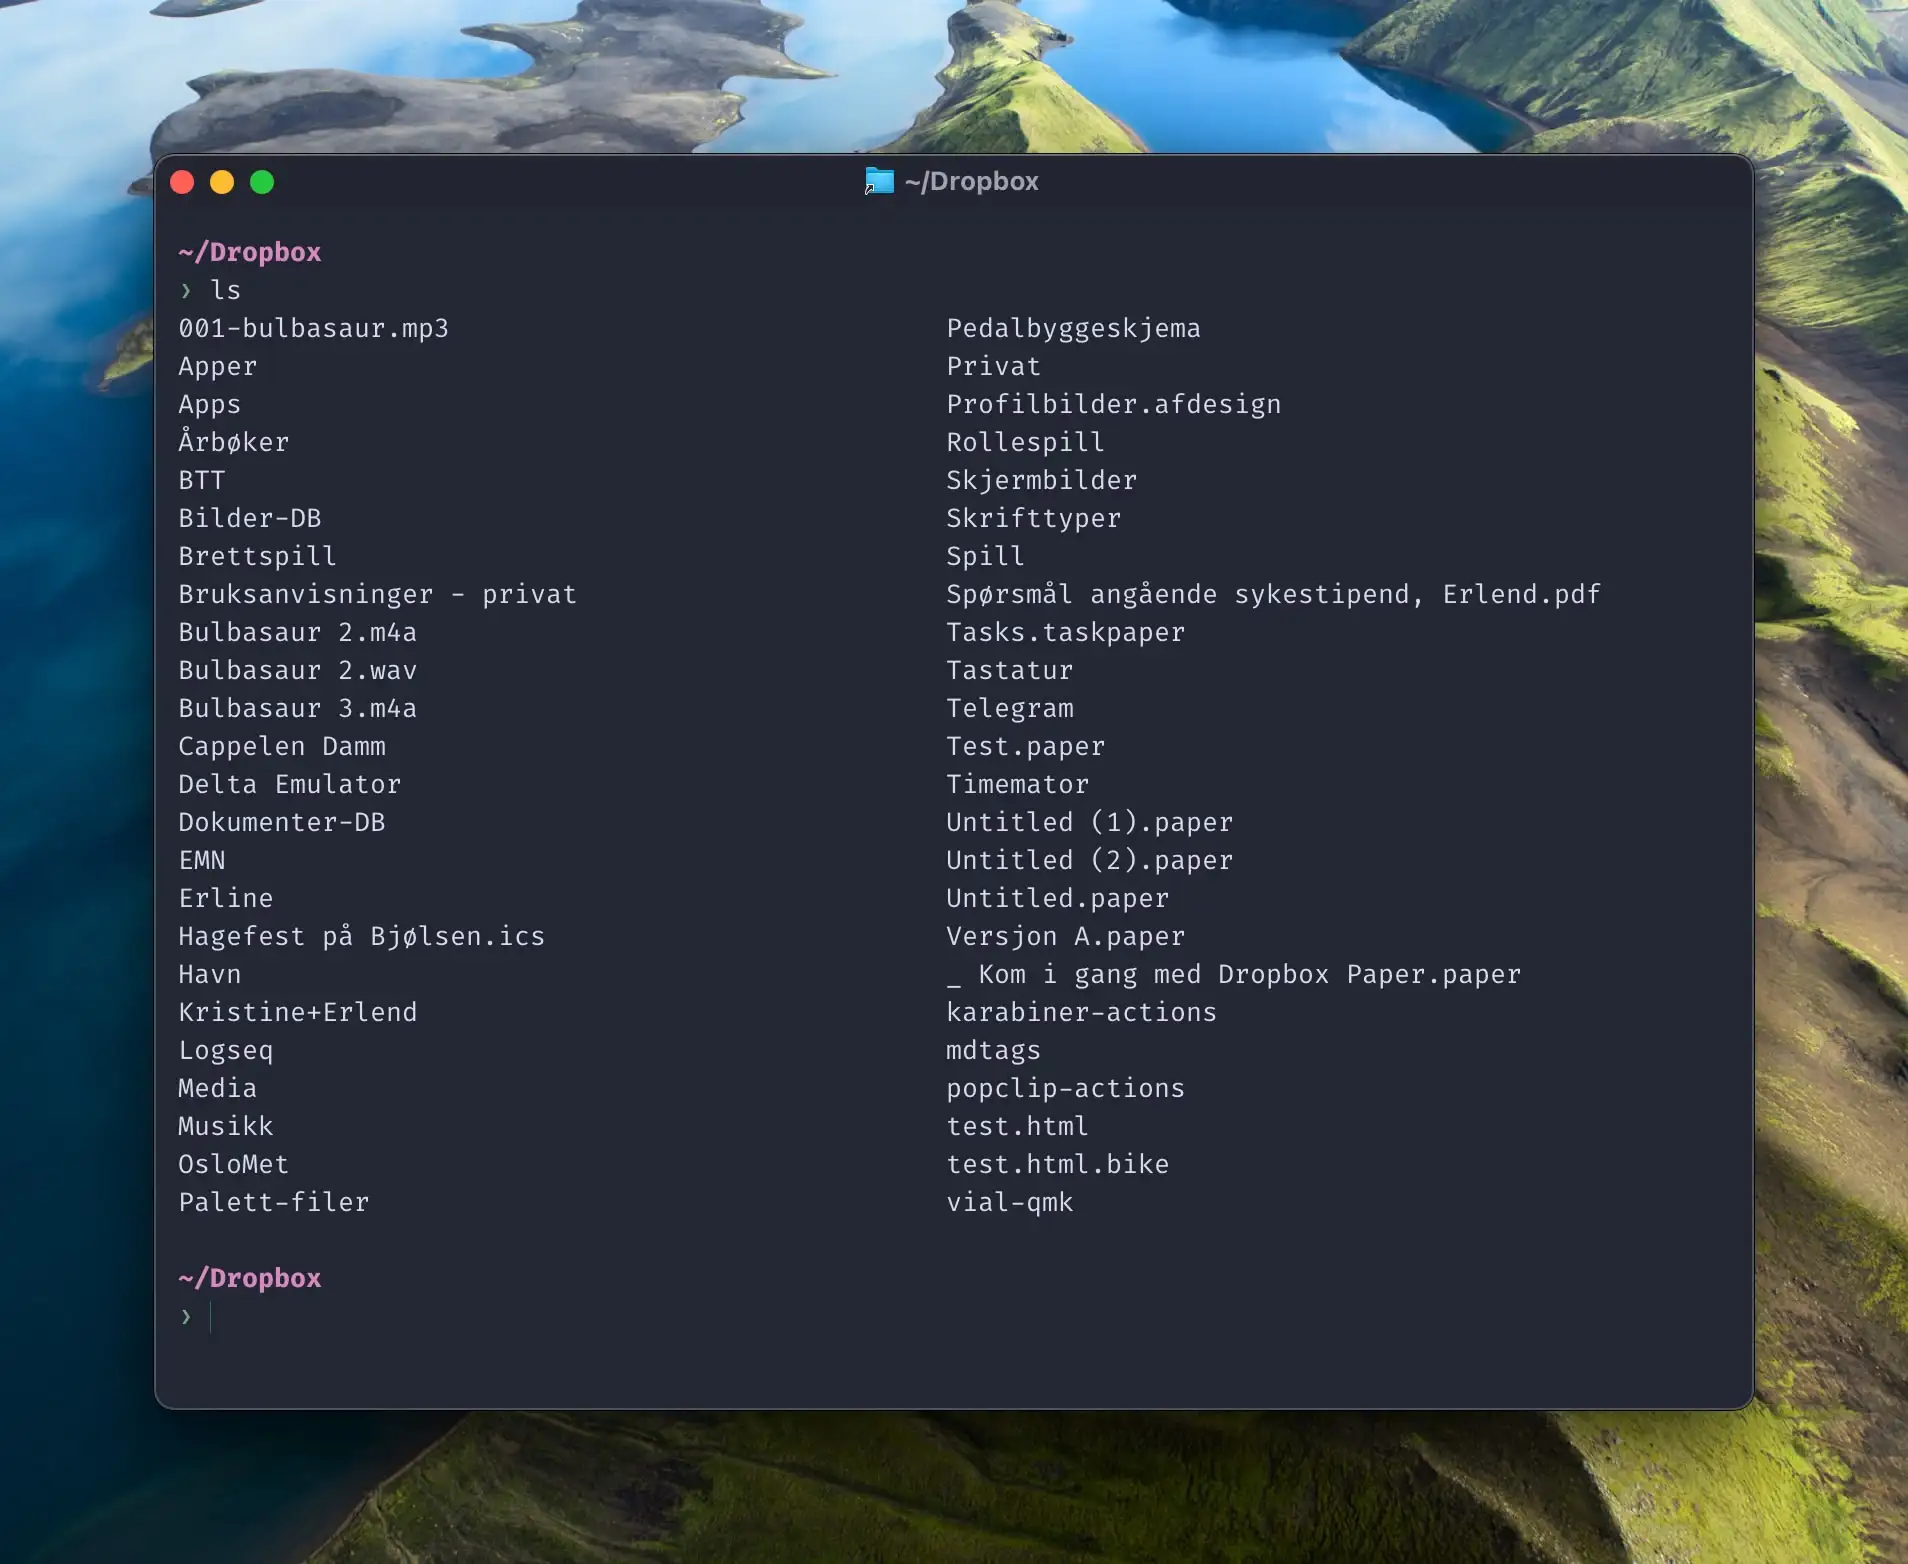
Another classic command is ls (list), which shows you the content of the working directory. But here’s what my messy Dropbox folder looks like with the default command:
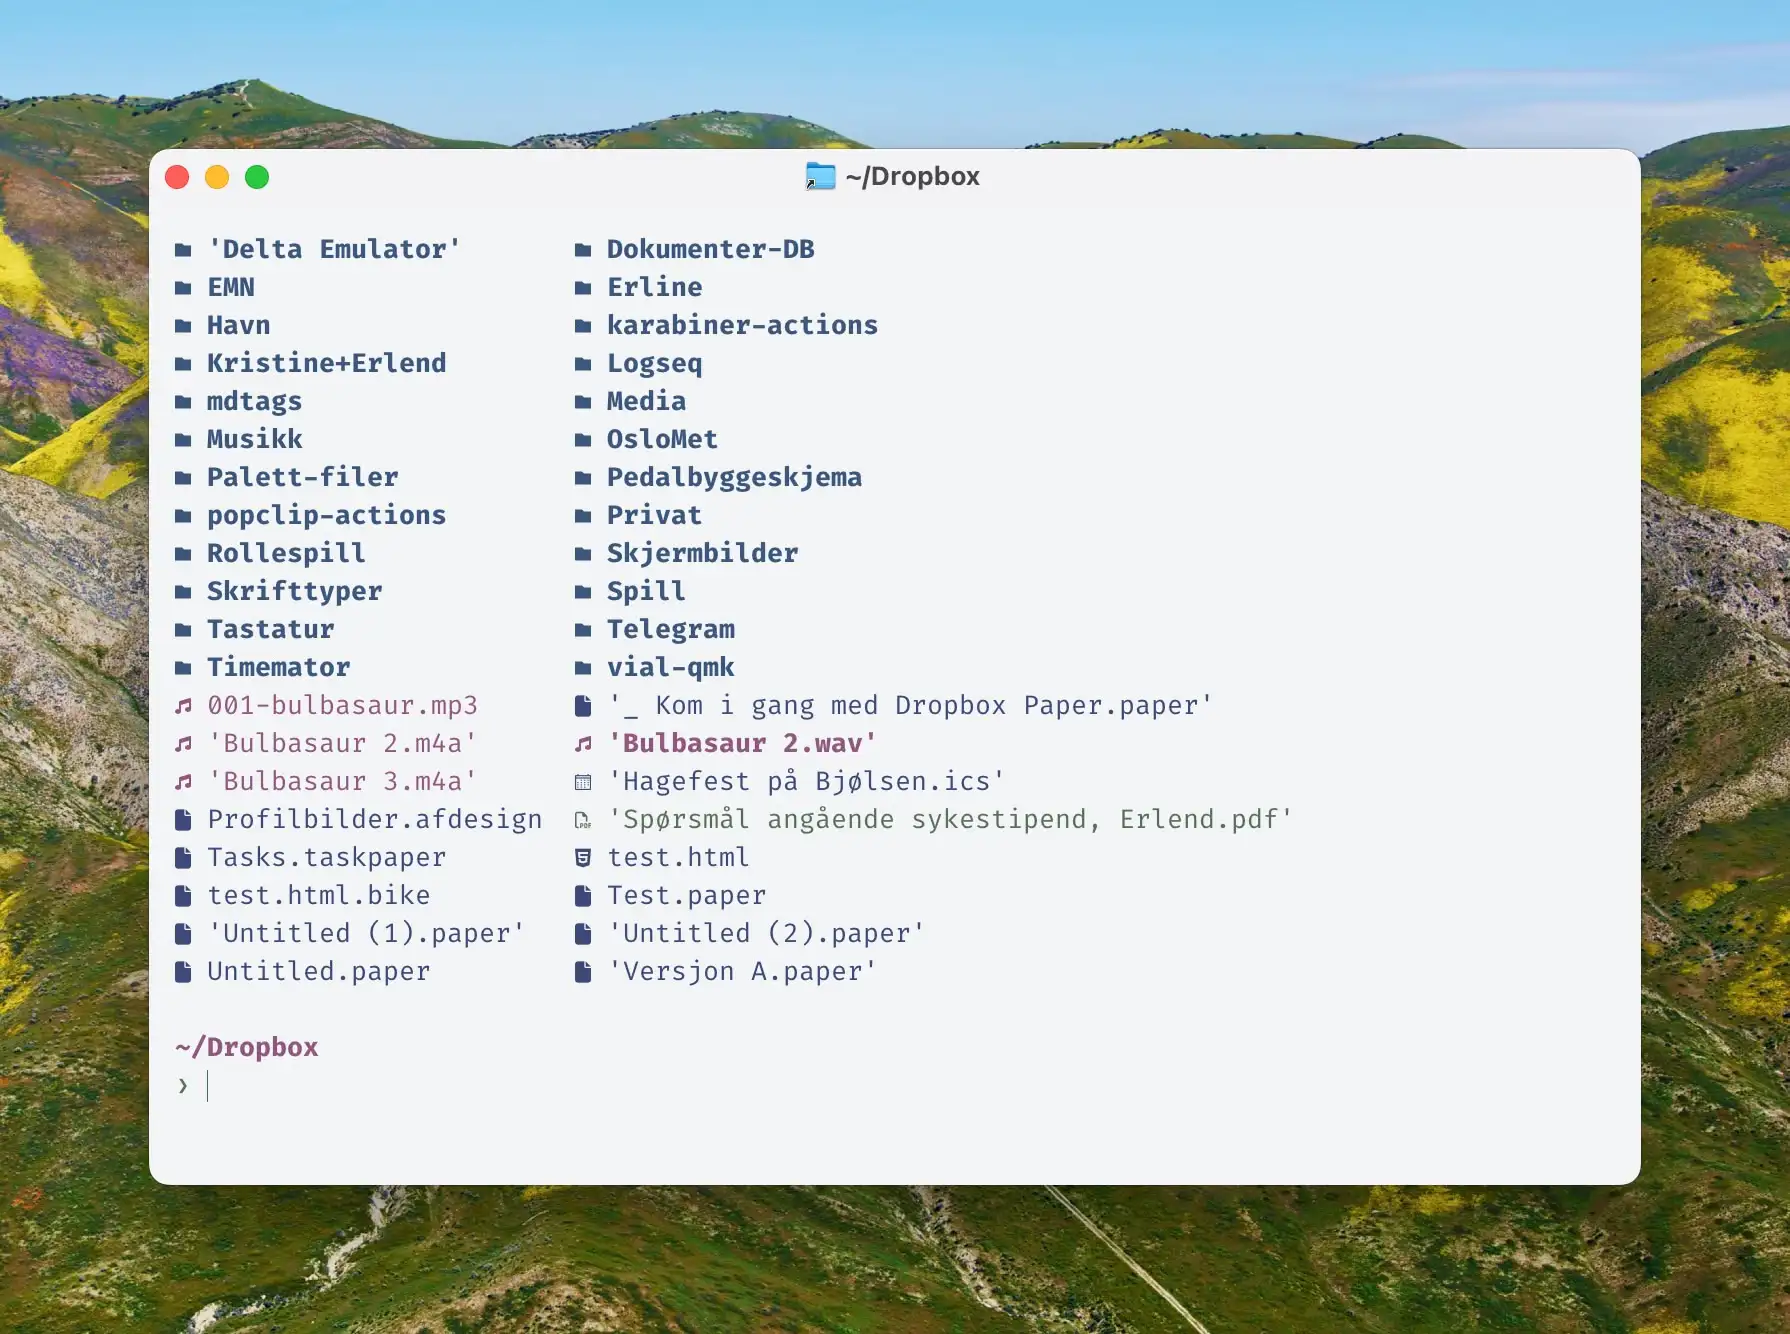
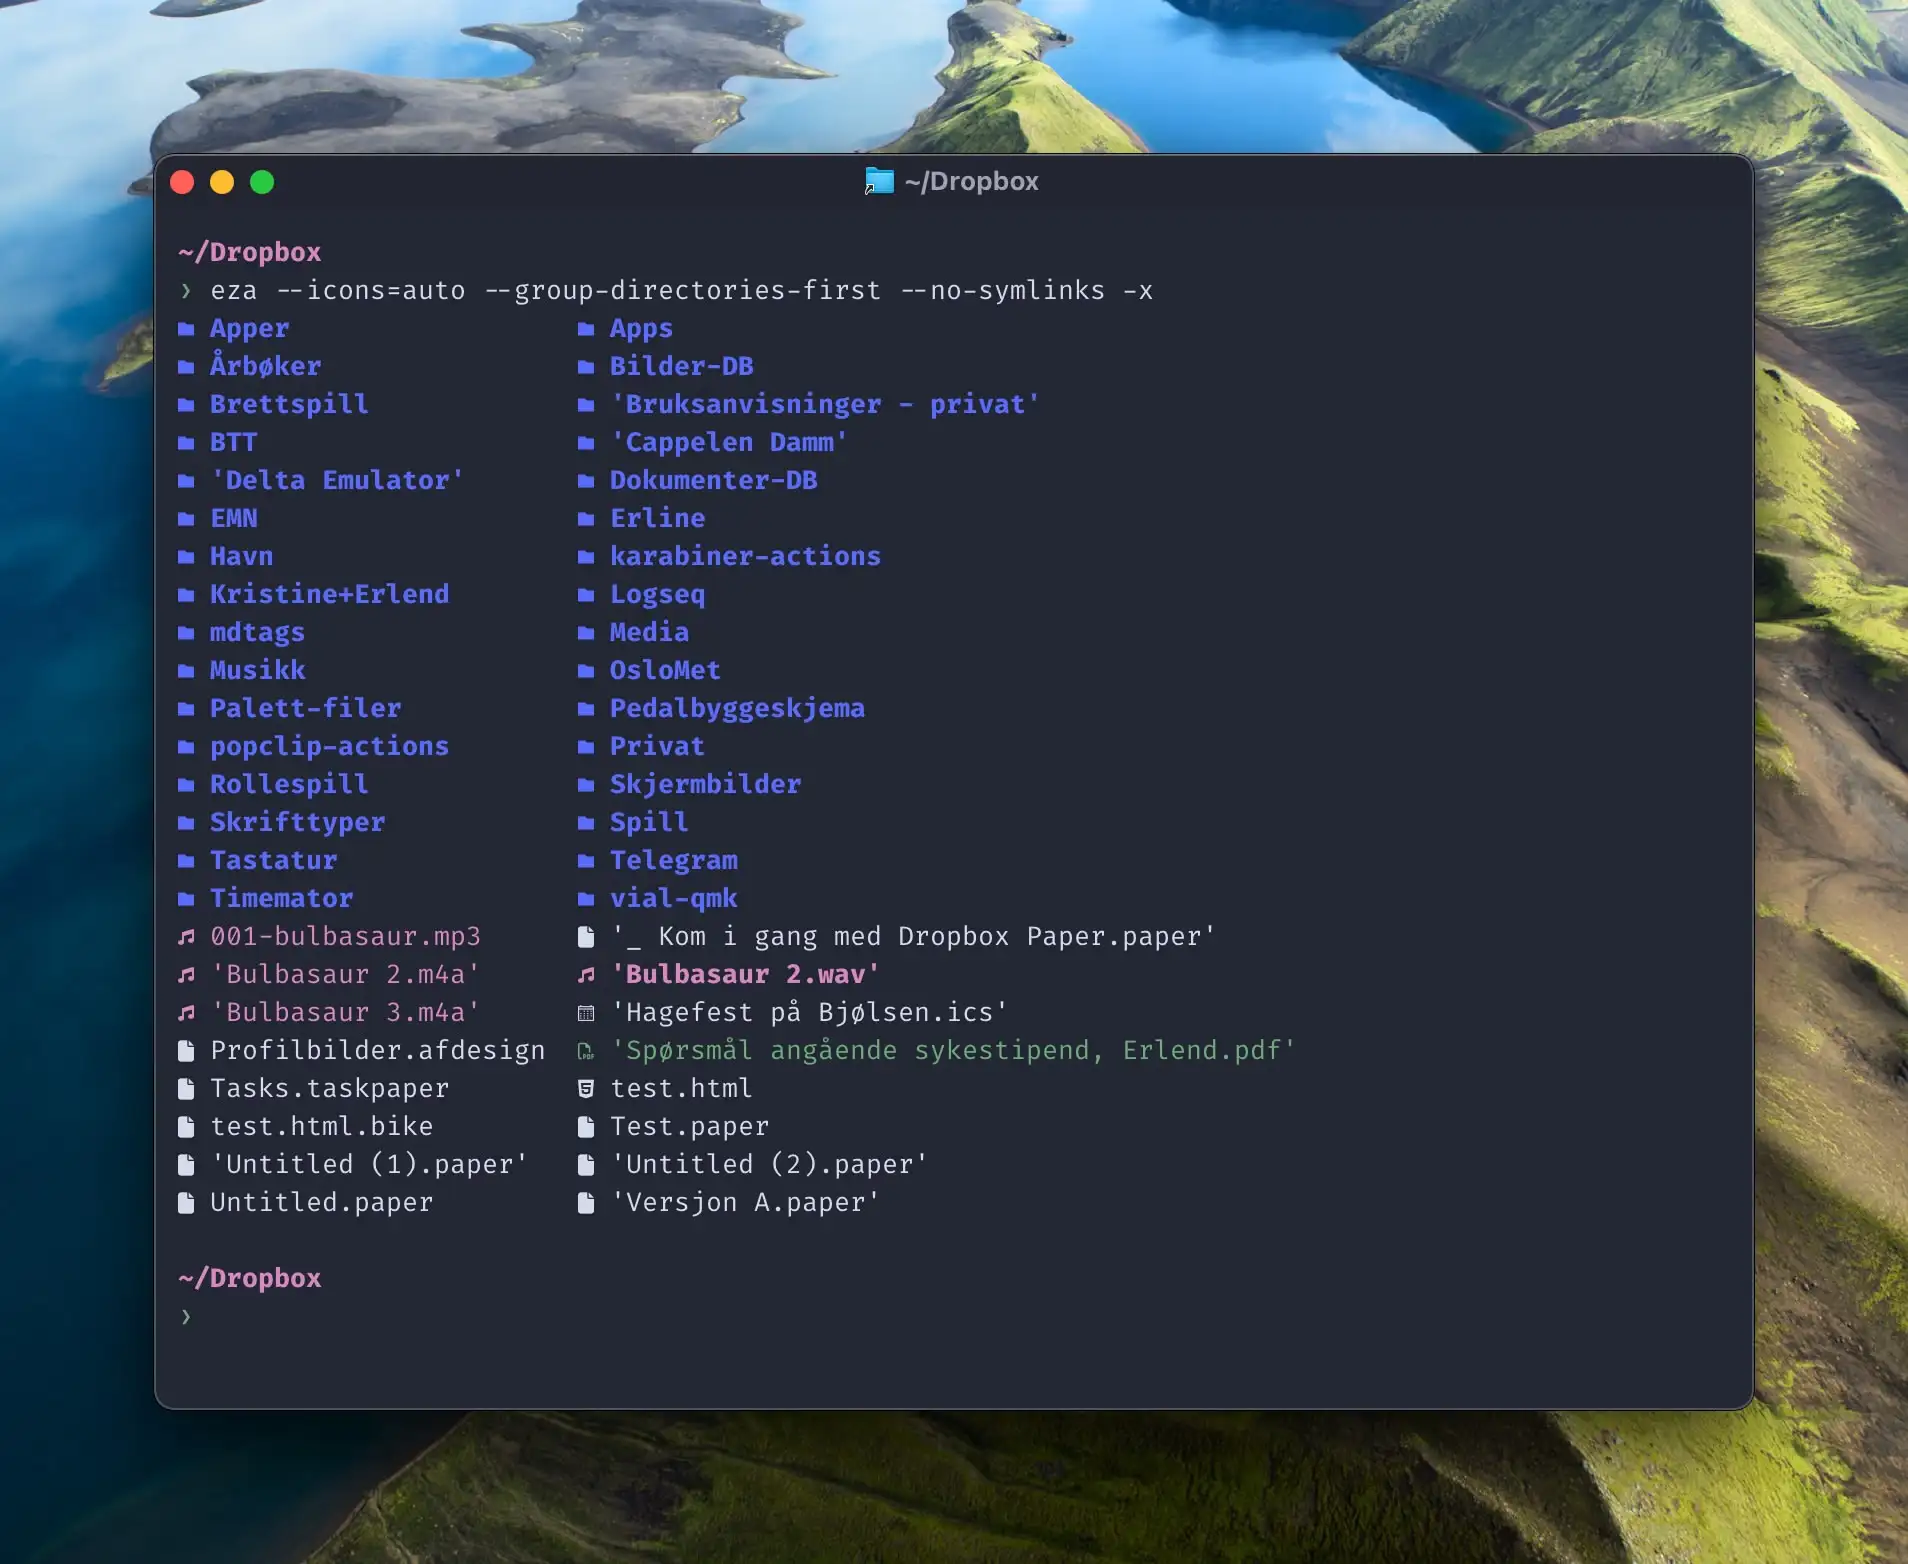
Then take a look at what it looks like if I use the tool eza instead:
However, the command I’ve run above isn’t just eza. It was the following:
eza --icons=auto --group-directories-first --no-symlinks -x
So here I’ve also made an alias (in .zshrc), so that writing ls instead gives me that:
alias ls="eza --icons=auto --group-directories-first --no-symlinks -x"
You can, of course, tweak the variables to fit your taste!
fzf and zoxide
You’ll often use ls in conjunction with cd (change directory) – and it’s a common way to get around via the terminal. However, this can also be improved – with zoxide. And it gets even better with the help of fzf (fuzzy finder).
- Install both, with
brew install zoxide fzf3 - Add these lines to .zshrc:
source <(fzf --zsh)eval "$(zoxide init --cmd cd zsh)"(They say this needs to be close to the end of the file, to override othercdcommand definitions.)
Now using cd will use zoxide instead. This will get smarter with use. And among other things, it makes it so you don’t have type the entire path to a folder you’ve been in before. Take a look at this video for more on this! 👇🏻
You can also run fzf by itself, by just typing fzf. However, hitting enter on a file will just print4 the path.
But let’s combine some things we’ve already set up. For instance, we can do the following:
fzf --preview 'bat --style=header --color=always --line-range :50 {}' --preview-window=right:60% | xargs open
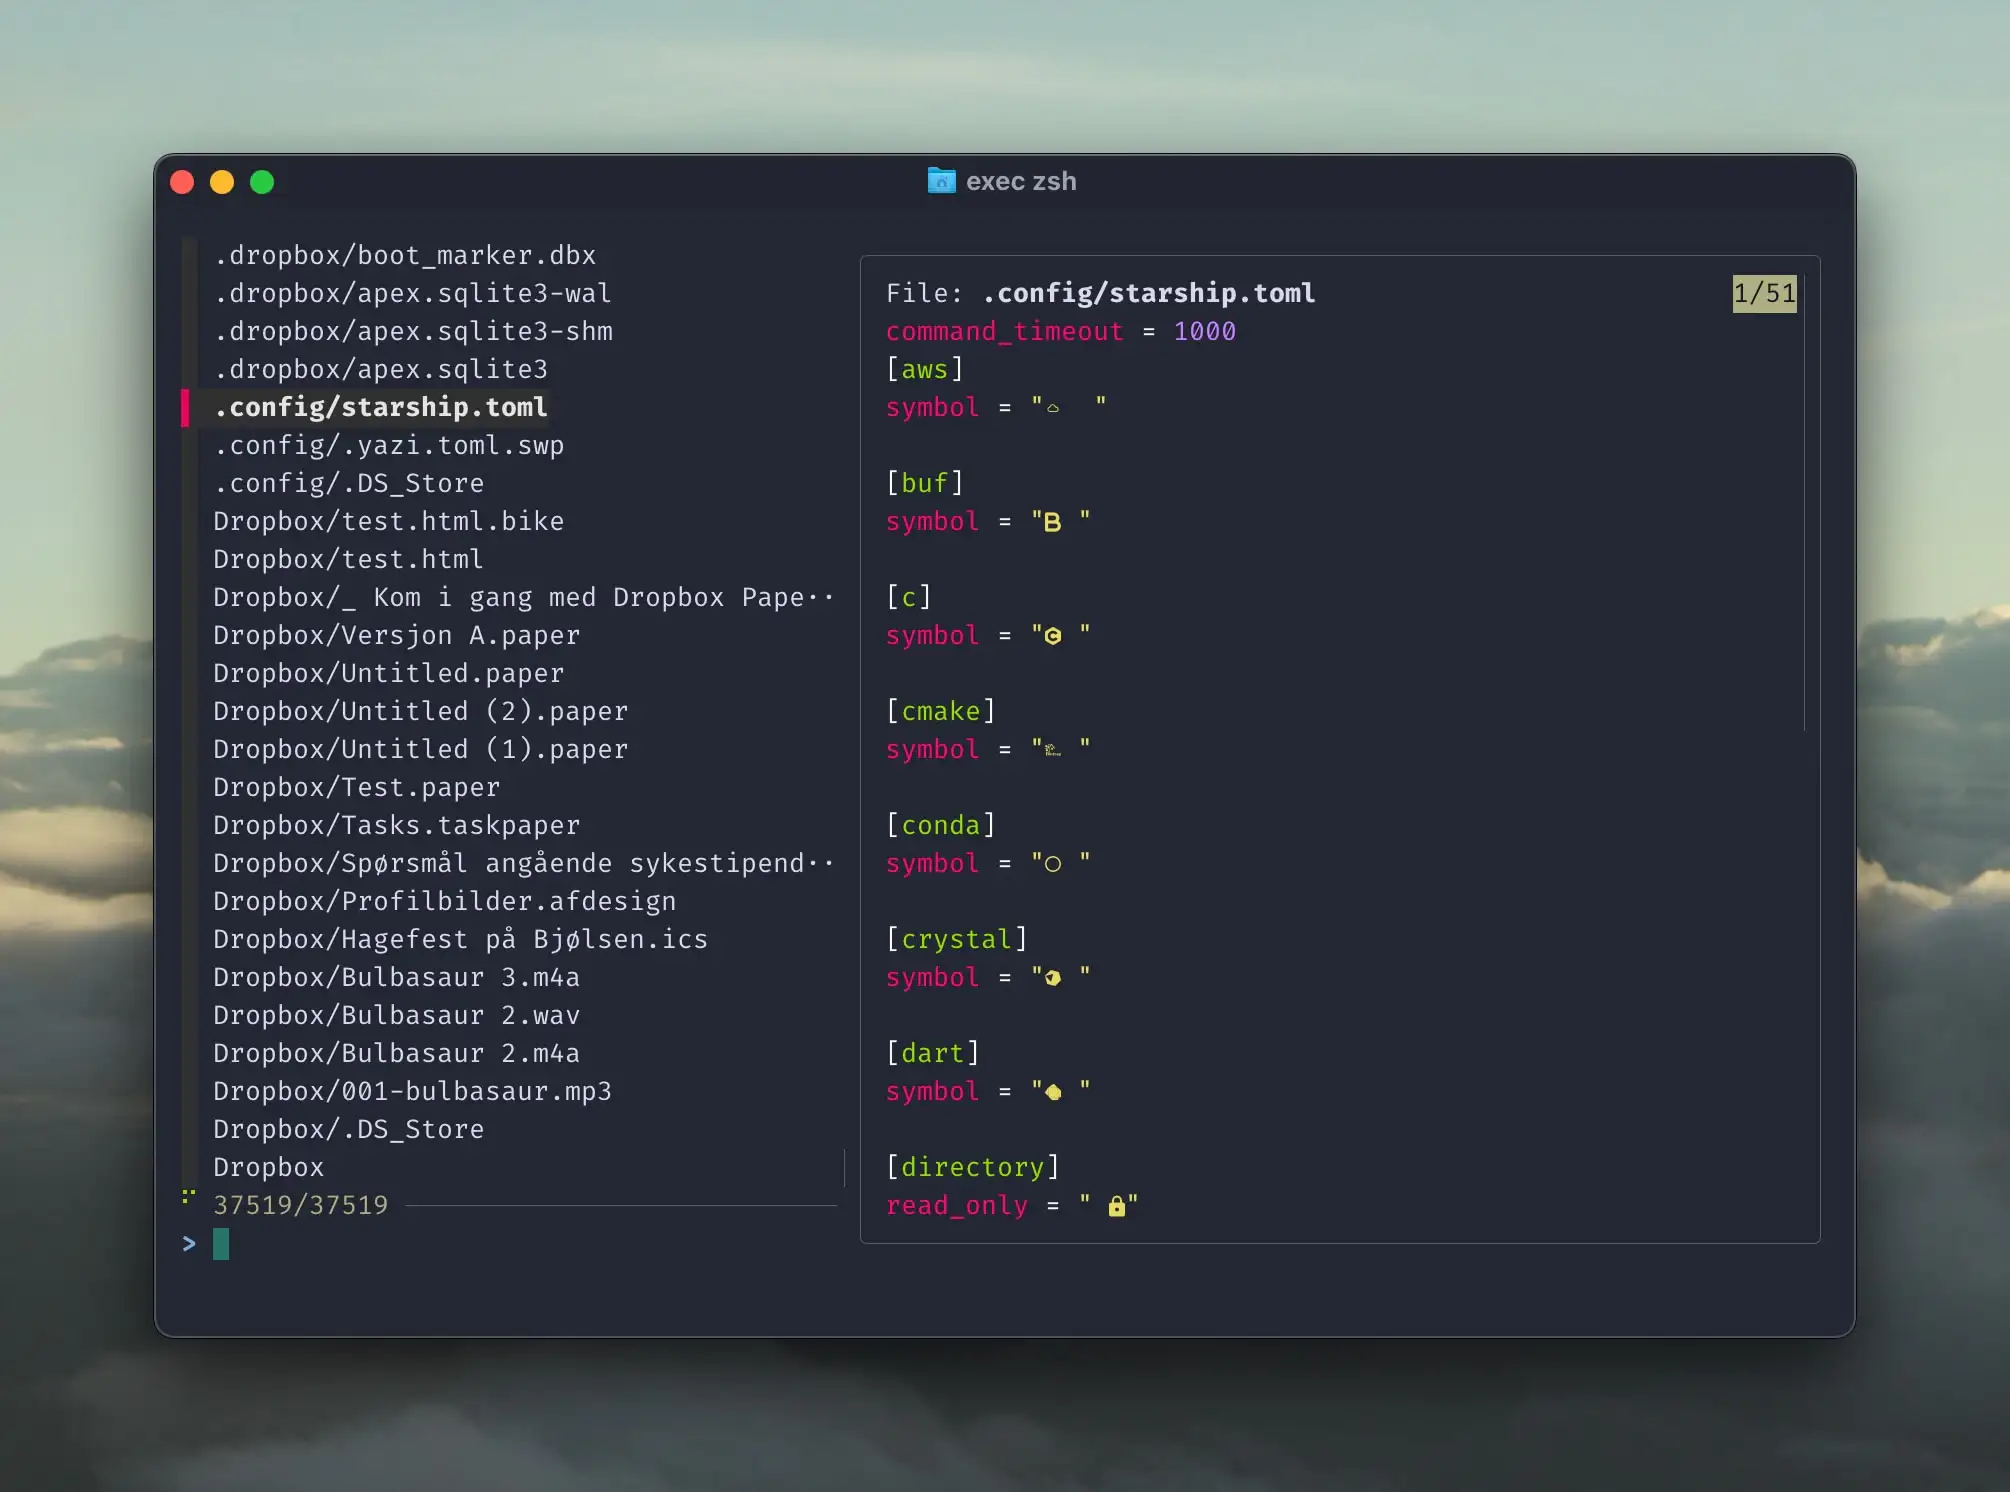
This will run the fzf fuzzy finder – but it will preview the files with bat. And hitting Enter will open the file in the macOS default. You can create an alias, and adjust the parameters, if you like. For instance:
alias fz='fzf --preview "bat --style=header --color=always --line-range :50 {}" --preview-window=right:60% | xargs open'
fz will give me this neat window and preview, which I can type to search in.A nice file manager
Now, this is a bit more advanced. So feel free to skip it for now, and perhaps come back to this later!
yazi
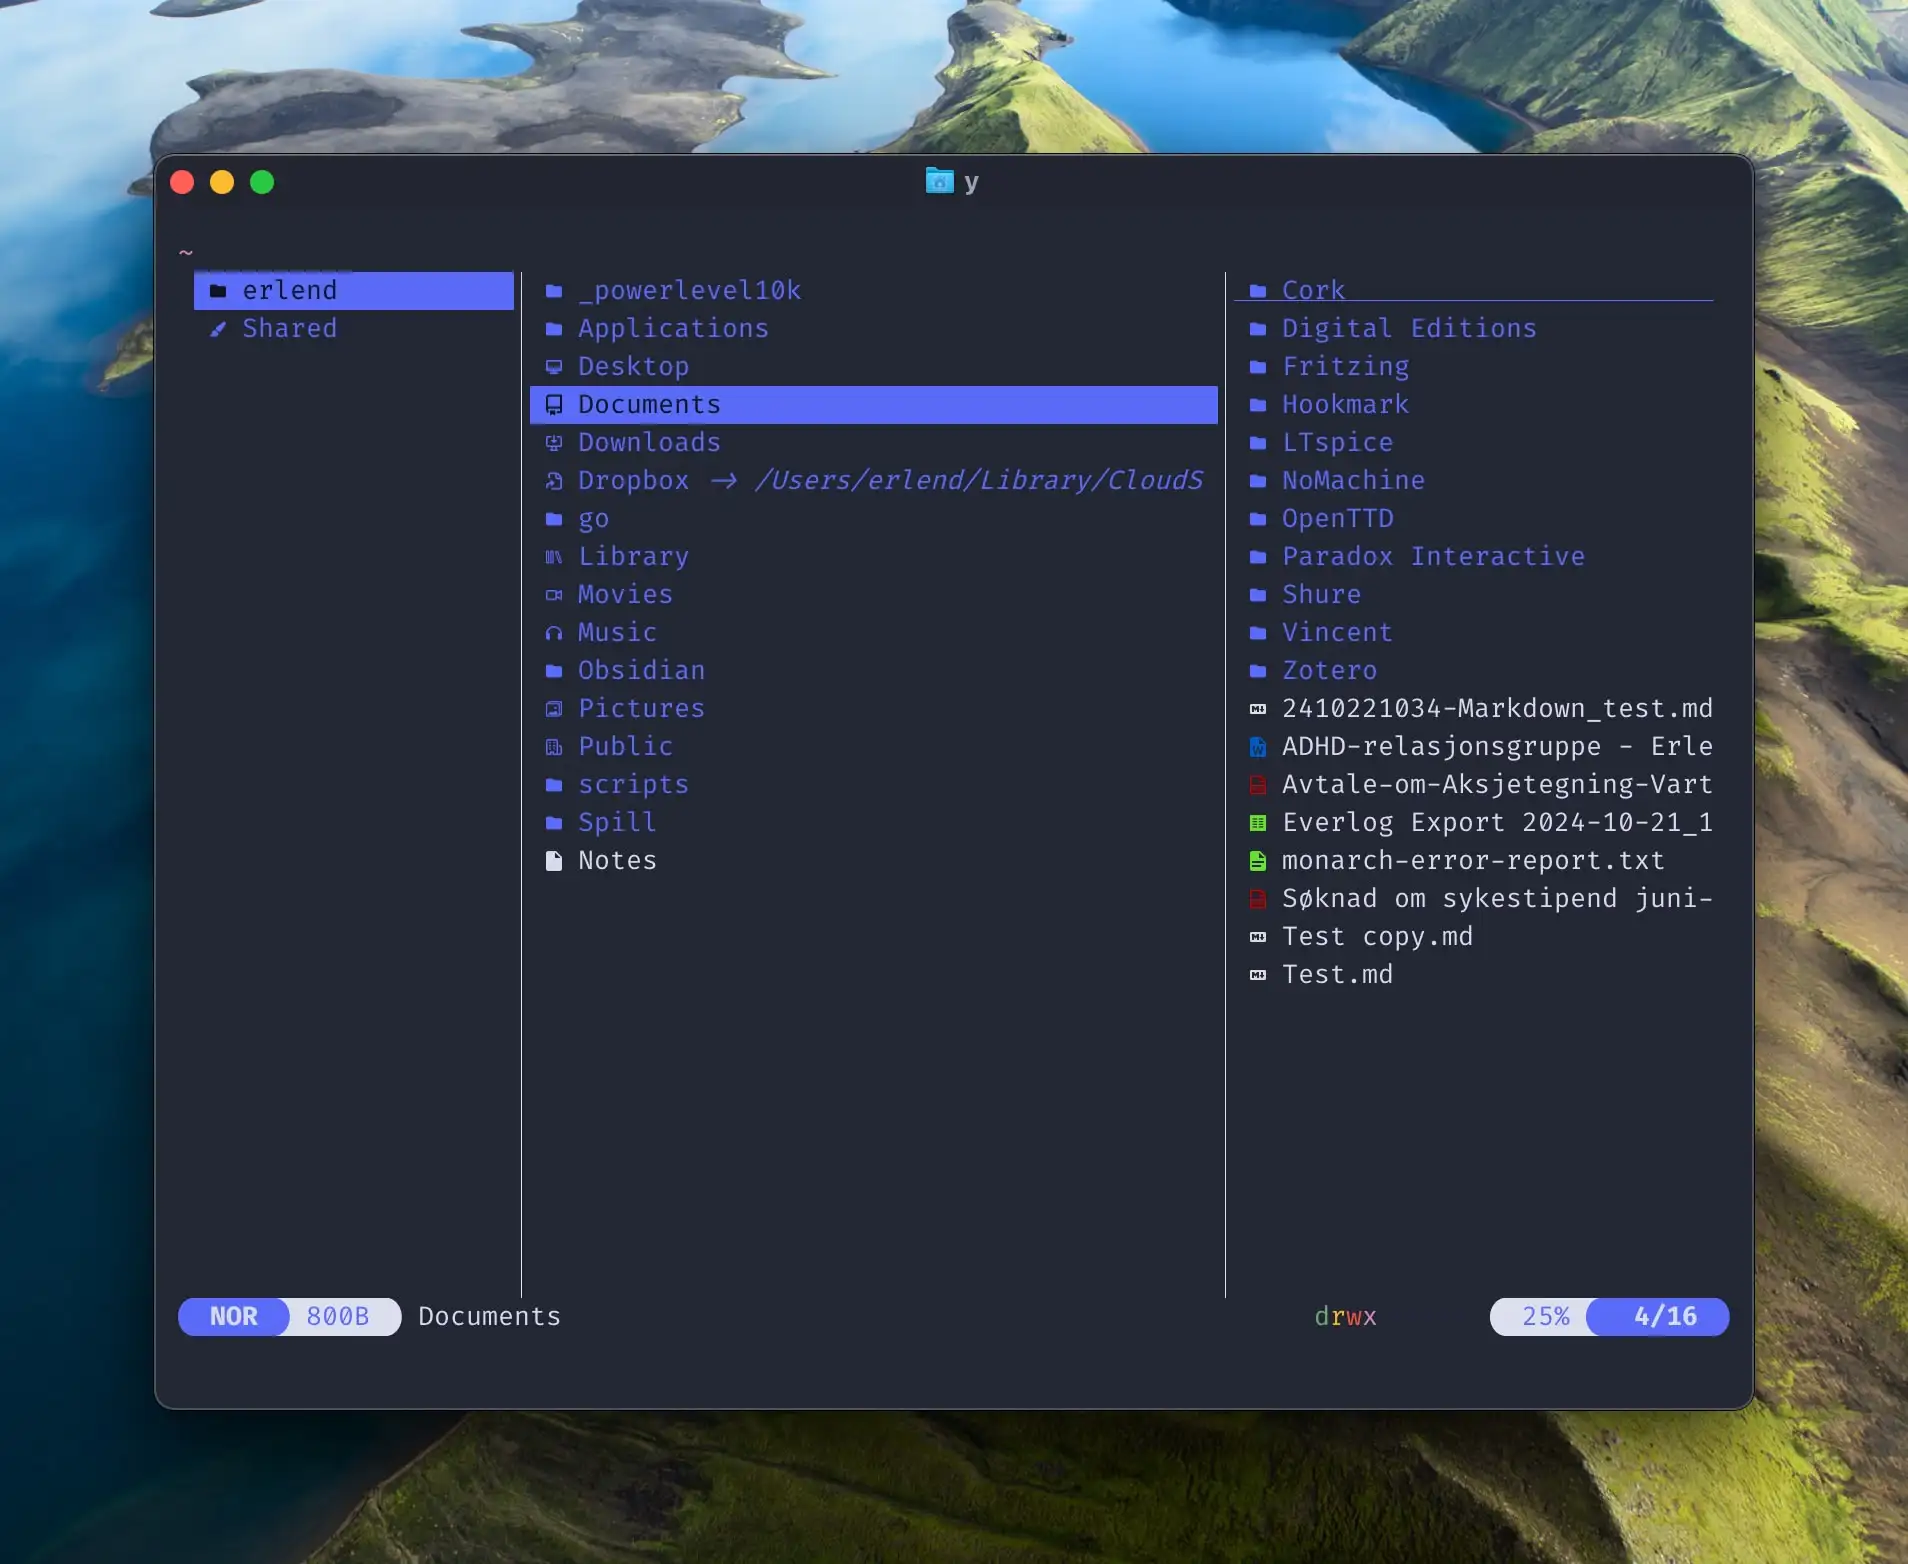
Lastly, I want to show a nice file manager – that you can use for things like changing your working directory, opening, copying and moving files, etc.
In addition to a nerd font, it also becomes better with multiple other tools (some you might have already). So I recommend installing all of these:
brew install yazi ffmpeg sevenzip jq poppler fd ripgrep fzf zoxide imagemagick
Then you should add this to your .zshrc:
function y() {
	local tmp="$(mktemp -t "yazi-cwd.XXXXXX")" cwd
	yazi "$@" --cwd-file="$tmp"
	if cwd="$(command cat -- "$tmp")" && [ -n "$cwd" ] && [ "$cwd" != "$PWD" ]; then
		builtin cd -- "$cwd"
	fi
	rm -f -- "$tmp"
}
Now you can just type y to open it.
All actions can be found here, but here are some of the more important ones:
- Move around with arrows.
q= Quit, and change working directory to where you were in yaziQ= Quit, without changing the working directorySpace= Toggle selection of a file.o= Open selected file(s)y= Copy selected file(s)x= Cut selected file(s)p= Paste file(s)P= Paste file(s) (and overwrite)d= Trash selected file(s)
z= Jump to a directory, using zoxideZ= Jump to a directory, or reveal a file, using fzfs= Search files by name, using the program fdS= Search files by content using the program ripgrep
This app also has a similar config story. You can copy the default config files, and then play around with the variables. Personally, I’ve adjusted the column widths, and made it open files in the macOS default!
This app is quite new for me, but I like it so far.
Phew – OK, that was a lot… But hopefully this guide has been of some value to other noobs like me. Would love to get feedback! From noobs, or pros.
Oh, and for reference – here’s my current .zshrc file:
eval "$(starship init zsh)"
eval $(thefuck --alias)

export EDITOR='open'

source <(fzf --zsh)
source $(brew --prefix)/share/zsh-autosuggestions/zsh-autosuggestions.zsh
ZSH_AUTOSUGGEST_HIGHLIGHT_STYLE='fg=10'

alias cat="bat"
alias nano="micro"
alias ls="eza --icons=auto --group-directories-first --no-symlinks -x"
alias -g -- -h='-h 2>&1 | bat --language=help --style=plain'
alias -g -- --help='--help 2>&1 | bat --language=help --style=plain'
alias fz='fzf --preview "bat --style=header --color=always --line-range :50 {}" --preview-window=right:60% | xargs open'

eval "$(zoxide init --cmd cd zsh)"

function y() {
	local tmp="$(mktemp -t "yazi-cwd.XXXXXX")" cwd
	yazi "$@" --cwd-file="$tmp"
	if cwd="$(command cat -- "$tmp")" && [ -n "$cwd" ] && [ "$cwd" != "$PWD" ]; then
		builtin cd -- "$cwd"
	fi
	rm -f -- "$tmp"
}
