My Blog's Photo Workflow, Powered by Shortcuts
And Thoughts on Alt Text
I use many images on my blog. But that’s not because I’m a photo blogger, or use a lot of decorative illustration images – it’s usually because I want to show and/or explain something.
I’m pleased with where my flow for uploading these, and adding them to my blog posts. So I would like to show what it looks like, and give thanks to Jarrod Blundy over at Hey Dingus, as I’ve built it around a shortcut of his.

The shortcut starting point
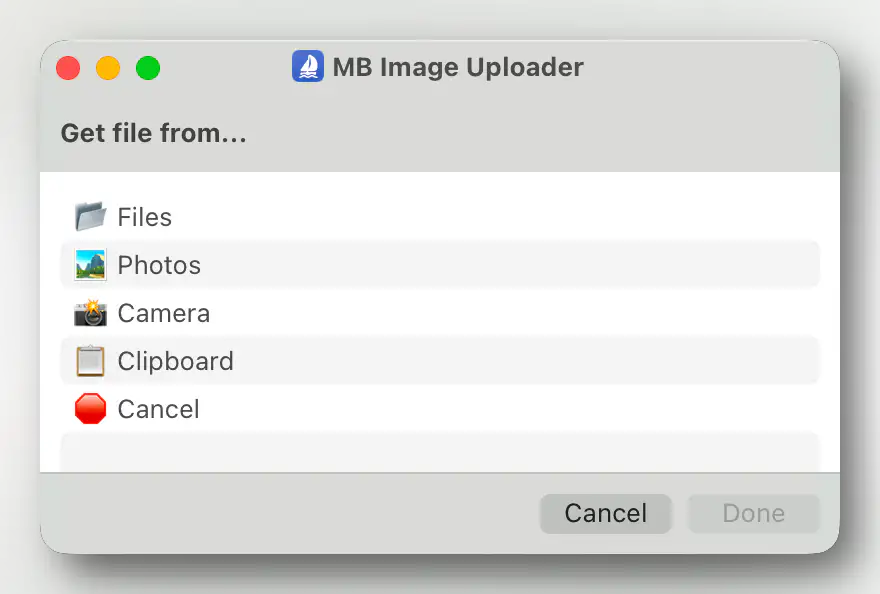
Jarrod has shared plenty of cool shortcuts, over at his Shortcuts Library. And the one I started with, was the one called Bulk MB Image Uploader. The point of this was to be able to upload several images at once to Micro.blog – which is the hosting provider we both use. However, uploading in bulk like this isn’t necessary to me. I just used the framework surrounding access to the Micro.blog API/app token, so I don’t have to use the website, and can do it all from shortcut actions.
More features
After being yelled at, by various web efficiency tests because my website used too many resources, I wanted to optimise the way I use images. And this involves two steps: Compress the main images, and add lazy loading (with a temporary lazy image, that keeps the layout while the image loads).
So, my version of the shortcut (which only works with one image at the time), actually uploads two images to Micro.blog:
- One “full-sized” WebP version,1
- and a lazy placeholder PNG version (that has only 24 pixels as its max height/width).
I’m using Jason’s GLightbox plugin for Micro.blog to get a lightbox for the images, and I combined that with this guide for lazy loading.2
So the code my image uploader shortcut spits out, looks like this:
	<div class="lazy-placeholder large"
		style="background-image:
		url(LINK-TO-LAZY-PLACEHOLDER.png);">

		[[<glightbox src="LINK-TO-MAIN-IMAGE.webp"
		alt="MORE ON ALT TEXT LATER." title="" description="" >]]
	</div>
Annoying conversion journey

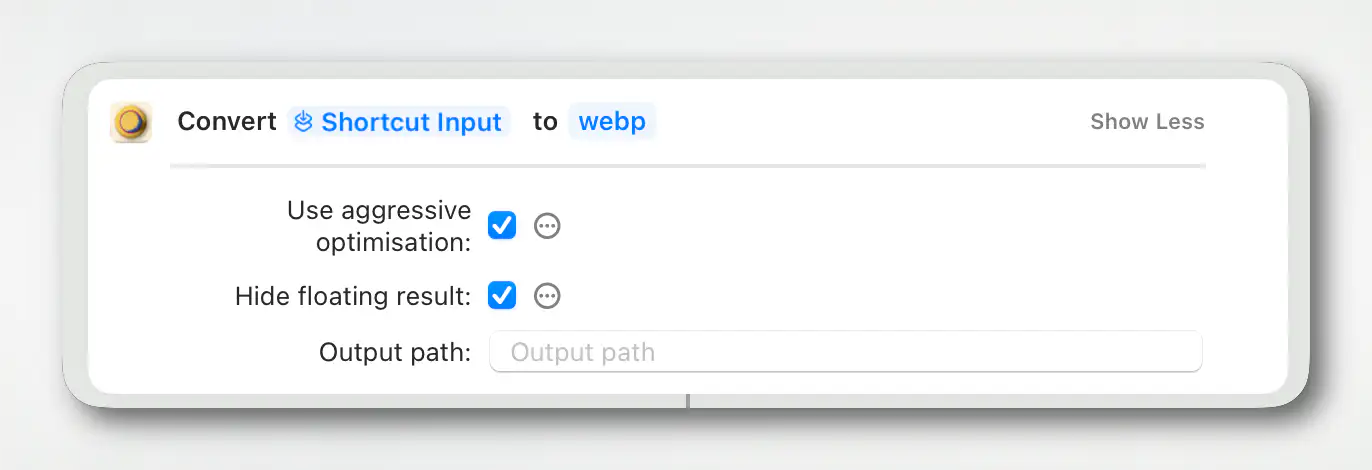
Shortcuts has a built-in Convert Image action (shown above) – but it’s really lacking. It can only convert to JPEG, PNG, TIFF, GIF, BMP, PDF and HEIF (so now WebP), and you generally don’t have plenty of options, for instance for compression. The good thing, is that these work on mobile as well!

But as I almost always do this on my Mac, I went searching for third-party Mac apps to help me with the conversion of the main image.
Both Squash and Permute have seemingly perfect Shortcut actions for stuff like this.
But Squash has an annoying bug, where it will add a “you’re using the free version” watermark, even though I’ve unlocked the app. It’s also very slow. The good thing is that, just like the built-in action, it’s able to just do the conversion and hand off the new images to the next part of the shortcut.
With Permute, I have to save the converted images to disk before passing it on. The thing that bothered me with this solution, though, is that it kept asking where I wanted to save the images, and also open up Permute when it performed the action.
The optimisation app Clop trotted in to save the day, though!
Framing screenshots
As my images will often be screenshots, I’m also a heavy user of the app Shareshot. This will take a screenshot, and either add a device frame, or some padding like on the images I’ve had in this post until now.
My uploader shortcut now asks me, “Do you want to frame the image?”, and will perform this before sending it to Clop etc. I can choose the following:
- No
- Yes, Square
- Yes, Fit Frame (with small padding)
- Yes, Fit Frame (with medium padding)
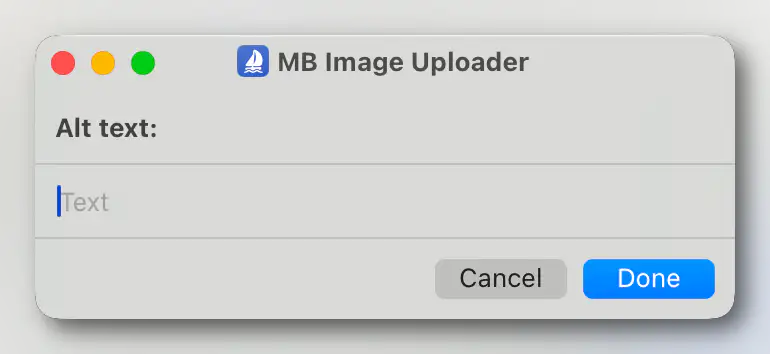
Alt text
The original shortcut has the option of adding automatic alt text generation with a module and OpenAI Vision. (And this just got a nice update!) However, I’ve turned this off.
Here’s the thing: The generated alt text is very competent – but it doesn’t know anything about the context in which I’m using the image. So I found myself heavily editing the alt text 100% of the times.
It is intended that this image description be used as a starting point for your alt text. You should review it, and edit or add to it as needed. – Jarrod Blundy (creator of the shortcut)
I can see the benefit of this starting point. But for me, it turned out to be faster to just have the shortcut allow me to manually type in the alt text.
My approach to alt texts
When I write alt texts, I like to think of it like I’m reading the blog post out loud to someone (over the phone, or whatever).
I also don’t want to waste the time of those reading with screen readers, so I try to reduce redundant and unimportant details. For instance, the alt text of the Tapestry screenshot above, in this post, is: “An iPhone screenshot with an iPhone frame, and padding that makes it a square.” As the point in this context was to show off that specific screenshot type, I focused on that. I didn’t mention that it was from Tapestry, as that’s mentioned in the caption. And the text content of the screenshot was completely irrelevant.
Mentioning the iPhone frame and padding would’ve been completely irrelevant when I used the exact same screenshot in the post about Tapestry. And this is an example of how alt text completely changes from one context to another.
I’m also not afraid of having the alt text simply be “explained below/above” if I truly give all the relevant information in the blog post itself.3 This is because I imagine it being annoying to get the same information twice.
Another example, from another blog post:
“And I get that many might like the things I don’t. So I think the answer is more customisation – like this settings screen from Mona:”
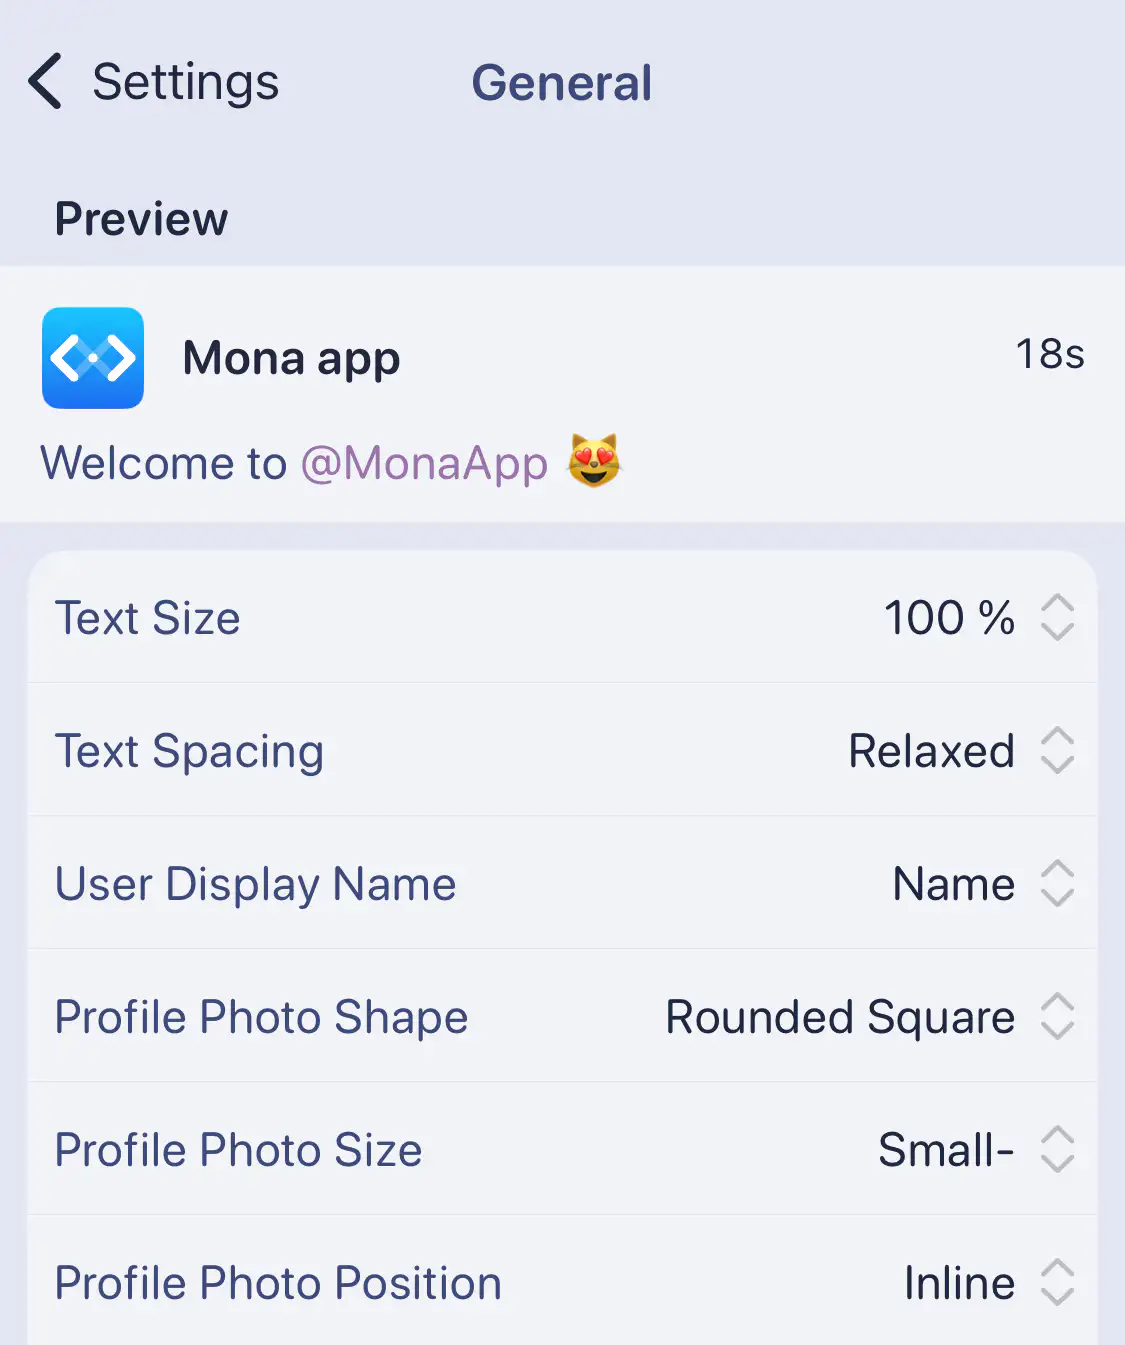
In the original context, my alt text was “I can adjust text size, text spacing, how much of the display name to show, the shape, size, and placement of the avatar.” — while in this context, it was simply “explained below”.
The o1 model (even more powerful than the 4o from the original shortcut) gave me this, by using Jarrod’s great “complex prompt”:
A smartphone settings screen shows a Mona app preview, displaying a welcome message to @MonaApp with a cat-face emoji, and listing customisation options like text size, username, and profile photo details.
— o1
It is good – but it wouldn’t really help me get to my alt texts faster.
I think it’s more relevant with other types of images, though (not screenshots) – but when I’m in blog writing mode, I don’t think it’s a big issue to just type out the description.
So, this is the flow I get when I hit the global hotkey to upload images for my blog posts:
A bonus shortcut
Here’s a link to the shortcut from above – but I’m not sure how useful it is. It’s very customised to my need, and I like to create module-based shortcut. So, for instance, the WebP Converter and Lazy Image Generator are different shortcuts. This makes it easier to plug-and-play with different ones (like one for Clop and one for Permute). But perhaps someone would like to poke around, and can get some inspiration from the mess…
I’ve also made a much simpler shortcut, for when I just need a quick markdown image (like in a note): This just uploads one compressed image, and then gives a simple markdown image link, with no alt text.

Now, I haven’t managed to get this shortcut to work with uploaded videos – so I would love to hear if someone has had success with this. Oh, and remember to check out Jarrod’s blog and Shortcuts Library!
-
I know that WebP images are a bit controversial… But they take up so much less space than alternatives, and they also handle transparency. ↩︎
-
I’ve had some problems with my implementation, but it’s in a pretty good place right now. It doesn’t work flawlessly with images with transparency, though. ↩︎
-
I’ve heard this is bad for SEO – but I don’t write alt text for Google. ↩︎