In Defence of Netflix Not Being in the Apple TV App
I like the Apple TV (box). It’s the only way I watch TV! I like that it’s a competent and fast piece of hardware, without ads*, that gives me easy access to all the streaming I want.
That it’s an app platform, makes it easy for even my niche Norwegian services to be a part of the platform. It can also have things like the excellent Infuse media player (for local files and Jellyfin).1
Apps can also choose to serve their content to Apple’s frameworks: This makes the content searchable with the global search, and also adds the content to the Apple TV app. A section of the app is “Up Next”, where you can continue watching things from different services:

However, annoyingly, Netflix doesn’t participate.
And before I defend them, I want to highlight the cynical reasons they don’t:
- It’s better for them if you stay in their app.
- The reason is that they can advertise new stuff (you’re not watching yet), to make sure you stay with the service. This is also why Continue Watching isn’t always at the top.
- If you’ve finished watching a show (perhaps through Apple TV (app)), you’ll might go on to something from another service next. And then you’ll might cancel your subscription after a while.
- They don’t have to.
- Even though they’re not as dominant as they used to, Netflix is really popular. So they feel like they can get away with not participating.
The mistake
Last week, there was a bit of writing because someone accidentally flipped the switch, and made Netflix actually participate:
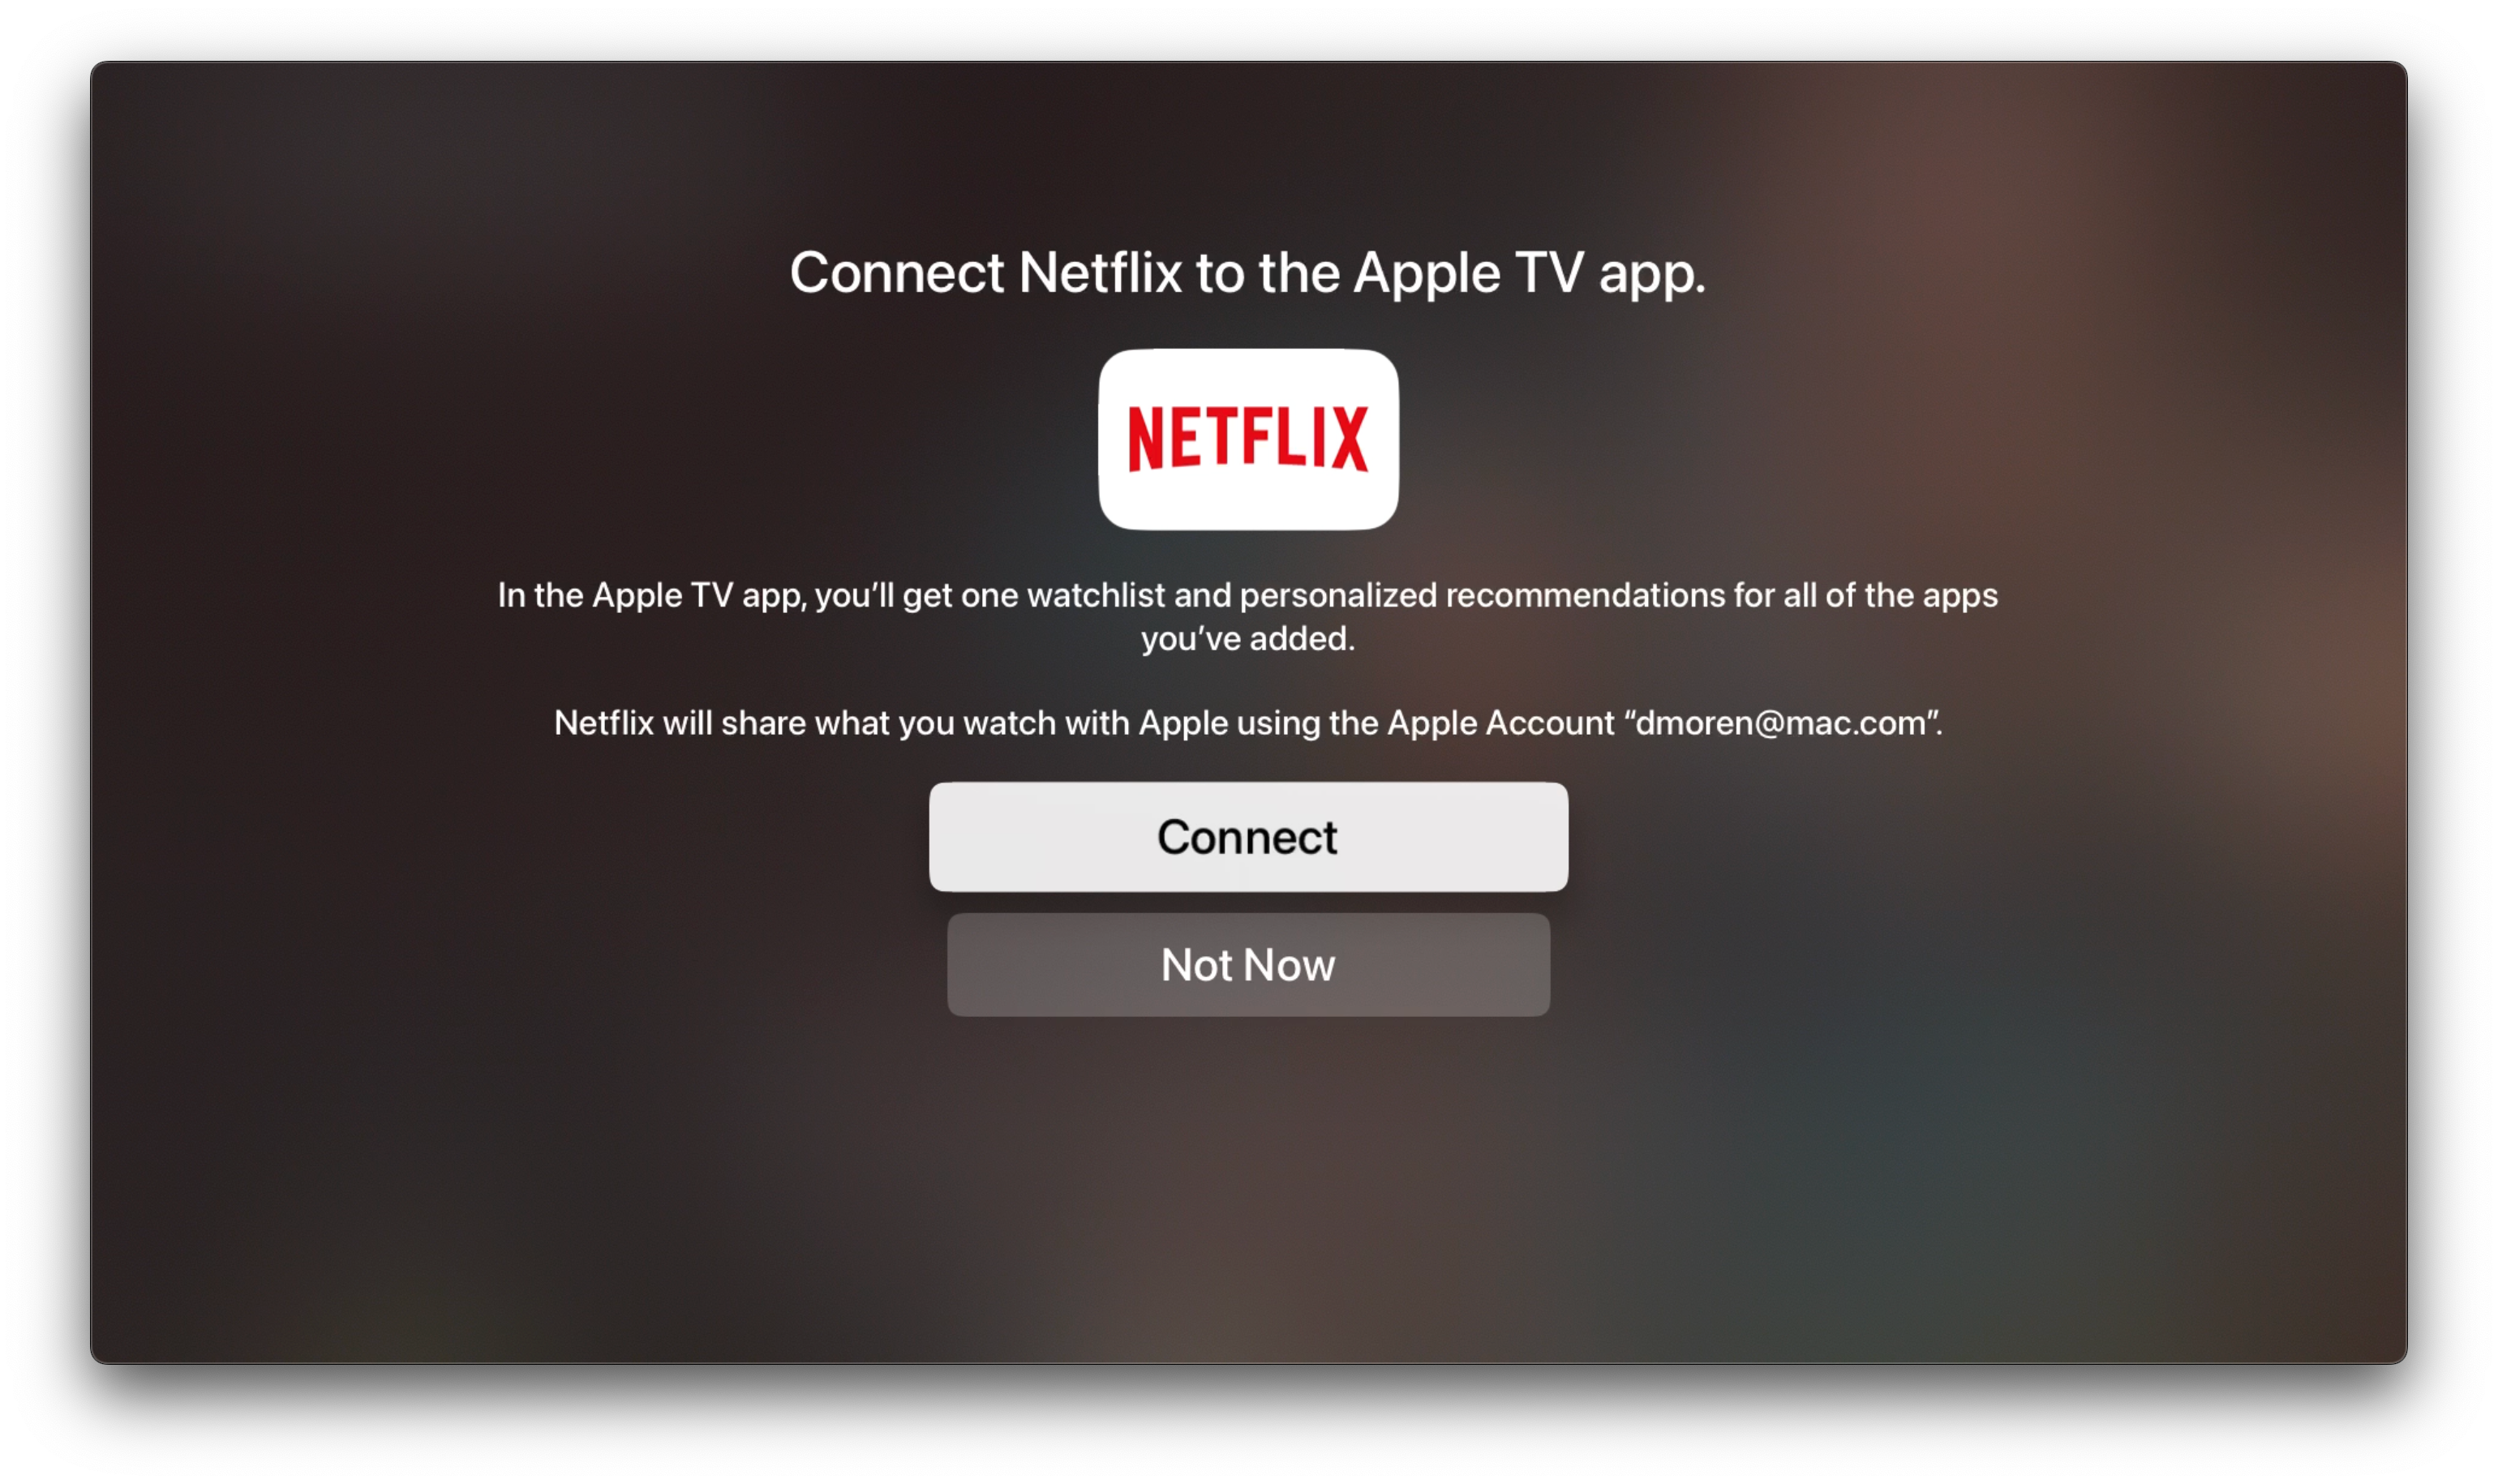
Netflix quickly turned it off again – and the take that was the most popular in this cycle, was perfectly summarised by this great quote:
Netflix deeply regrets accidentally making Netflix a better product for its customers.
As someone who uses both Netflix, the Apple TV (box), and Apple TV (app), Netflix participating would be better for me. But I think I have more understanding towards Netflix than most.
The defence
My first thought was that it was funny hearing someone like John Gruber criticising the move. When Apple themselves don’t play nice with others, to instead give users a unified experience (or whatever), he’s usually quick to defend them. And when they do this, it’s also because they’re dominant enough to not have to.
But I also think John Siracusa had plenty of good points on this, in the latest episode of Accidental Tech Podcast. And I’m stealing some of these here.
My Blog's Photo Workflow, Powered by Shortcuts
And Thoughts on Alt Text
I use many images on my blog. But that’s not because I’m a photo blogger, or use a lot of decorative illustration images – it’s usually because I want to show and/or explain something.
I’m pleased with where my flow for uploading these, and adding them to my blog posts. So I would like to show what it looks like, and give thanks to Jarrod Blundy over at Hey Dingus, as I’ve built it around a shortcut of his.

The shortcut starting point
Jarrod has shared plenty of cool shortcuts, over at his Shortcuts Library. And the one I started with, was the one called Bulk MB Image Uploader. The point of this was to be able to upload several images at once to Micro.blog – which is the hosting provider we both use. However, uploading in bulk like this isn’t necessary to me. I just used the framework surrounding access to the Micro.blog API/app token, so I don’t have to use the website, and can do it all from shortcut actions.
More features
After being yelled at, by various web efficiency tests because my website used too many resources, I wanted to optimise the way I use images. And this involves two steps: Compress the main images, and add lazy loading (with a temporary lazy image, that keeps the layout while the image loads).
So, my version of the shortcut (which only works with one image at the time), actually uploads two images to Micro.blog:
- One “full-sized” WebP version,1
- and a lazy placeholder PNG version (that has only 24 pixels as its max height/width).
I’m using Jason’s GLightbox plugin for Micro.blog to get a lightbox for the images, and I combined that with this guide for lazy loading.2
So the code my image uploader shortcut spits out, looks like this:
✉️ Tapestry Feedback Feedback Feedback
Not too long ago, I wrote some feedback to Iconfactory’s latest app, Tapestry. I just got some great feedback on that, from them, so I wanted to provide a response.
Here’s what they wrote, on Mastodon:
There’s a lot in your post. Thx for such thoughtful feedback, it’s appreciated. Some things like the ability to turn off the service name is coming. The thing to keep in mind is this: just because a particular part of the design doesn’t work for you, doesn’t mean it wasn’t designed that way for a reason that you may have not considered.
The service name is a perfect example. Lots of people are colorblind or even unsighted. To them they cannot tell posts apart simply by color.
So while we are going to add the ability to turn off the service name, that’s why it’s there by default. Avatars are never going to move to the right side. Their placement was carefully considered as was how they appear with their transparency.
Everything you see is the result of over a full year of design, testing by over 1,500 TestFlight backers & then tweaking to adjust things that didn’t work as well as originally planned.
In the end Tapestry may not be for everyone & that’s fine
If Tapestry ends up looking & behaving like Reeder or Surf or… what’s the point? We designed the app the way we wanted it to look & behave using feedback from our testers as a guide. The design will continue to evolve based on feedback like yours (which is thoughtful) but it can never be all things to all people.
Many have told us they love Tapestry so it seems to be doing a lot of stuff right but it can always be better. We’re gratified but will continue to improve going forward. 👍
Here’s my response:
Thanks for reading my feedback, and getting back to me with such an interesting response! And looking back at my own feedback, I see that it was harsher than what was intended… Sorry!
✉️ Micro Social: A New Third-Party iOS App for Micro.blog
And Some Very Early Feedback
Greg Morris is someone whose blog I’ve followed for a while, but I didn’t know was a developer. But now he has released a third-party iOS client for Micro.blog!
As he’s mentioned, it happened “quite accidentally”, and it’s very early days. So this post is just me letting people know it exist, and providing some very early feedback.
To Greg:
Oooh, I love that you’re making this! I’m 100% in the target demographic for Micro Social. (Someone who uses, but doesn’t like, the default Micro.blog app — and is willing to pay for something better.)
I’ll try to provide some more useful feedback later, as I’ve used the app more, that you can use if you’d like. 🙂
Here are some first-impressions:
(In general I like it! So these “negative” comments are meant to be constructive. 🫶🏻)
I’m currently running an iPhone 13 Mini — so the phone is probably both older and smaller than what you use. ☺️
I had several crashes two updates ago, but it’s fine now. But I’ve noticed that avatars load slowly when I scroll (even if I scroll slowly). Maybe you can have the lazy loading start “earlier”?
I really like that you have avatars and names on a separate line, so you can use full-width content. (Instead of having weirdly large left-margins, that far too many apps has. I have strangely strong feelings about this…)
I also really like the “card look”:
However, on my Mini phone, I wish you were a bit more stingy with the padding, as the content gets too narrow. Especially on the timeline, due to the extra arrow on the right side. Is this needed?
The Paper Dev Should Give Their Take on a Tot-Like App
I recently wrote a review of Iconfactory’s great app, Tot.
I like it – but editing text in it does make me miss my favourite places to do this: Paper and Bike.
And this process made me realise that the Paper dev has all* the pieces in place to give their take on an app like this. And it makes sense from a business perspective!
The pieces
- A best-in-class text engine, that can jump between Markdown (plain-text) and Preview (rich text) Modes.
- This is also already great on both Mac, iOS, and iPadOS. (No Apple Watch, though.)
- The UI is made to be minimalistic, mimicking just a piece of paper.
- Paper ships with several beautiful accent colours, and great support for them in the UI.
- It also provides good export features. (Including for copy/paste.)
Here’s what I would do:
My suggestion for a name (also to make it easier to discuss here) is Slate.
A slate is a thin piece of hard flat material, historically slate stone, which is used as a medium for writing.
The next question is how much it’s OK to copy from others. Let’s pretend it’s fine to take all …
The best parts from Tot:
Fixed number of notes
I really like that Tot only supports 7 notes, that are all “internal” to the app.1 I also love how they’re distinguished from each other by colours.2
Having exactly 7 would a bit on-the-nose… But one of the reasons I liked the “Slate” name, is that you could one-up, rhyme, and go for 8!3
Perhaps the 8 notes could be regular, accessible Markdown files in the app’s iCloud folder, to simplify automation? But that you can’t create other notes with the app, and it can’t “find” other notes if you place them there.
The business model
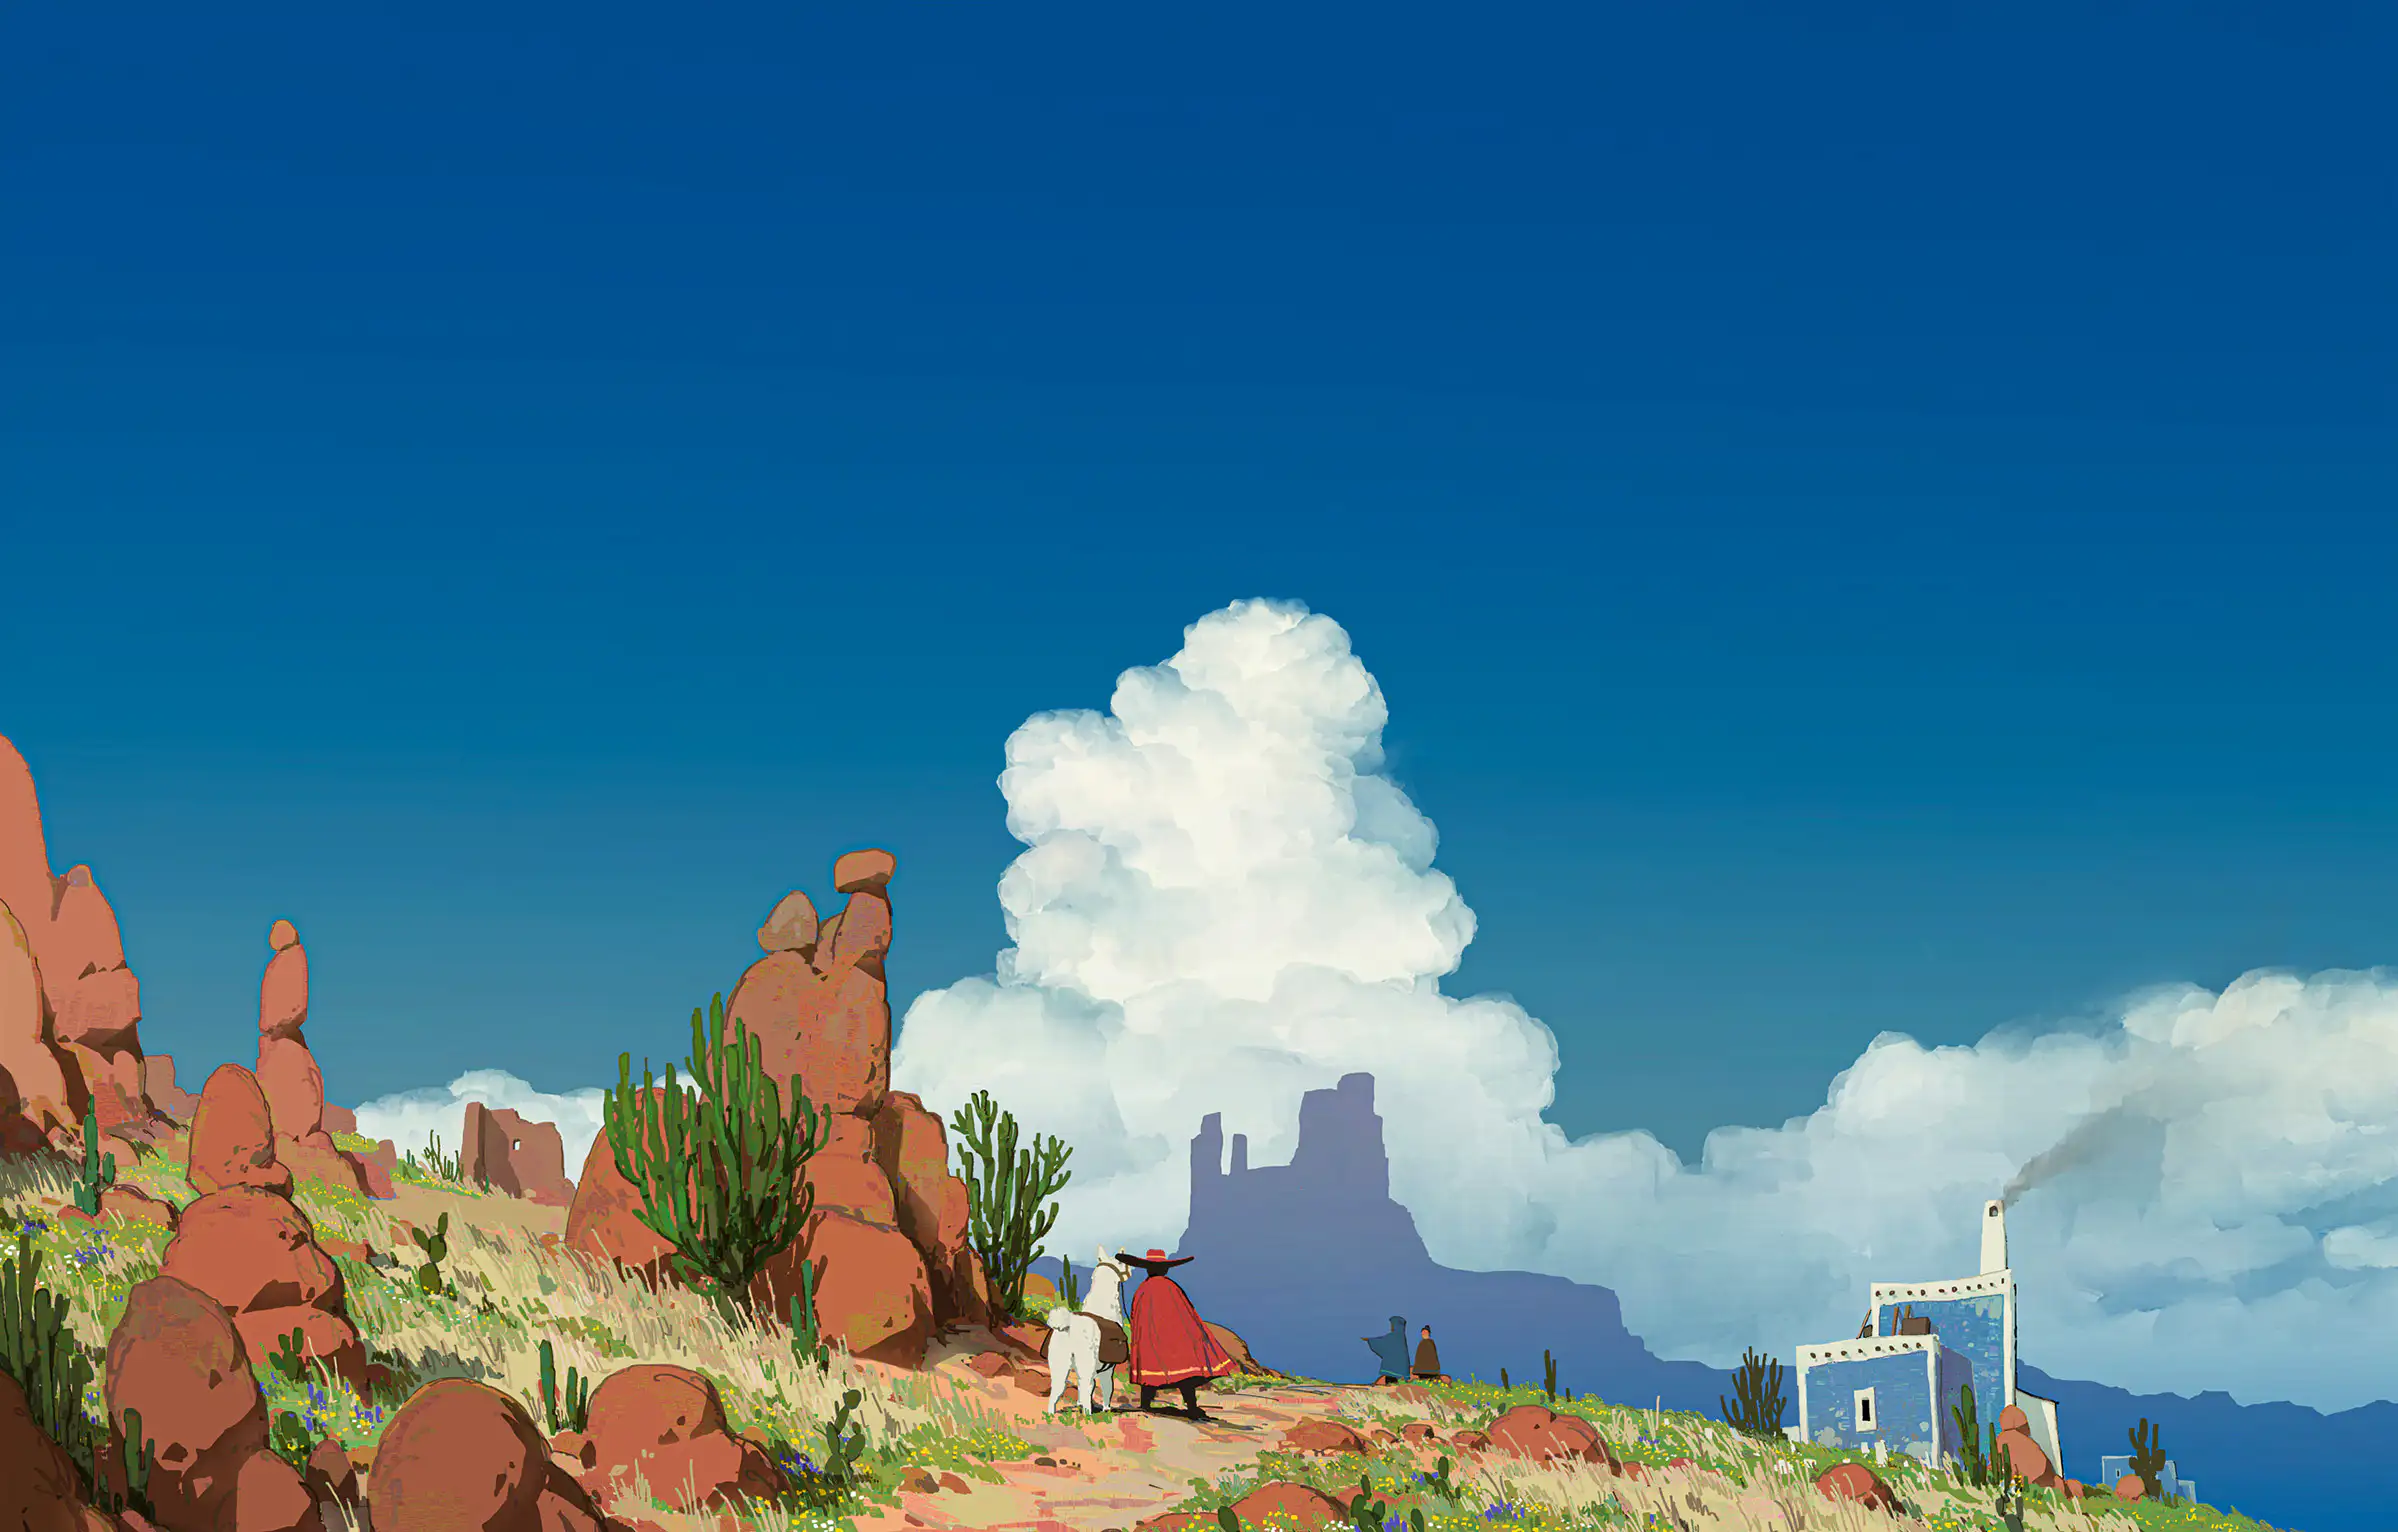
Quick Recommendation #6: Arco (video game)
Original, Tactical, Recreational
Last year, Panic published a terrific indie game I’d like to recommend: Arco. I’ve only played the first two acts, but I like it a lot so far.
It has great pixel art, music, writing, and story.
It also has a genuinely innovative turn-based combat, and guilt system, which makes in-game choices interesting.
It’s available on PC, Mac, and Switch. I’m playing it on Mac, with a controller – and it works flawlessly. (If you want to get it for desktop, I recommend getting it through Epic, as the dev gets a larger piece of the pie.)
Click here to see all my quick recommendations!